What Does Repartitioning a Hard Drive Do?
Repartitioning a hard drive means changing the size, number, or layout of existing disk partitions. In Windows 10/11, you can repartition an HDD or SSD to create new partitions, extend the C drive, merge partitions, or reorganize storage without reinstalling Windows.
Most users repartition a drive to:
- Fix low disk space issues
- Separate system and personal files
- Create a gaming or backup partition
- Reorganize hard drive storage
- Prepare for dual-boot systems
Typical partition layout changes include:
| Operation | Purpose |
| Shrink Partition | Reduce partition size |
| Extend Partition | Increase partition size |
| Create Partition | Create a new volume |
| Delete Partition | Remove unused partitions |
| Move Partition | Rearrange disk layout |
| Merge Partitions | Combine free space |
In Windows 10/11, you can repartition a drive using built-in Disk Management or a professional free partition manager like MiniTool Partition Wizard.
However, Windows Disk Management has limitations:
- Cannot move partitions
- Cannot extend partitions unless unallocated space is adjacent
- Cannot flexibly resize some system partitions
For advanced repartitioning operations, try to use MiniTool Partition Wizard.
Here is a direct comparison between the built-in Windows Disk Management tool and MiniTool Partition Wizard to help you choose the right tool for repartitioning your hard drive.
| Feature | Disk Management | MiniTool Partition Wizard |
| Extend non-adjacent space | No | Yes |
| Move partition position | No | Yes |
| Split one drive into two | No | Yes |
| Risk of data loss | Low | Extremely low |
| Cost | Free | Free version available (Paid upgrades) |
Repartition a Hard Drive Using Disk Management
Disk Management is a graphical disk management utility embedded in Windows. This tool covers basic partition functions such as shrinking/extending/creating/formatting partitions.
To repartition a hard drive in Windows 10/11, you usually shrink an existing partition to create unallocated space and then create, extend, or resize partitions as needed.
Here are the steps:
Step 1. Shrink a partition to generate unallocated space.
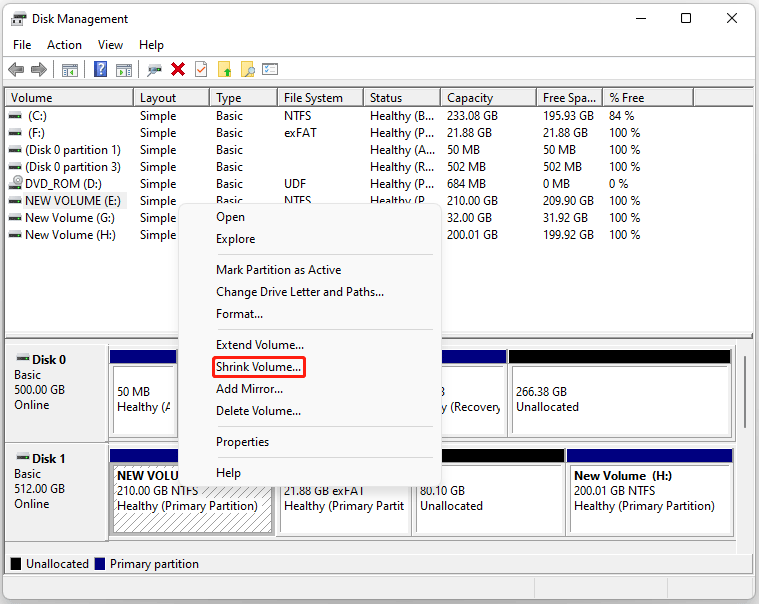
- Press the Windows + X key, and then choose Disk Management.
- Right-click the source partition and choose Shrink Volume. The system will query the drive to see how much free space is available.
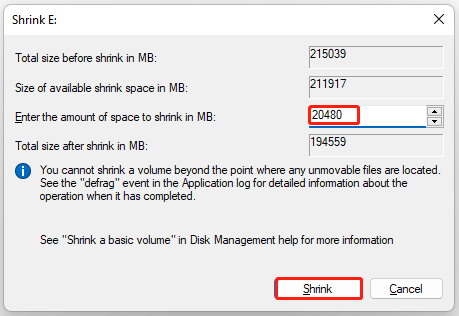
- A window will pop up showing available space. Enter the amount of space you want to carve out for the new partition in megabytes (MB) (e.g., \(10,240 \text{ MB} = 10 \text{ GB}\)) and click Shrink.
- You will now see a block of black, unallocated space next to your drive.
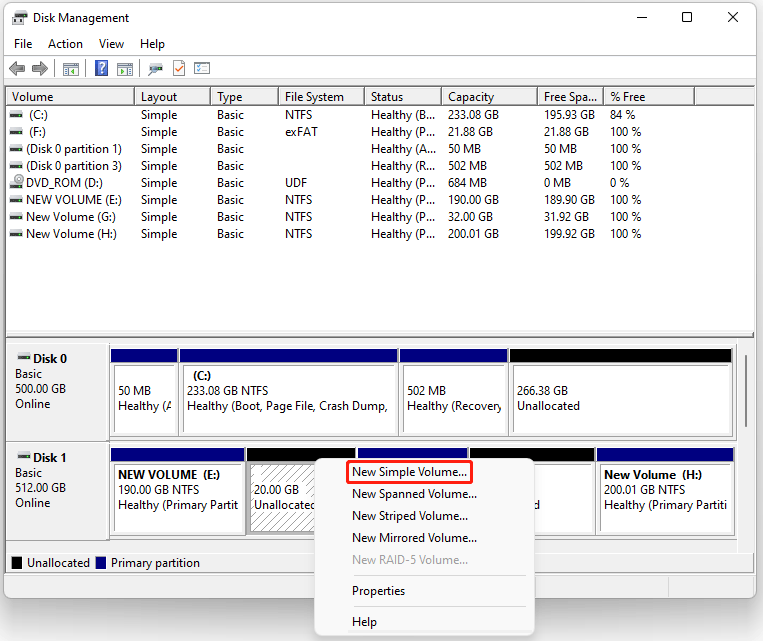
Step 3. Create a new simple partition after obtaining unallocated space.
- Right-click the newly created Unallocated space and select New Simple Volume.
- Click Next to open the wizard, and click Next again to confirm the size of the new volume.
- Choose an available Drive Letter from the drop-down menu and click Next.
- Under the Format Partition screen, ensure the File system is set to NTFS (for Windows).
- Give the partition a meaningful name in the Volume Label box (e.g., “Data” or “Work”).
- Check the box for Perform a quick format (Quick Format) and click Next.
- Review your settings and click Finish.
- The new partition will now format and immediately appear as a usable drive in File Explorer under “This PC.”
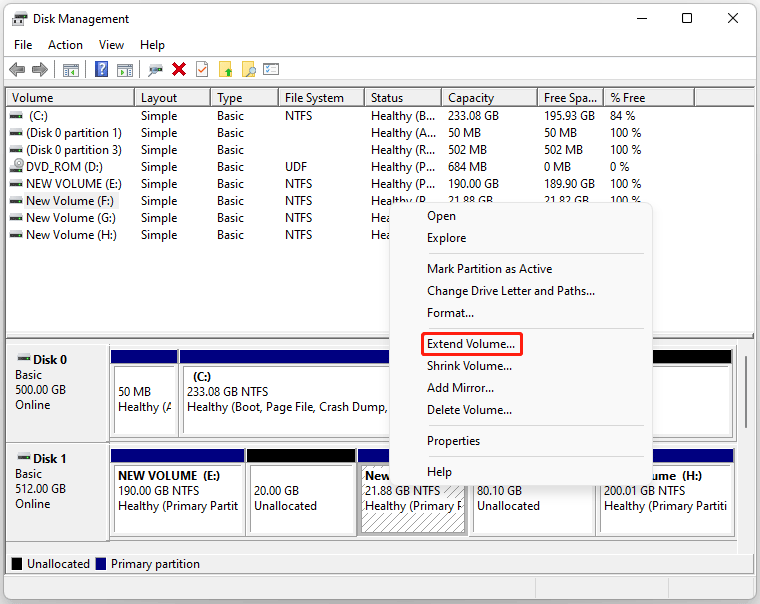
Step 4. Extend another partition if the unallocated space is directly adjacent on the right side.
- Right-click the target partition.
- Choose Extend Volume, and then click Next.
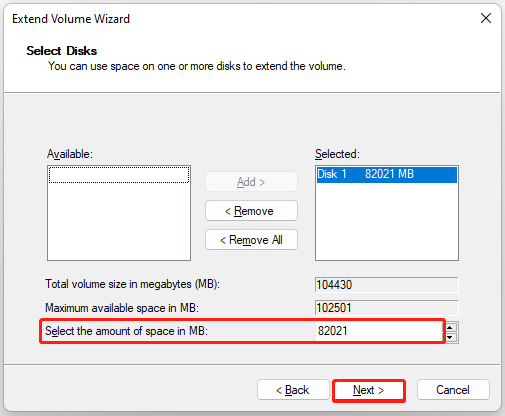
- The wizard automatically selects all available unallocated space. Click Next to accept, or adjust the amount in the Select the amount of space in MB box.
- Click Finish.
Repartition a Hard Drive Using MiniTool Partition Wizard
MiniTool Partition Wizard is a professional all-in-one disk partition management software developed for Windows users.
Compared with the Windows built-in Disk Management tool, this third-party tool breaks multiple functional restrictions of native utilities.
It supports non-destructive adjustment of all types of partitions, flexible merging of non-adjacent unallocated space, and one-click completion of complex repartition tasks.
- Comprehensive functional coverage: Integrates basic functions (shrink, extend, create, delete, format partition) and advanced functions (MBR/GPT disk conversion without data loss, partition copy, OS migration, bad sector detection, deleted partition recovery).
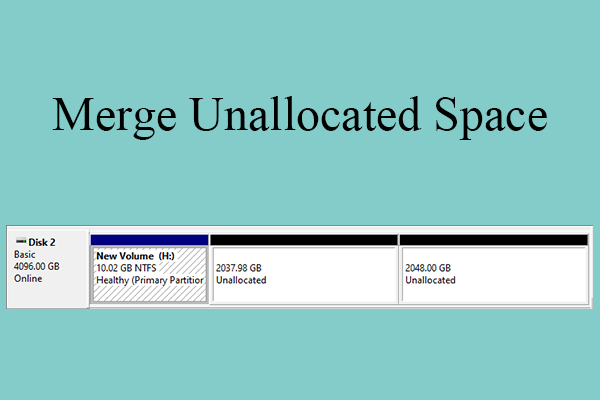
- Flexible space management: Supports merging non-adjacent unallocated space into any target partition freely, solving the biggest pain point of Windows Disk Management.
- Wide compatibility: Compatible with all Windows versions from Windows 7 to the latest Windows 11, supporting HDD, SSD, external drives, USB, and multiple file systems including NTFS, FAT32, exFAT, and EXT4.
- Non-destructive operation: All partition adjustment and merging operations can be completed without formatting partitions or deleting original data.
Let’s learn how to repartition a hard drive in Windows 10/11 using MiniTool Partition Wizard.
MiniTool Partition Wizard FreeClick to Download100%Clean & Safe
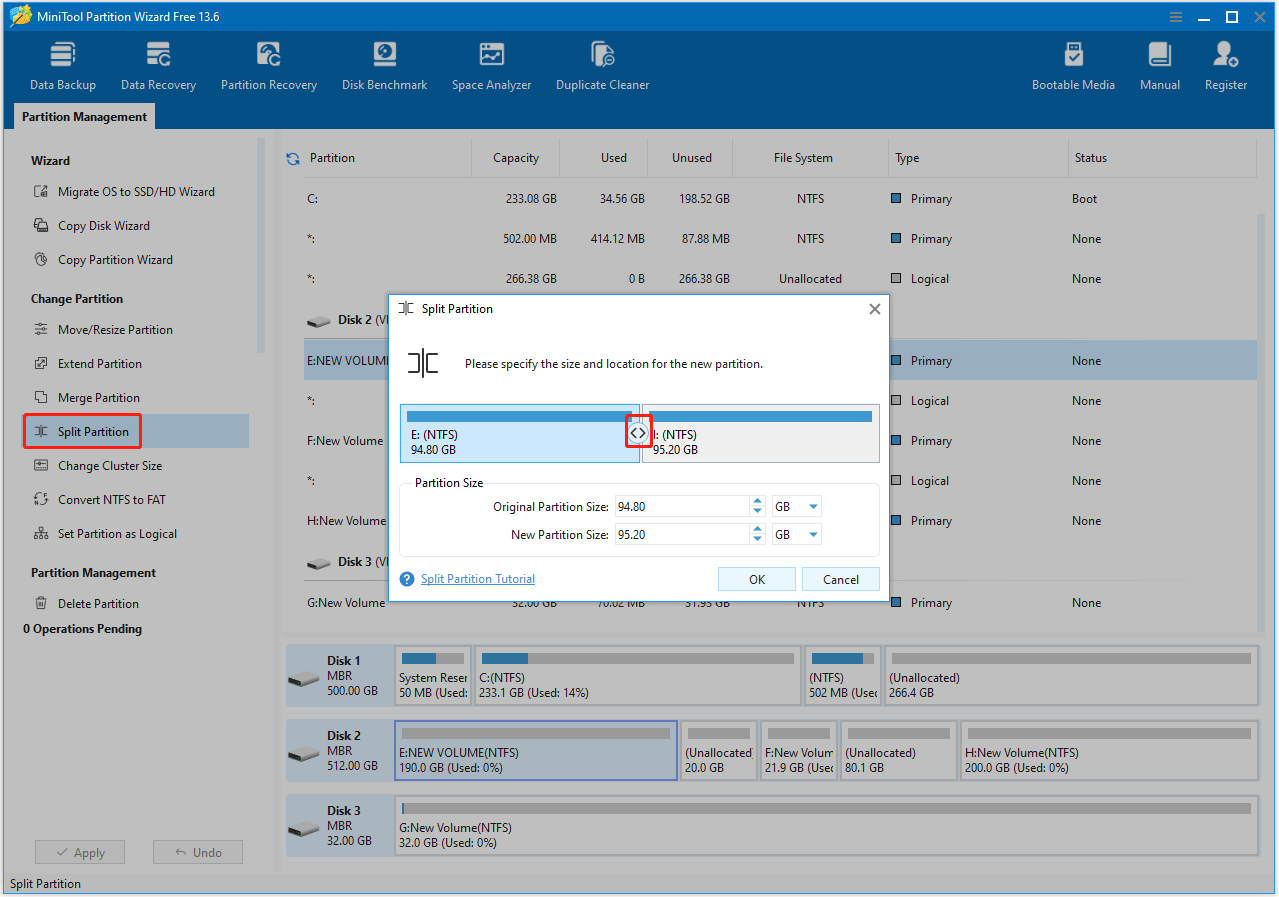
Option 1. Split a Partition into Two
Use this if you have one large drive (like C:) and want to cut it in half to make a new D: drive.
- Open MiniTool Partition Wizard.
- Highlight the partition you want to divide and select Split Partition from the left action panel.
- Drag the borderline left or right to adjust the sizes of the two new partitions, or type the exact gigabyte sizes into the boxes.
- Click OK.
- Click Apply in the bottom-left corner of the main window to execute the changes.
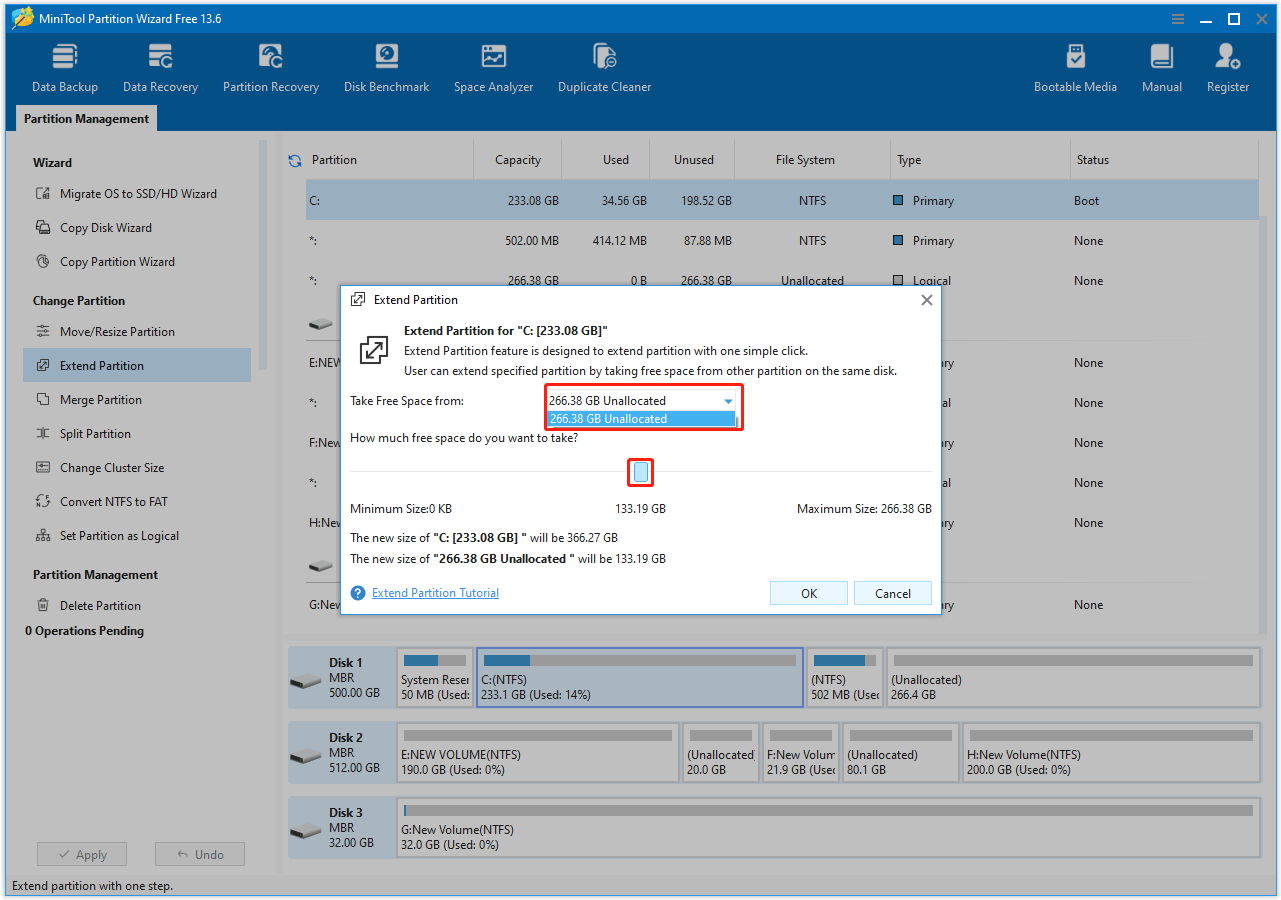
Option 2. Extend a Partition using Free Space
Use this if your main drive (C drive) is full and you want to take free space from another drive or from unallocated space anywhere on the disk.
- Open MiniTool Partition Wizard.
- Right-click the partition you want to expand (e.g., C:) and select Extend.
- Open the drop-down menu labeled Take Free Space from and select the drive or unallocated block you want to take space from.
- Drag the slider to choose exactly how much space to take.
- Click OK.
- Click Apply in the bottom-left corner to finish.
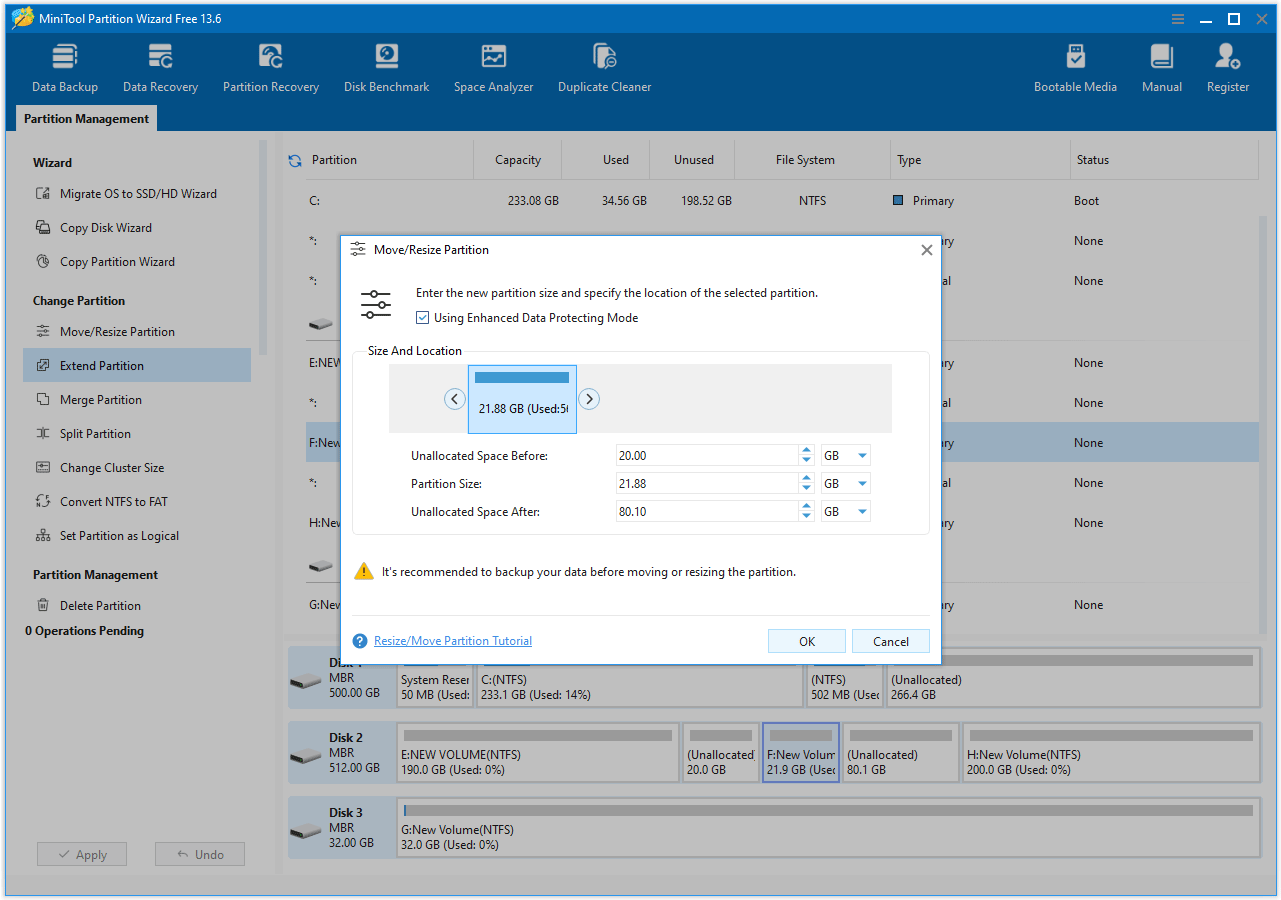
Option 3. Resize or Move a Partition
Use this if you have unallocated space, but it is blocked or sitting in the wrong spot.
- Open MiniTool Partition Wizard.
- Right-click the partition you want to change and select Move/Resize.
- To resize: Hover over the left or right edges of the partition block and drag them to shrink or expand it.
- To move: Click and hold the middle of the partition block and slide the entire block left or right into empty unallocated space. You can move
- Click OK.
- Click Apply in the bottom-left corner.
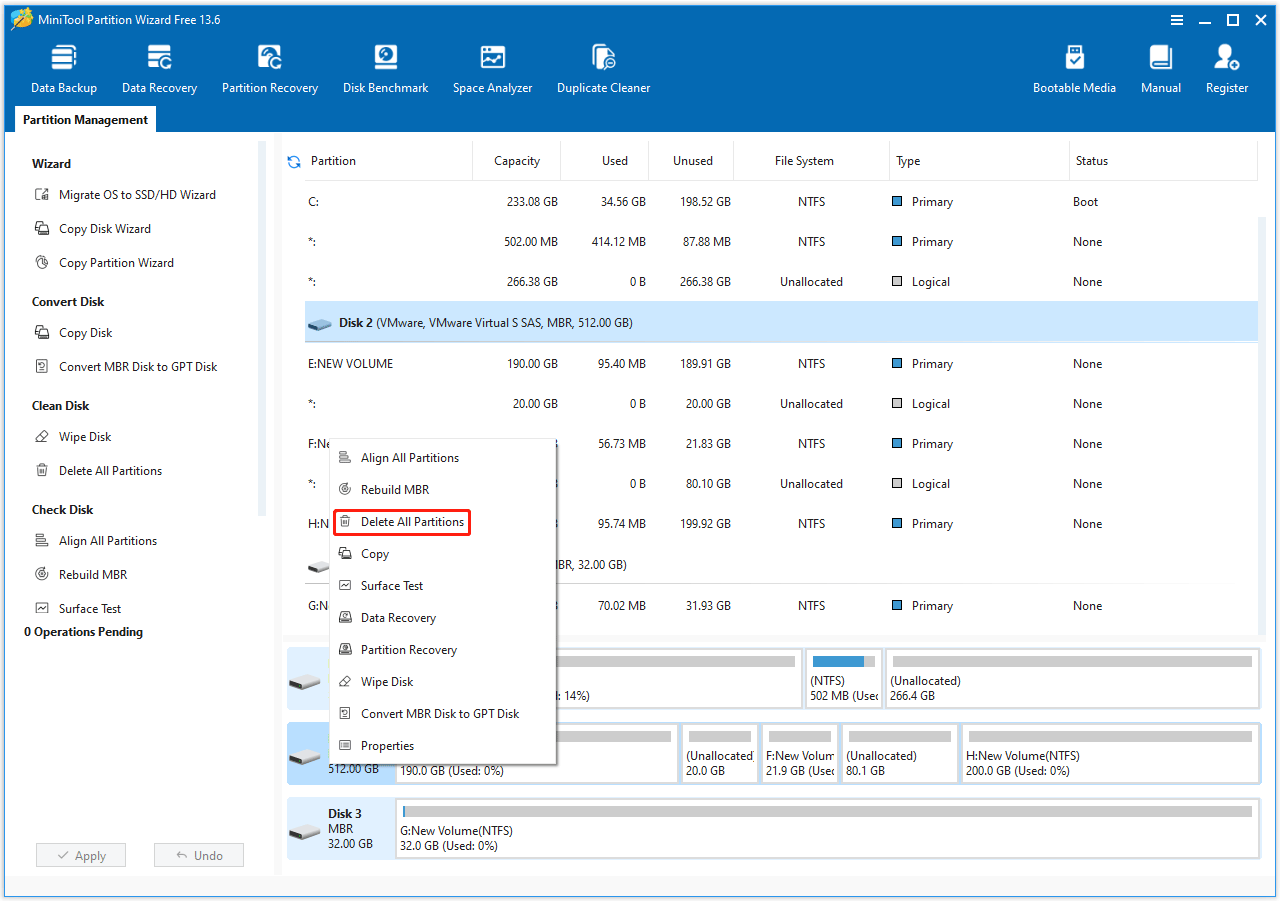
Option 4. Delete All Partitions at One Time
Use this if your drive isn’t the boot drive and you want a complete repartitioning.
- Launch MiniTool Partition Wizard
- Right-click the target hard drive and choose Delete All Partitions.
- Read the notification and confirm it by clicking Yes.
- Preview and Click Apply.
Common Scenarios about Repartitioning a Hard Drive
Here are some common scenarios and solutions for repartitioning a hard drive in Windows 10/11:
Scenario 1. C Drive Is Full
Solution:
- Shrink another partition
- Extend the C drive
Scenario 2. Need Separate Data Partition
Solution:
- Shrink the main partition
- Create a new D drive
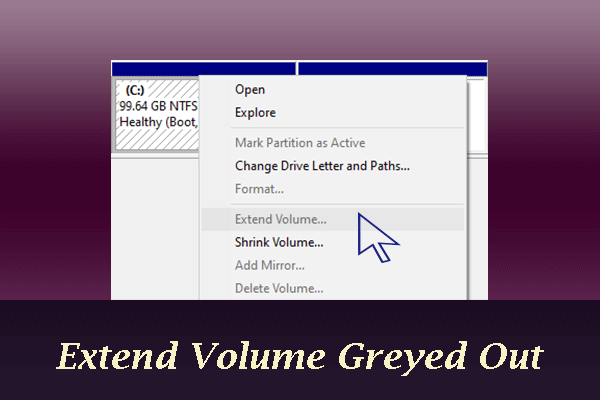
Scenario 3. Extend Volume Is Greyed Out
Solution:
- Move partitions
- Make unallocated space adjacent
- Directly use MiniTool Partition Wizard
Scenario 4. Upgrading to SSD
Solution:
- Clone OS to SSD
- Repartition storage layout afterward
Repartition a Hard Drive FAQ
Always back up important files before repartitioning a drive.
If a Recovery Partition or another healthy drive sits between your C: drive and the unallocated space, Windows will lock the option. You need to use a third-party tool like MiniTool Partition Wizard to move the blocking partition out of the way.
Yes, if you choose to "Delete Volume" or format a partition. Always double-check that you are modifying the correct drive letter before confirming.
Partitioning an SSD does not harm its lifespan or reduce its performance.
Bottom Line
Windows Disk Management is suitable for simple tasks such as shrinking or creating partitions.
However, MiniTool Partition Wizard provides a more flexible solution for advanced repartitioning operations like:
- Extend partitions without adjacent unallocated space
- Move partitions
- Merge partitions
If you want the safest and easiest way to repartition a hard drive in Windows 10/11, especially when Disk Management limitations prevent operations, MiniTool Partition Wizard is worth trying.
If you have any questions related to MiniTool Partition Wizard, just contact us by sending an email via [email protected].
About The Author

Position: Columnist
Vega enjoys helping people with computer problems, including disk management, data recovery, data backup, and more. She is constantly expanding her knowledge in related fields. And she will continue to bring more easy-to-understand professional articles to help people solve various problems on the PC.
User Comments :