Sometimes users need to hide a partition so as to prevent it from being accessed by others. This MiniTool Partition Wizard tutorial shows users how to hide/unhide partition easily and quickly.
About Hide/Unhide Partition
It is a common sense that lots of users are accustomed to store valuable photos, business documents and personal files to computer hard drives. In this case, many users don’t want others to access their confidential files without permission.
At this time, they can choose to hide that partition, so that the files can never be seen by malicious people. Users themselves can’t see the hidden partition in the computer, either. So if they need to make the partition accessible to all, they should unhide partition.
Common situations where users need to hide/unhide partition:
- If users have installed multiple operating systems on the same computer, they’d better hide the other system partitions for the sake of file integrity.
- Users might want to hide the disk partition which includes recovery tools or other kinds of significant files.
- To manage or use files in a hidden partition, users need to unhide the partition at first.
- If users want to share the files in a hidden partition with families or friends, they should unhide it.
How to Hide/Unhide Partition
Lacking related experience and knowledge, ordinary users often don’t have a clear idea of how to hide/unhide partition. MiniTool Partition Wizard offers a good way to help them hide/unhide partition conveniently and safely.
MiniTool Partition Wizard FreeClick to Download100%Clean & Safe
How to Hide Partition
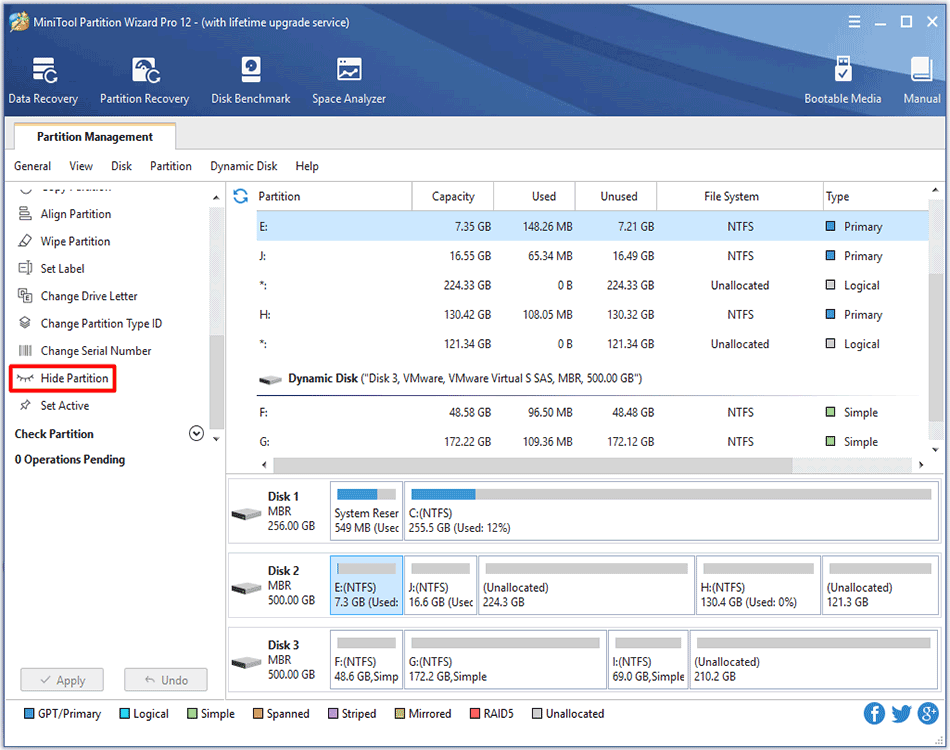
Step 1. Open the software and enter its main interface. Then, select the target partition and choose Hide Partition from the left action panel or right-click menu.
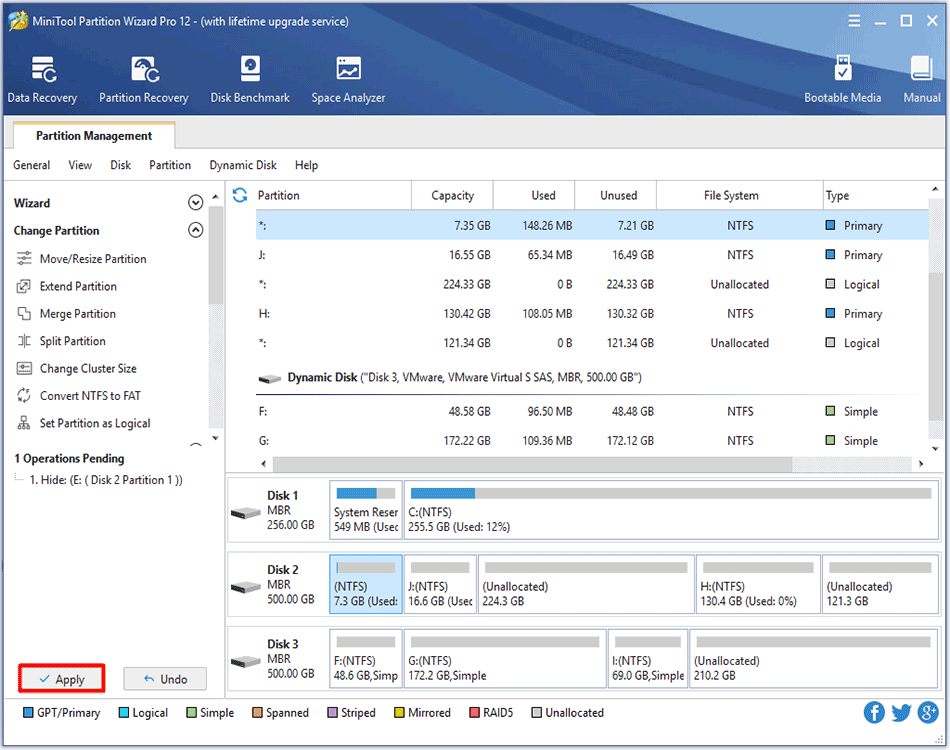
Step 2. Then the target partition is shown without partition letter on the interface. Click Apply to save the change.
How to Unhide Partition
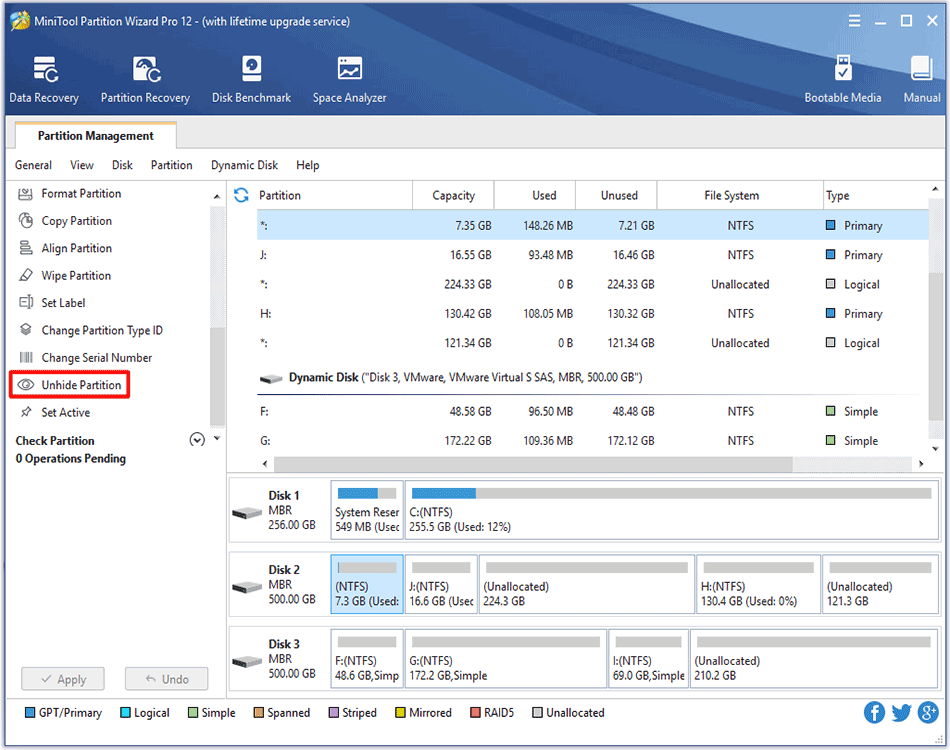
Step 1. Select the target partition and choose Unhide Partition from the left action panel or right-click menu.
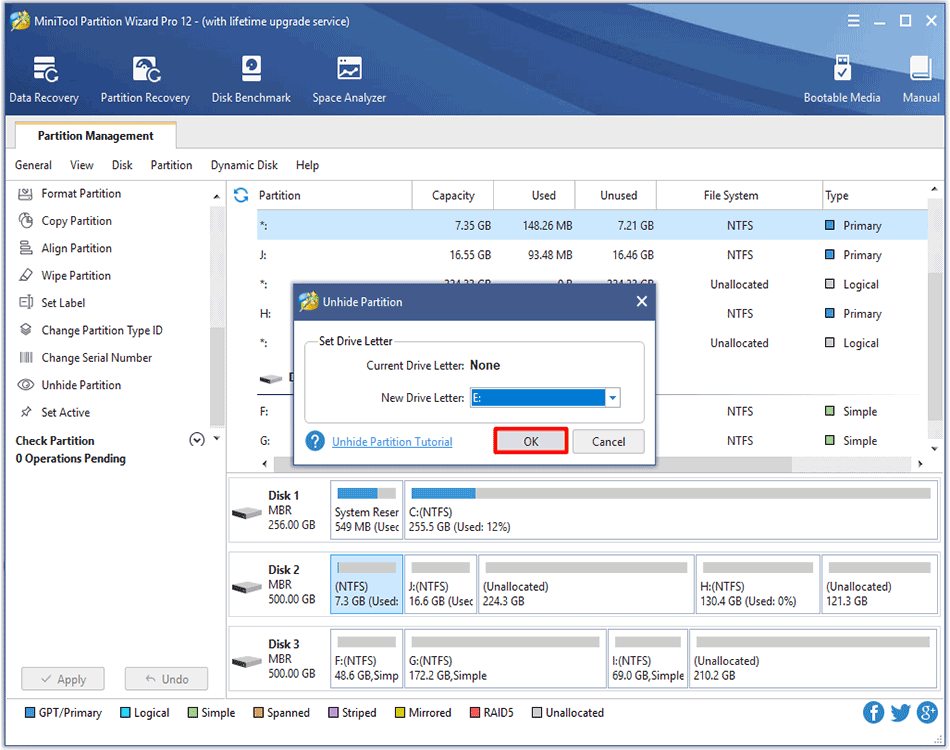
Step 2. There will be a pop-out window which allows users to set a new drive letter to the target partition. Choose a letter and click on OK to back to the main interface.
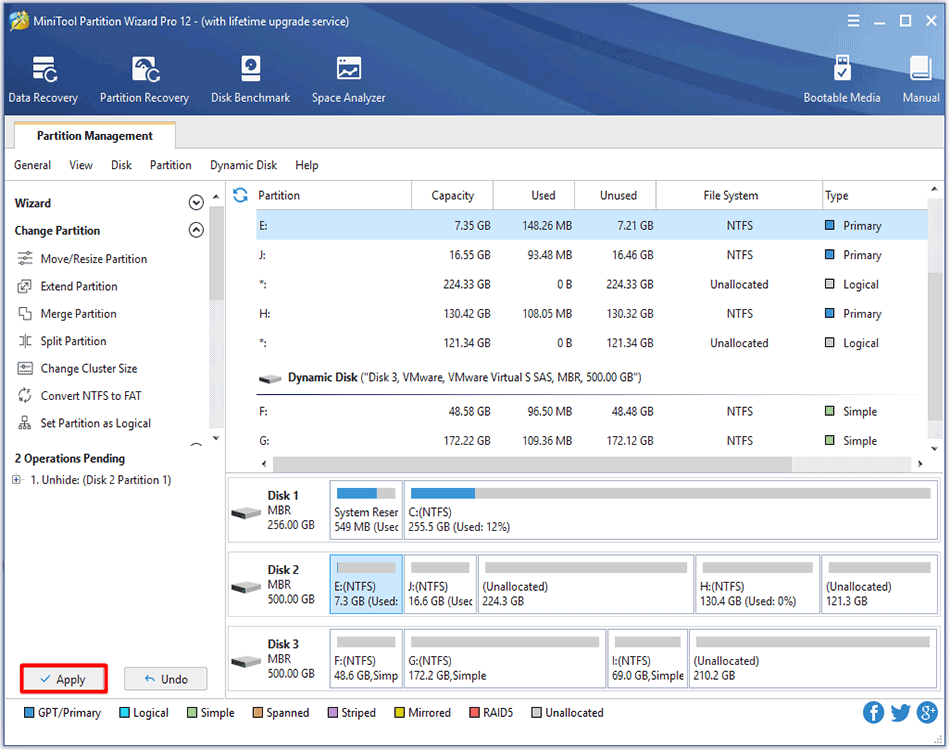
Step 3. Here, the target partition is shown with the specified drive letter. Then, click on Apply to save the change.

User Comments :