When a volume size is unreasonable, users may need to resize its capacity. MiniTool Partition Wizard tutorial here shows how to extend/shrink volume size and move volume location with simple steps.
About Move/Resize Volume
Move/Resize Volume feature in MiniTool Partition Wizard is much useful for you to change volume size on dynamic disk. With this function you can complete the following 3 operations:
- Shrink dynamic volumes including simple volume, mirrored volume, striped volume, spanned volume and RAID 5 volume to release unallocated space so as to create new volumes or extend another volume.
- Extend a mirrored volume, spanned volume, striped volume, or RAID 5 volume to unallocated space to enlarge volume size (note that Disk Management can only extend simple volume and spanned volume.)
- Move unallocated space to make it adjacent to the volume to be extended.
How to Move/Resize Dynamic Volume
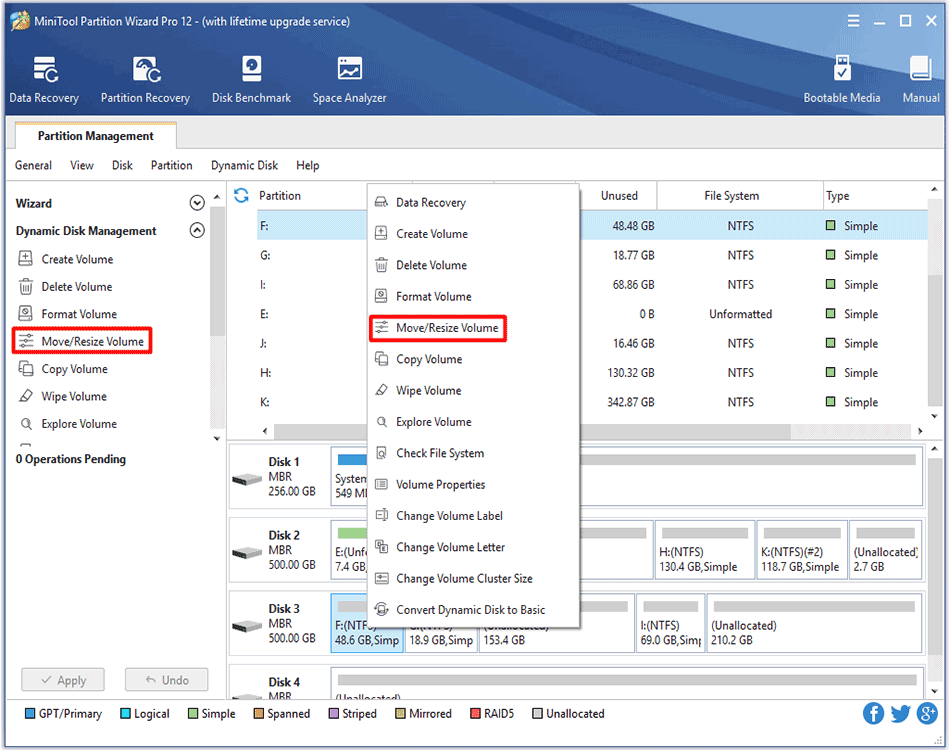
Step 1. Run MiniTool Partition Wizard to get the main interface. Then, select the volume that needs to change location/volume size and choose Move/Resize Volume from the left action panel or from right-click menu.

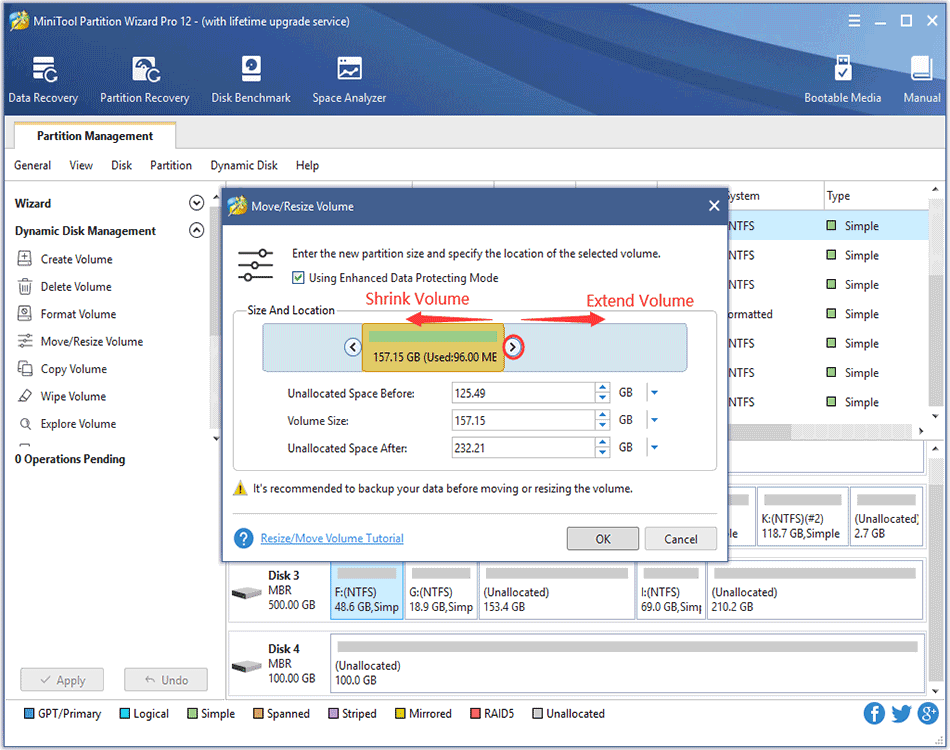
Step 2. To shrink a volume, just drag the border of the rectangle bar leftwards. To enlarge a volume, drag the handle rightwards. Alternatively, users can type exact volume size in MB, GB, or TB to edit volume size.

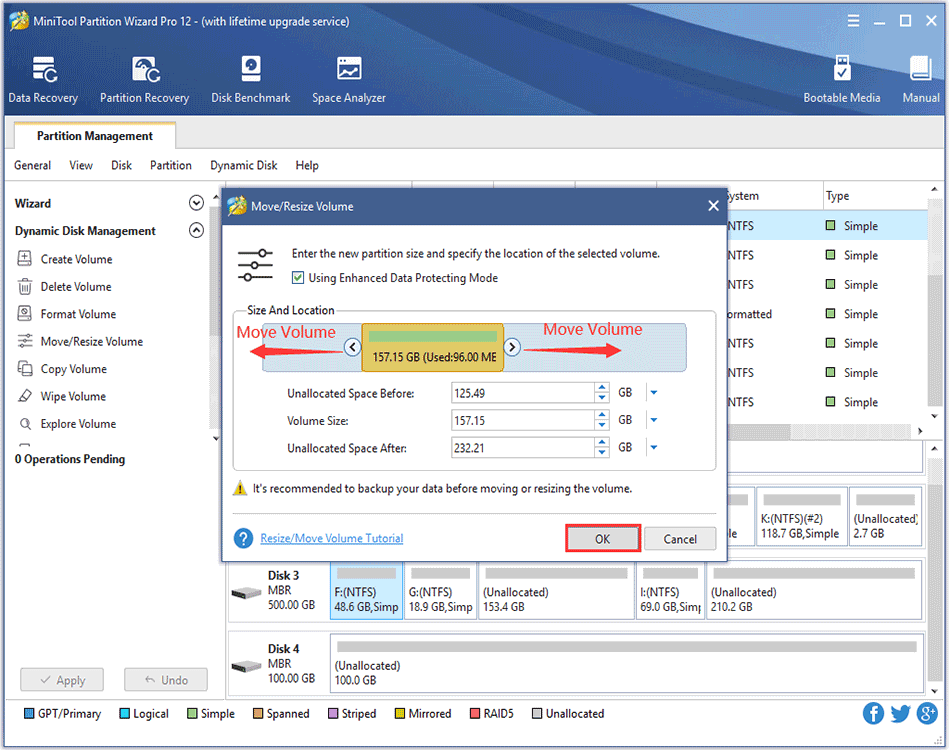
To move volume location, please drag the whole handle or manually define unallocated space in MB, GB, or TB before or after the volume. After getting needed volume size and location, users need to click OK to continue.

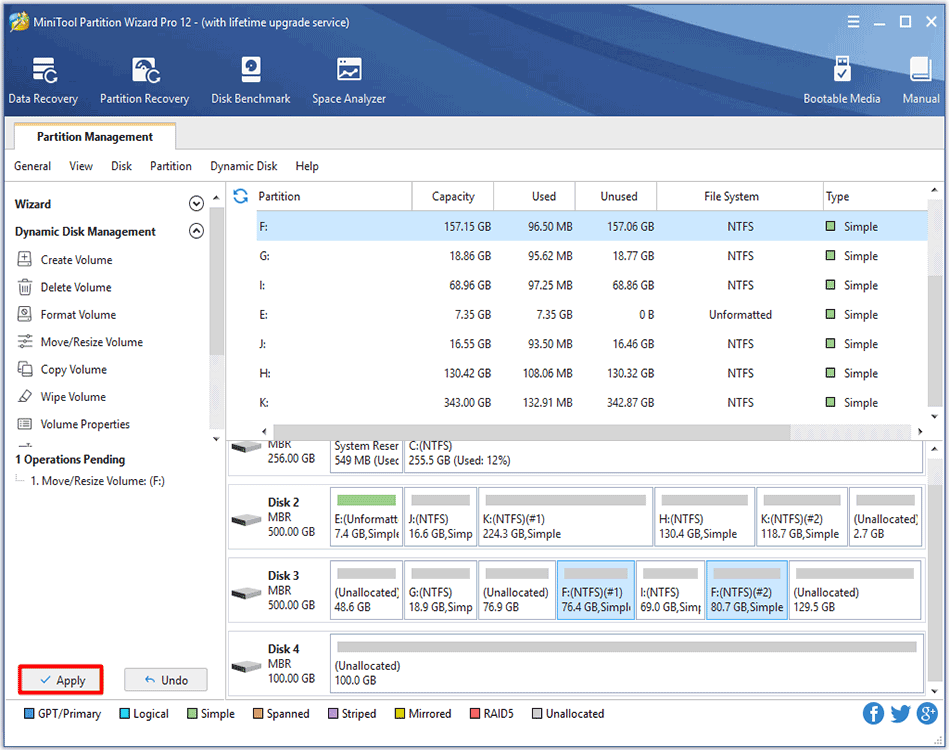
Step 3. Click Apply button at the top to perform changes.


User Comments :