A lot of people complain that a Windows Defender bug fills Windows boot drive with gigabytes of files. If you are also one of them, this post of MiniTool is worth reading. It provides detailed steps to fix the problem.
Windows Defender Bug Fills Windows Boot Drive with Thousands of Files?
Is your HDD/SSD suddenly starting to run out of space? According to lots of user reports, a Windows Defender bug fills Windows boot drive with thousands of files, wasting gigabytes of disk space on Windows 10. Sometimes the occupying disk space can reach up to 30GB. Here’s a true example from the tenforums.com:
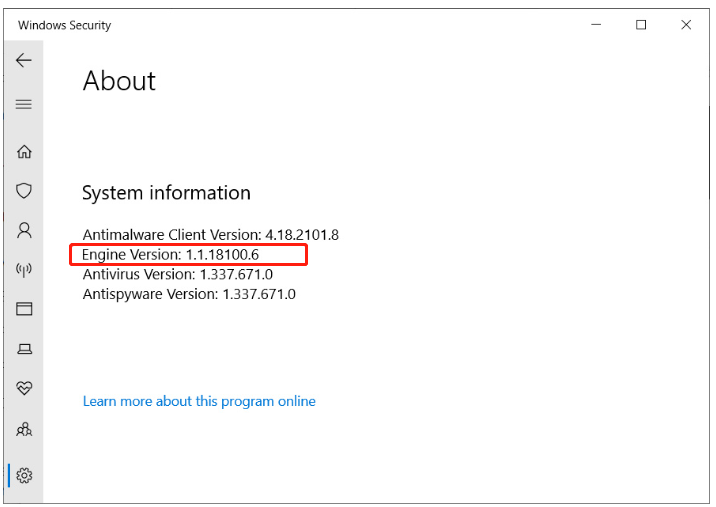
If anyone noticed, in the last Windows Defender was a bug that caused your HDD/SDD filled up with crap files. In the meantime, a fix has been released and is being installed silently. If you have any version of Engine version LOWER than 1.1.18100.6 you have this bug. If you have received this update, you are on engine version Engine Versie: 1.1.18100.6 (Lower than that, you have not received the update yet, like Engine Versie: 1.1.18100.5 i.e.)https://www.tenforums.com/antivirus-firewalls-system-security/178846-windows-defender-bug-hotfix-today.html
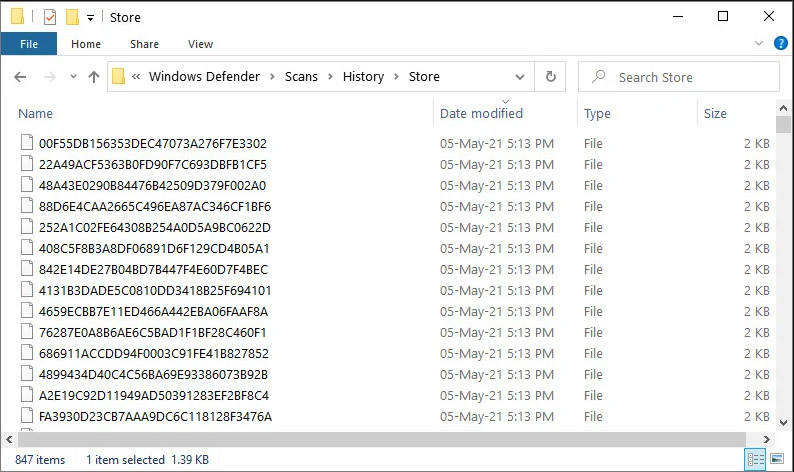
According to a survey, the Windows Defender was found with the Microsoft Defender antivirus engine update “1.1.18100.5”. After installing the update, the C:ProgramDataMicrosoftWindows DefenderScansHistoryStore directory began to fill up with thousands of small files, ranging from about 600 bytes to 2KB.

Furthermore, the number of total files varied from different users. Some users reported that their C drive has been filled up with thousands of files, eating up 30GB of space. Other people reported that the number of files even piled up to 11 million, consuming about 11GB of space.
The “Windows bug fills Windows boot drive” issue often appeared after they turned on Microsoft Defender real-time protection. It’s so frustrating that your HDD/SSD runs out of space due to the bug. How to fix it? Let’s keep reading the following part.
How to Fix the “Windows bug fills Windows boot drive” Issue
It has been proven that the “Defender bug fills Windows boot with large files” problem can be resolved by updating the antivirus engine from 1.1.18100.5 to 1.1.18100.6. How to update Windows Defender antivirus on Windows 10? Here’re 2 simple methods.
# 1. Update Windows Defender via Windows Security
Since the “Windows Defender bug fills boot with files” issue occurs, Microsoft has released an update for the real-time protection bug. Follow the steps below to update Windows Defender.
Step 1. Press Windows + I keys to open the Settings app and select Update & Security.
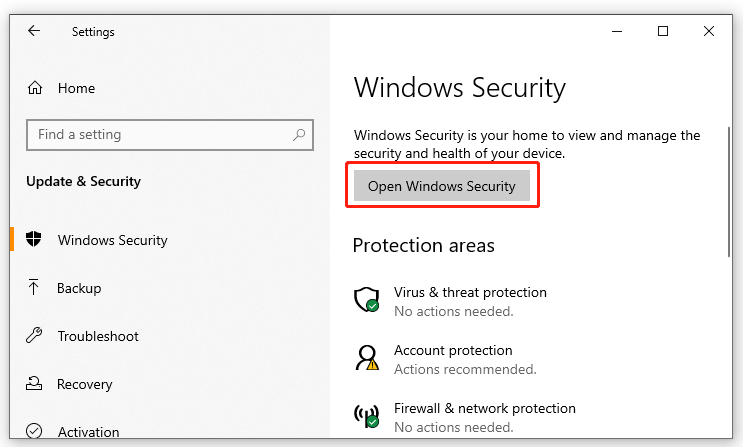
Step 2. Select Windows Security from the left panel and click on Open Windows Security from the right side.

Step 3. Click on the Settings (Geared-shape) icon from the left bottom corner and select About. Then you can check the current version of your Microsoft Defender antivirus engine. If you are using an old version, proceed with the following steps to install the latest update.

Step 4. Follow Step 1 to open the Settings window, select Windows Update from the left side and click on Check for updates to install any pending updates. Usually, the update is titled Security Intelligence Update for Microsoft Defender Antivirus.
Step 5. Once installed, restart your computer and see if the “Windows Defender bug boot drive with files” issue gets solved.
# 2. Update Windows Defender via CMD
Another way is to use CMD to manually trigger a Windows Defender antivirus engine update. If you can’t update Windows Defender via the above method, try this way.
Step 1. Type cmd in the search box on the taskbar. And then right-click the Command Prompt app and select Run as administrator.
Step 2. In the elevated Command Prompt window, type the following commands in order and hit Enter after each one.
- cd %ProgramFiles%Windows Defender
- exe -removedefinitions -dynamicsignatures
- exe -SignatureUpdate
Of course, you can manually delete them if the Windows Defender bug fills Windows boot with files. To do so, press Ctrl + A keys to select all files in the Store folder and press Shift + Delete keys to remove the files.
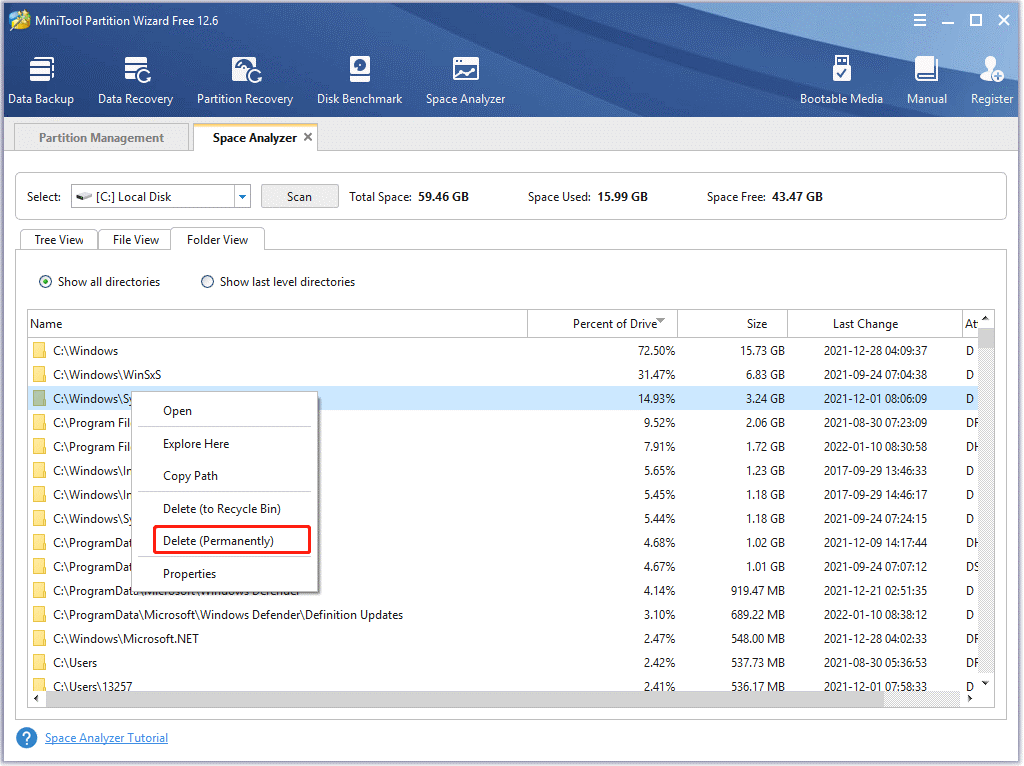
Alternatively, you can use a professional file cleaner like MiniTool Partition Wizard, which can check what’s occupying your disk space and delete unnecessary files permanently.
MiniTool Partition Wizard FreeClick to Download100%Clean & Safe


![My Computer Is Frozen and Control Alt Delete Not Working? [Fixed]](https://images.minitool.com/partitionwizard.com/images/uploads/2022/04/fix-my-computer-frozen-ctrl-alt-del-not-working-thumbnail.jpg)
User Comments :