Nowadays, updating BIOS become easier than ever, but it still has the risk of failure. This post from Partition Magic tells you the symptoms of the Lenovo BIOS update failed issue and shows you how to solve it.
Lenovo BIOS Update Failed Symptoms
Lenovo is one of the most famous computer brands in the world. In the last quarter of 2024, Lenovo’s market share of global PC shipments stood at 26.3 percent.
The best-known brands of this company include the ThinkPad business line of notebooks, the IdeaPad, Yoga, LOQ, and Legion consumer lines of notebooks, and the IdeaCentre, LOQ, Legion, and ThinkCentre lines of desktops.
If you use a Lenovo PC, you may need to update Lenovo BIOS sometimes, because the BIOS update will improve stability and expand compatibility, allowing you to use new hardware like recently-released memory, storage drives, or CPUs.
To update Lenovo BIOS, you can use the software Lenovo Vantage and Lenovo System Update. They will update the Lenovo BIOS automatically. You can also install the Lenovo BIOS update manually by using the WinFlash software, double-clicking the BIOS EXE file directly, or using the bootable CD version.
However, you may encounter the Lenovo BIOS update stuck or failed issues sometimes. The symptoms may be as follows:
- The Lenovo BIOS update progress gets stuck at a certain percentage for several hours.
- On the BIOS interface, some errors pop up. For example: An unexpected error has occurred, and the process did not complete. Error: Firmware update failed. Error: Invalid firmware image. Error: Secure Flash Rom Verify fail. Error! Can not find or load Rom image!
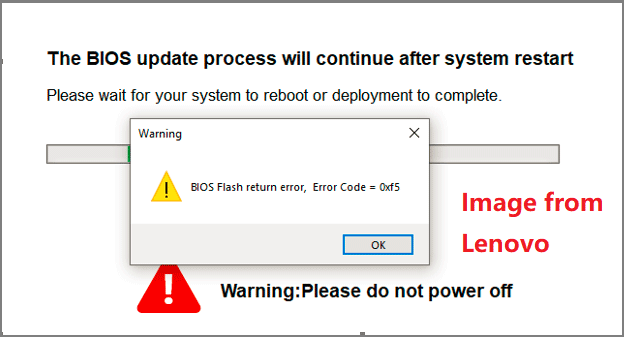
- Various errors pop up when you update Lenovo BIOS using the software. For example: Some updates were not installed correctly. Flash Error. Write error during flashing. The utility process has not completed. Not allow flash. Boot Guard version verification failed. BIOS Flash return error.
- The Lenovo computer won’t boot up after the BIOS update.
How to Fix the Lenovo BIOS Update Failed Issue
If you get the Lenovo BIOS update stuck or failed issues, you can try the following methods to solve them.
Way 1. Install an OS
If no OS is installed on the Lenovo computer, the BIOS update may fail. When this occurs, the BIOS update process is skipped and moved to the normal boot process, or the BIOS version is the same as the version before the update. To avoid this issue, you need to install an OS first and then update the BIOS.
Way 2. Increase the EFI Partition
Nowadays, most modern computers will use the UEFI boot mode. Then, the computer will create an EFI/ESP (Extensible Firmware Interface) partition on the system disk.
This partition is a hidden FAT16/32 partition that contains the boot loaders, boot managers, device driver files for hardware devices present in a computer and used by the firmware at boot time, system utility programs that are intended to be run before an operating system is booted, and data files such as error logs.
When a computer is booted, the UEFI firmware will load files stored on the ESP to start operating systems and various utilities. In addition, the EFI partition can also be used to store and manage updates for UEFI firmware.
On the Lenovo computer, the EFI partition size may be around 100MB. You need to increase its size and the Lenovo BIOS update failed may be solved. To do that, you can try the following 2 methods.
#1. Use MiniTool Partition Wizard
This software can extend a FAT32 or NTFS partition for free. Here is the guide:
MiniTool Partition Wizard FreeClick to Download100%Clean & Safe
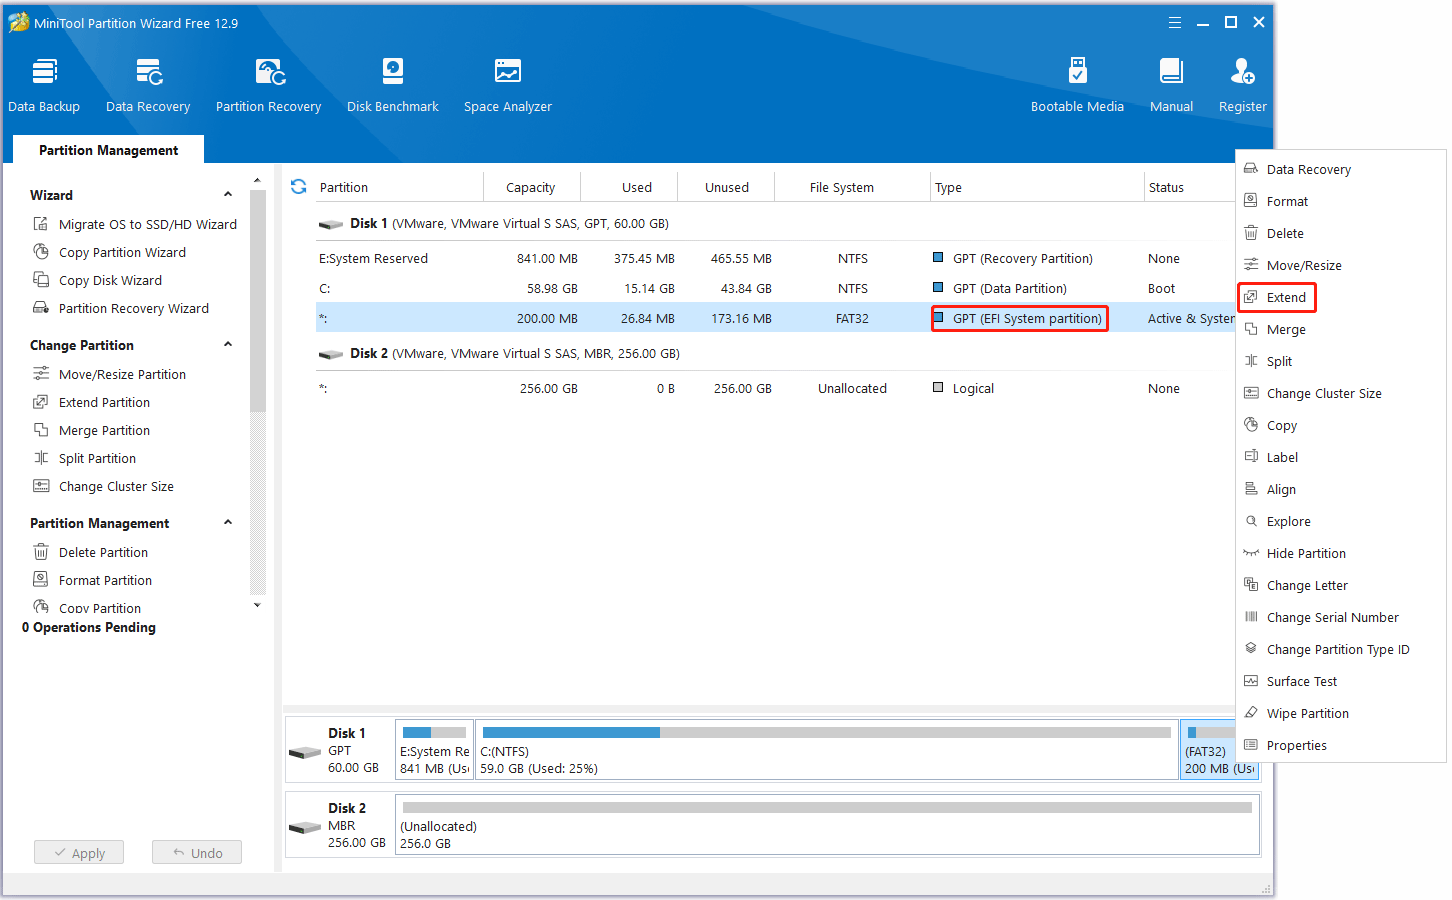
Step 1: Launch MiniTool Partition Wizard. Right-click the EFI partition and choose Extend.
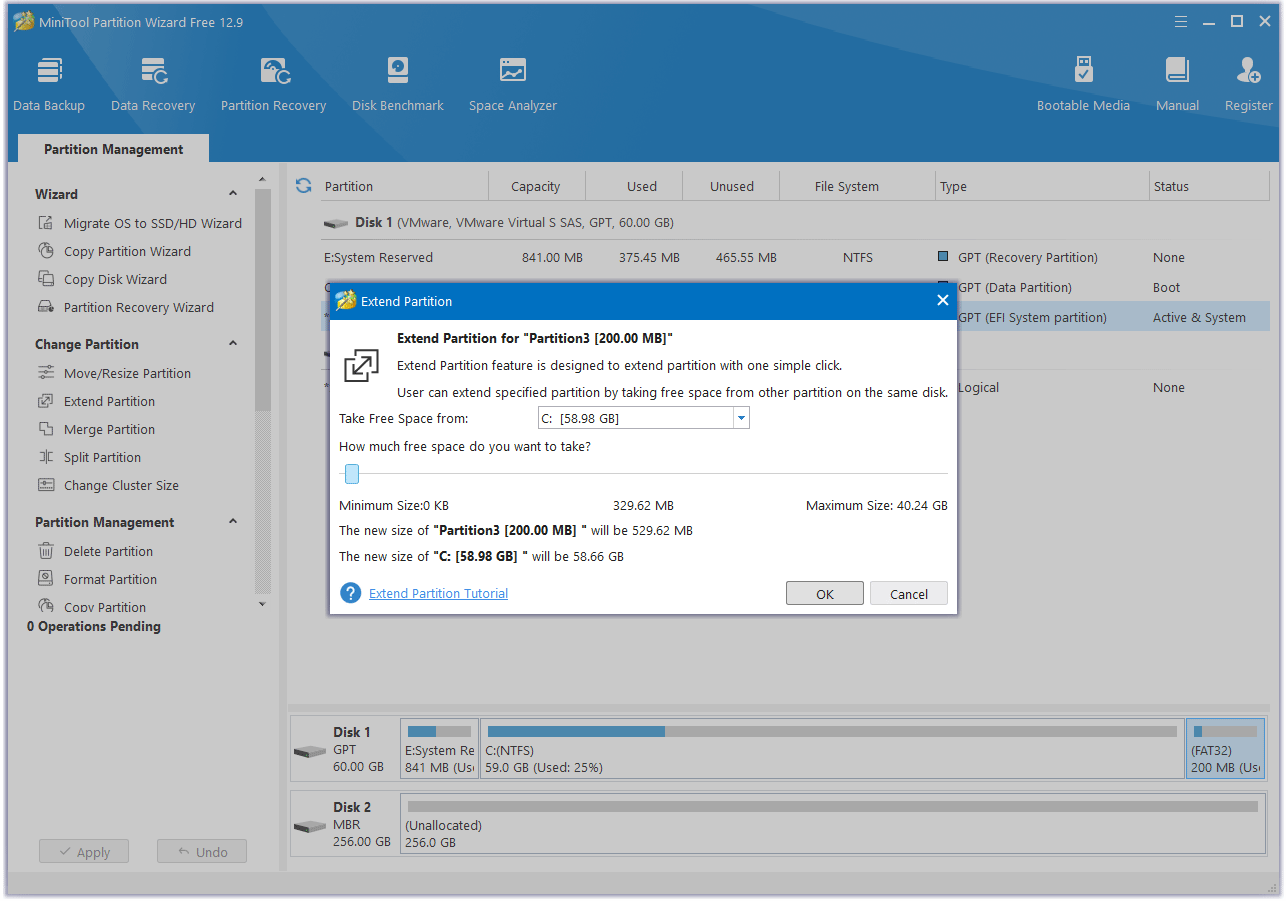
Step 2: Select an existing partition to take free space. Drag the blue block to decide how much space to take. At least 100MB is recommended. Then, click OK.
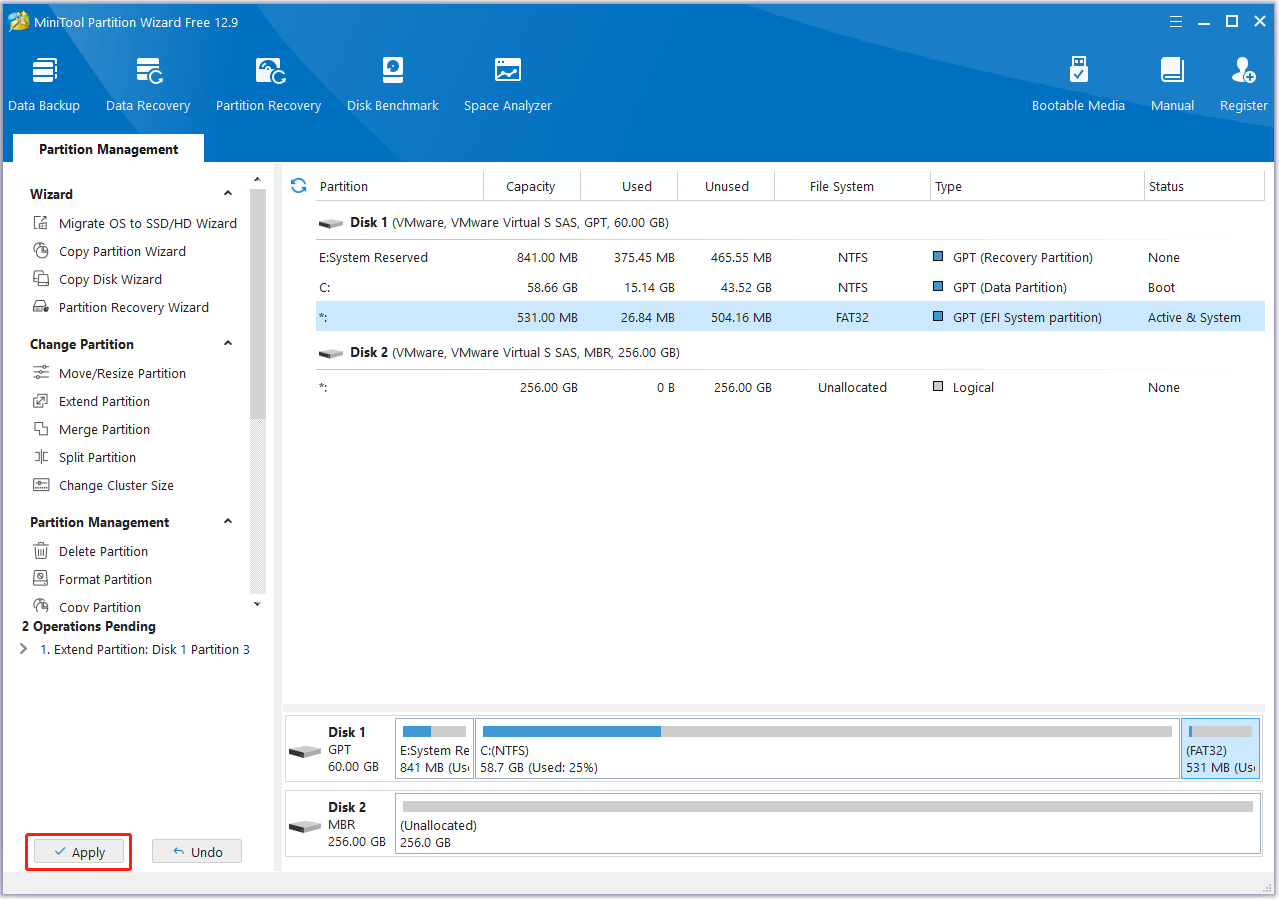
Step 3: Click the Apply button to execute the pending operation. MiniTool Partition Wizard will require you to restart the PC. Do what it asks.
#2. Delete the EFI Partition and Create a New One
You can make a Windows installation media and then boot the computer from it. Press Shift + F10 to launch the Command Prompt. Then, use DiskPart commands to delete the EFI partition, shrink an existing partition, and then create a new EFI partition.
Way 3. Reset the BIOS
Lenovo allows you to update the BIOS in several ways. If one way fails, you can try another way to update it. If you encounter the Lenovo BIOS update failed black screen issue, you can try resetting the BIOS first.
Boot into the Lenovo firmware and then choose the option to load default settings. If you can’t enter firmware, you need to clear CMOS by removing the battery or adjusting the jumper.
Way 4. Reprogram the BIOS Chip
This way is offered by a Reddit user and another user says it is useful. If your Lenovo computer becomes bricked and the above ways don’t work, you can try this way. Click this link to get the guide.
Bottom Line
You may encounter the Lenovo BIOS update failed black screen issue sometimes. This post offers the solutions. One way is to increase the EFI partition. If you encounter issues when doing that using MiniTool Partition Wizard, contact us via [email protected]. We will get back to you as soon as possible.
About The Author

Position: Columnist
Linda has been working as an editor at MiniTool for 5 years. She is always curious about computer knowledge and learns it crazily. Her articles are simple and easy to understand. Even people who do not understand computer can gain something. By the way, her special focuses are disk management, data recovery and PDF editing.
User Comments :