Over time, the computer disks gradually fill up, affecting the computer performance. How to free up disk space on PC? You can delete unnecessary files, manage Storage Settings, compress files, move files to cloud or external drive, or use disk partition software to expand the partition or upgrade the disk.
Disk space is the total storage capacity on your hard drive. If the disk space is full, especially the C drive, your computer will encounter various problems. For example:
- The computer performance is degraded. Windows and programs will boot, run, and shut down very slowly.
- The computer and programs may not respond or even crash.
- You may encounter issues when updating Windows and programs, downloading files, and installing new apps.
To avoid these issues, you need to free up disk space regularly. How to free up disk space on PC? You can try the following methods.
Method 1. Delete Unnecessary Files
How to free up space on C drive? The simplest way is to delete unnecessary files. You can use Windows File Explorer to do that. Here is the guide:
Step 1: Delete user files.
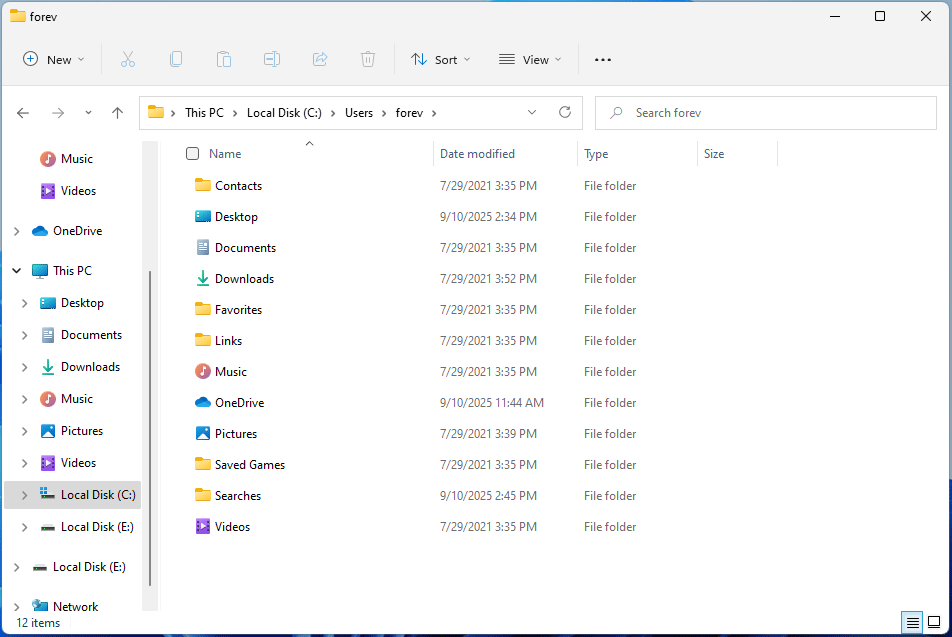
- Open Windows File Explorer and go to C:\Users\username.
- Under this folder, there are many folders like Desktop, Documents, Downloads, Music, OneDrive, Videos, Saved Games, etc. You need to open these folders one by one to find and delete unnecessary files.
Step 2: Find large files to delete.
- In Windows File Explorer, open a partition (C: drive for example).
- Click View > Show > Hidden items.
- On the Search bar, type this command: Size: > *MB. * should be replaced accordingly. Press Enter and File Explorer will list all files larger than *MB in the drive.
- Find unnecessary files to delete.

Method 2. Delete Duplicate Files
Duplicate files occupy much disk space. You can find and delete these files to free up disk space.
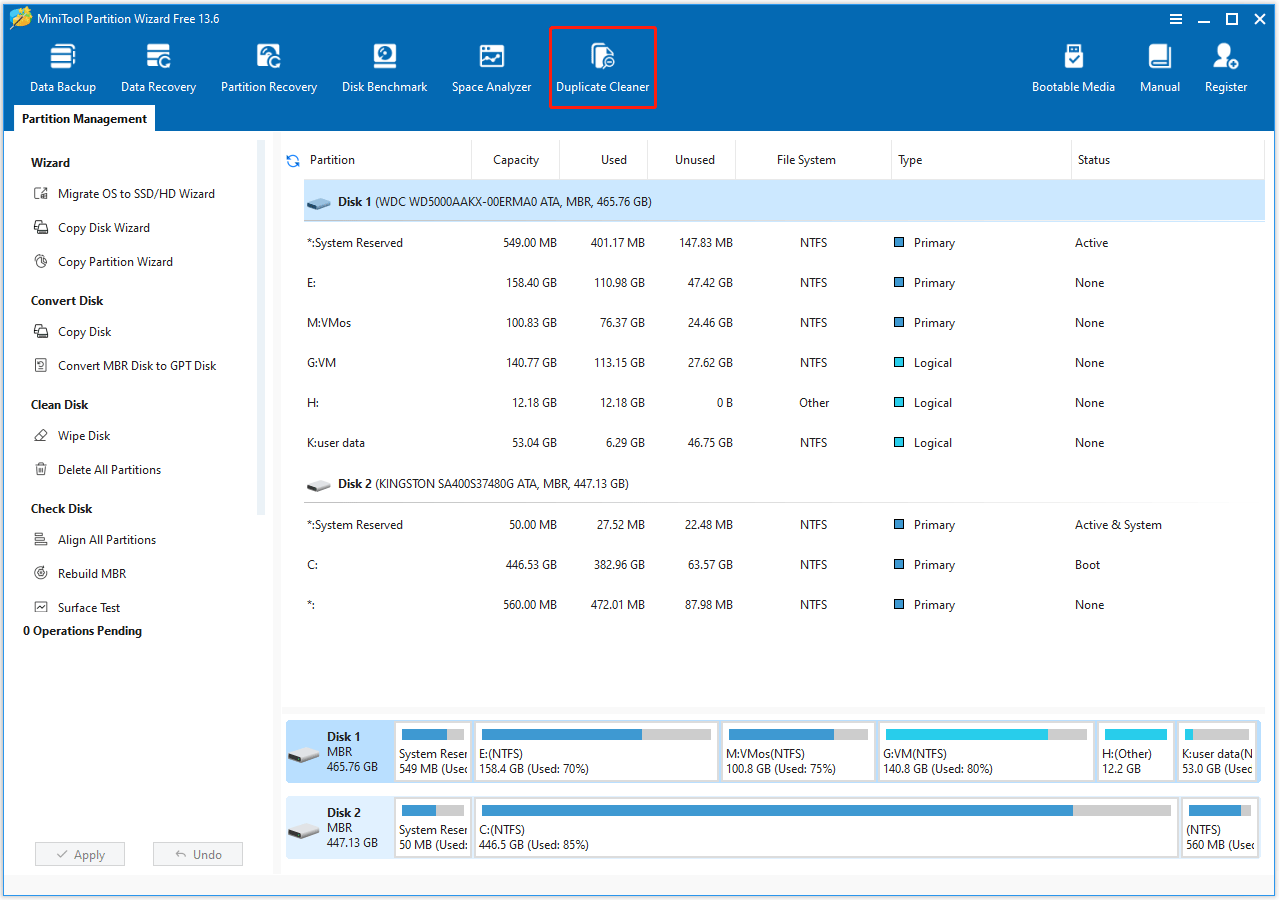
MiniTool Partition Wizard is a duplicate cleaner that helps you detect and delete duplicate files stored across your PC with just a few clicks.
MiniTool Partition Wizard FreeClick to Download100%Clean & Safe
Step 1. Launch MiniTool Partition Wizard to enter its main interface. Then click the Duplicate Cleaner feature on the top toolbar.
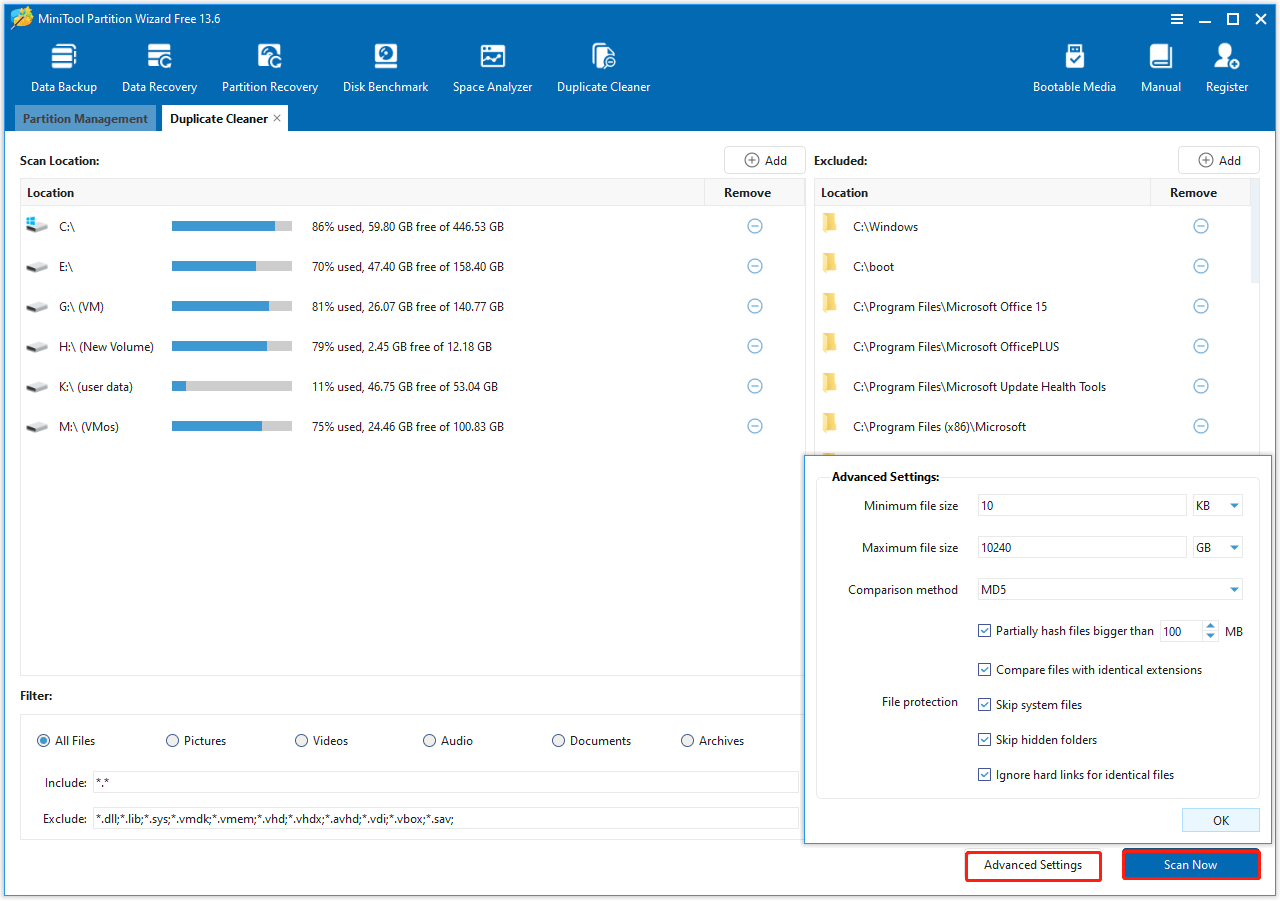
Step 2. In the following interface, configure the scan settings, including location and file type. Then click Scan Now. You can click the Advanced Settings to adjust file size, choose the hash comparison method, and set file protection options for a more precise scan.
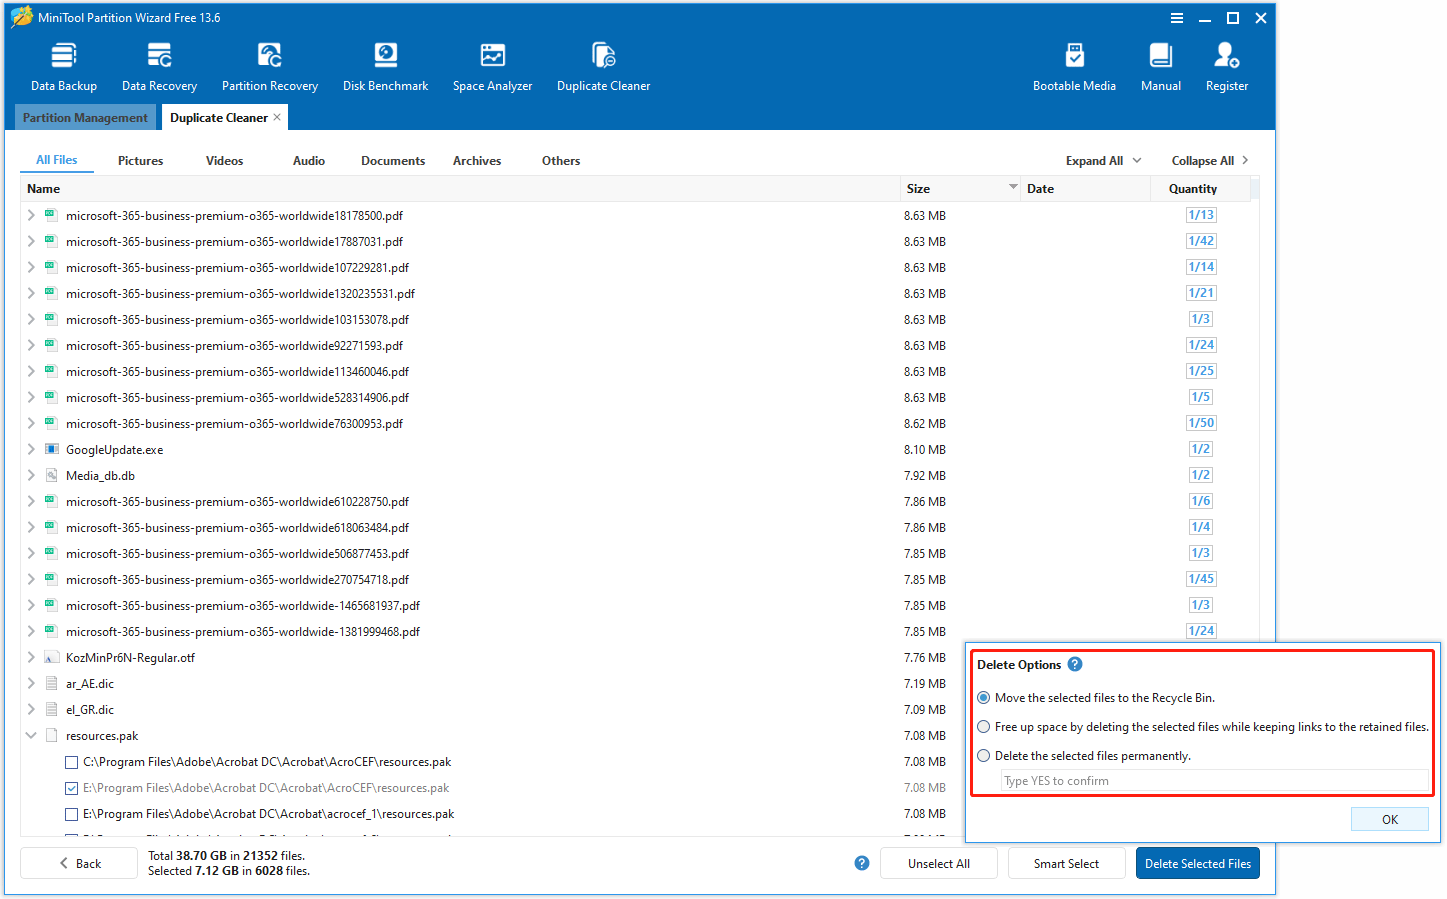
Step 3. After scanning, the results will show all duplicate files with their size and quantity. Click Smart Select and then select different selection methods according to your needs.
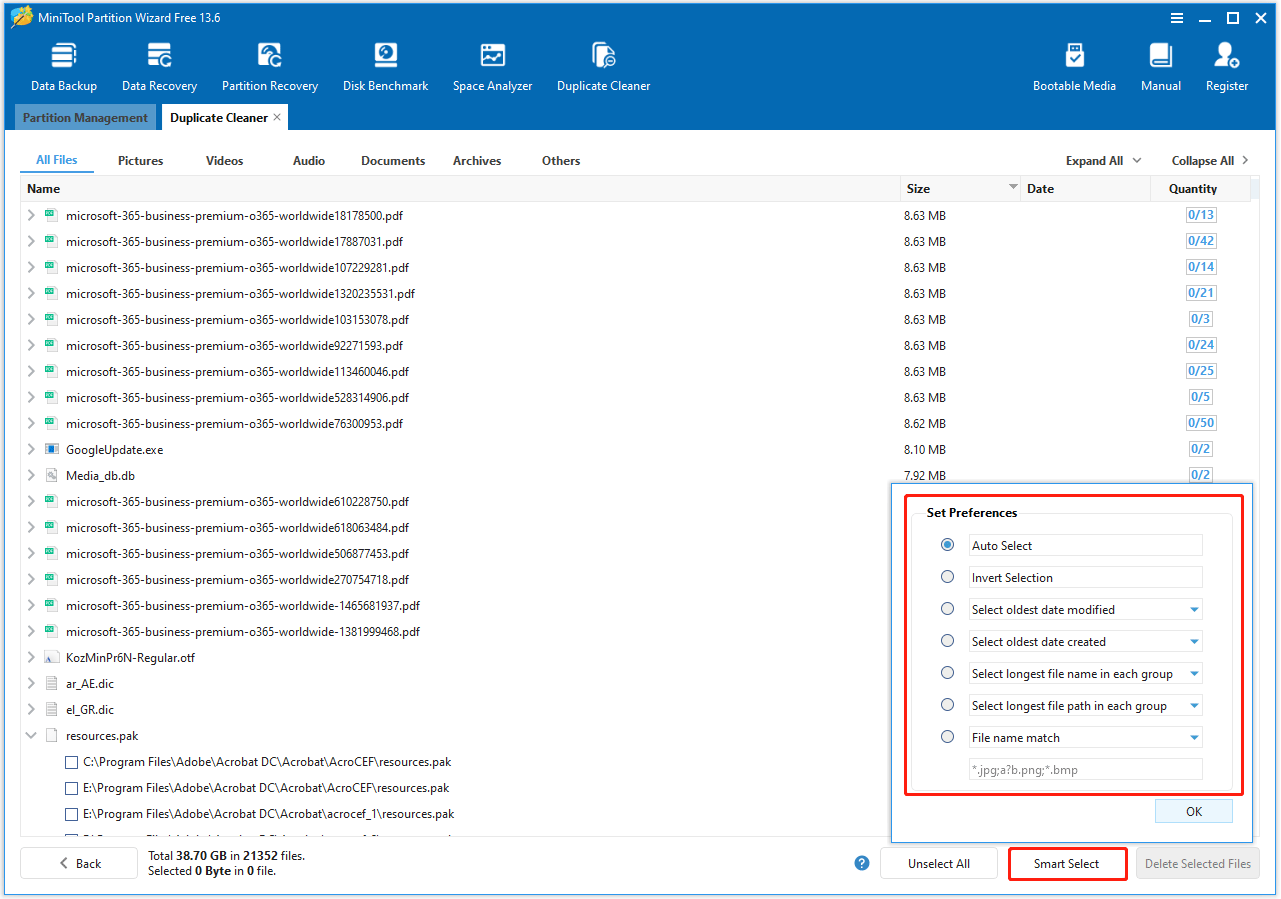
Step 4. Click Delete Selected Files to choose different deletion options. Then click OK to start the deletion of duplicate files.
Here is a short video guide:
Method 3. Manage Windows Storage Settings
How to get more storage on PC? Windows Storage settings offer many options. For example, you can uninstall apps, empty Recycle Bin, delete temp files (the same as Disk Cleanup), and turn on Storage Sense here.
The guide is as follows:
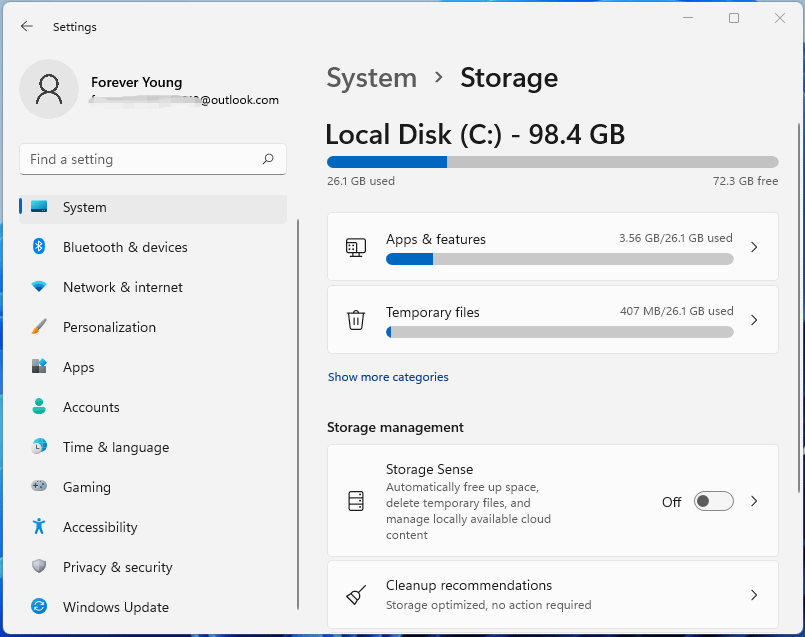
Step 1: Open Windows Storage.
- Press the Windows log key + I to open Settings.
- Go to System > Storage.
Step 2: Uninstall unused apps.
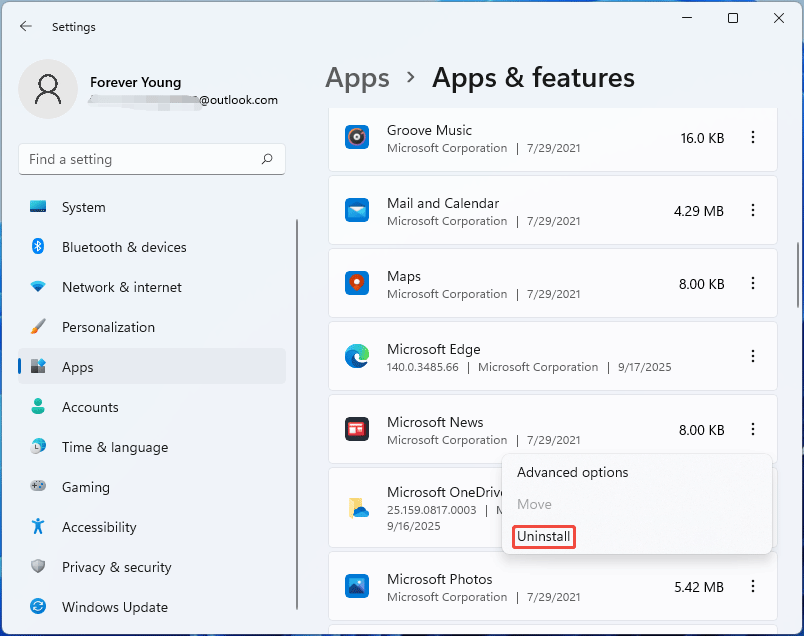
- Click Apps & features.
- Scroll down to find apps that you don’t use and then click the three-dot icon.
- Click Uninstall.
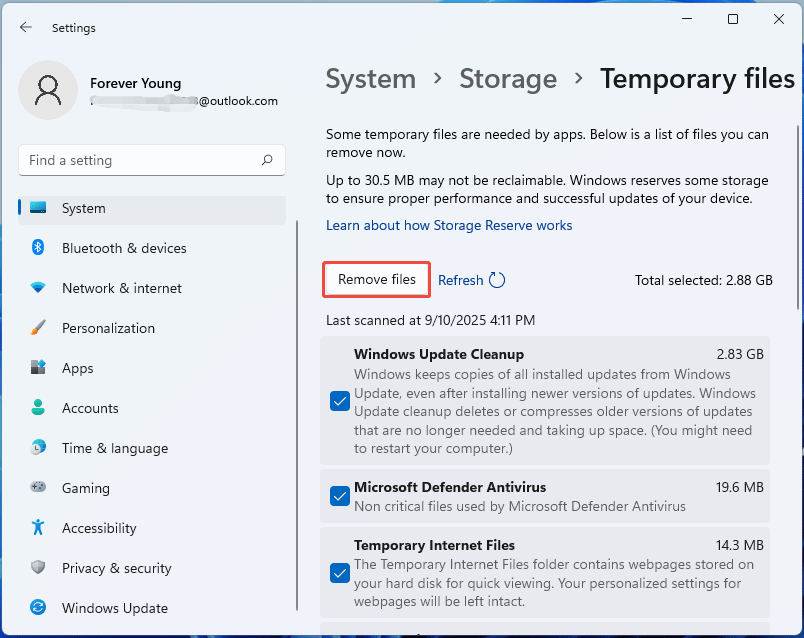
Step 3: Delete temp files. These temporary files are the same as those in Disk Cleanup, including app and internet temp files, old versions of Windows updates, Downloads, Recycle Bin, Thumbnails, DirectX Shader Cache, etc.
- Click the back arrow to go back to the Storage settings.
- Now, click Temporary files.
- Downloads and Recycle Bin may not be selected. You can check them manually.
- Click Remove files.
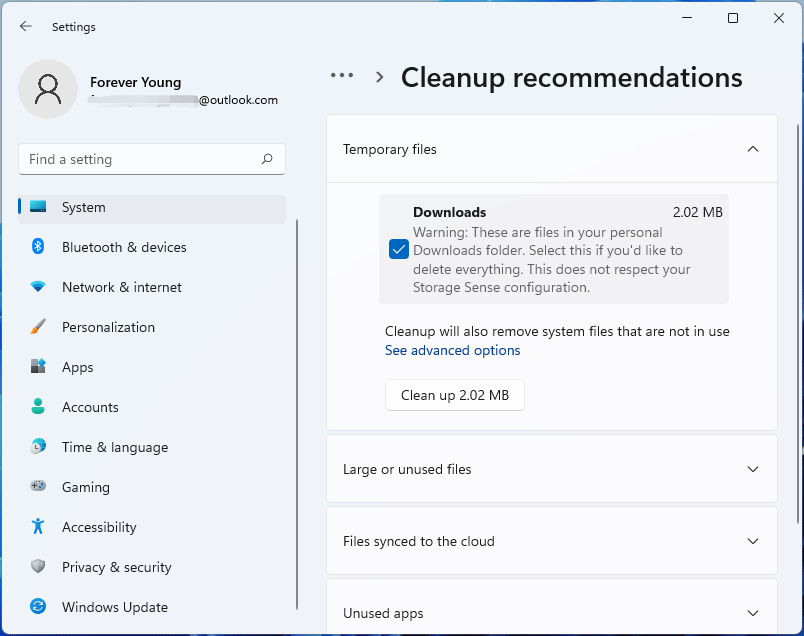
Step 4: Check Cleanup recommendations (Windows 11 only). It offers advice to help you free up disk space.
- Go back to the Storage settings.
- Under Storage management, click Cleanup recommendations.
- Select each of the categories to see recommendations for cleaning up.
- Check items that you want to remove and then click the Clean up button.
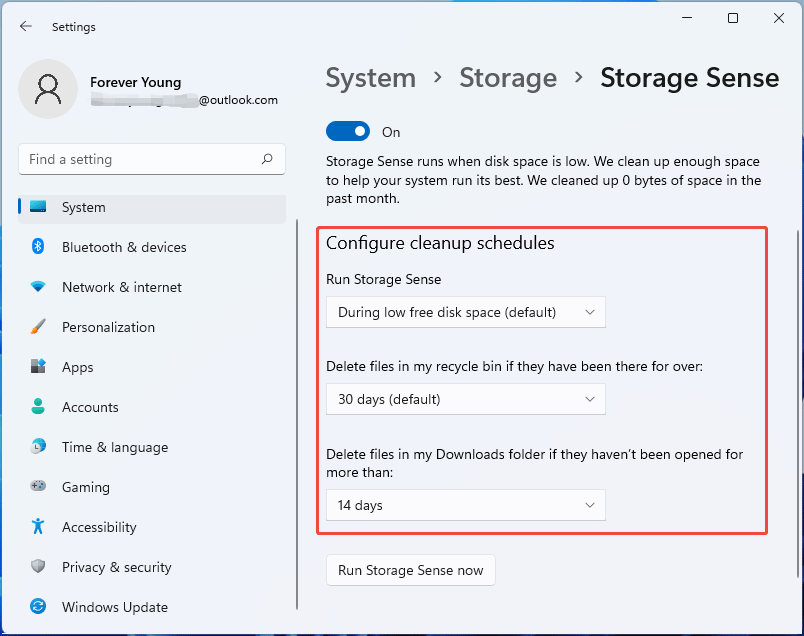
Step 5: Turn on Storage Sense, which can delete temporary system and app files automatically.
- Back to the Storage settings, under Storage management, turn on Storage Sense.
- Click Storage Sense and you can change its settings. You can determine how often it runs and deletes files in Recycle Bin and the Downloads folder.
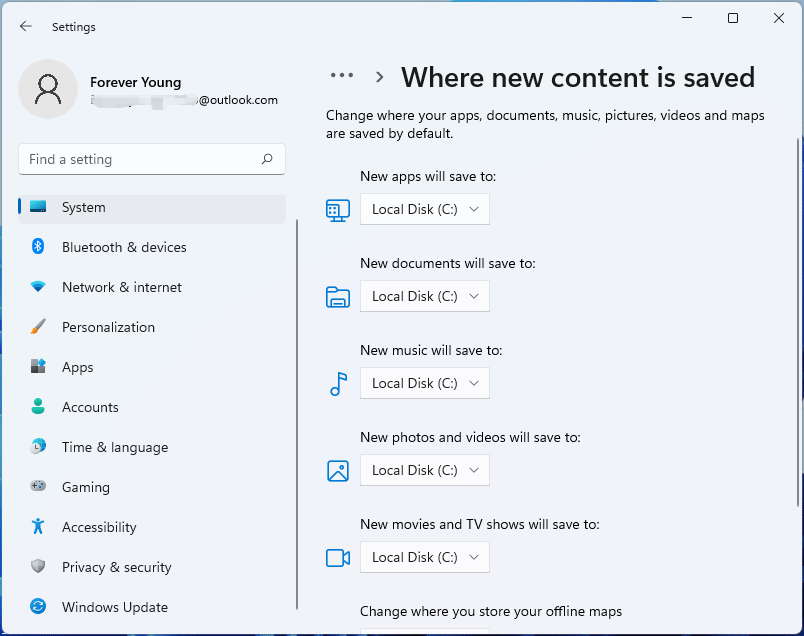
Step 6: Change new content save location.
- Back to the Storage settings, under Storage management, expand Advanced storage settings.
- Click Where new content is saved.
- Select another partition for the new apps, documents, music, pictures, videos, and maps. Then, click Apply.
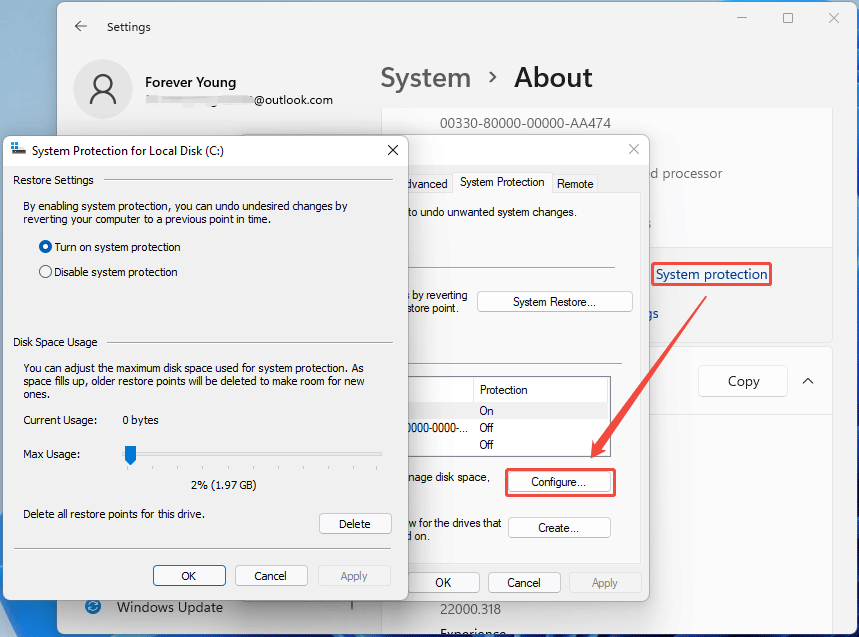
Method 4. Configure System Restore Settings
If you have turned on system protection, a part of disk space will be used by it to create system restore points. Then, you can either reduce the disk space used for system protection or disable this feature to free up the disk space.
Here is the guide:
- Open Settings and go to System > About.
- Scroll down to find the system protection link and click it.
- On the pop-up window, click Configure.
- On the new window, drag the blue block to the left to reduce the disk space used for system protection. You can also delete system restore points or disable system protection.
- Click OK to save changes.
Method 5. Make OneDrive Files Online Only
Do you use OneDrive? If so, you can keep the files online while deleting the local OneDrive files to clear disk space on PC. The OneDrive files only have shortcuts in the local PC. If you want to get them, you can then re-download them to the local PC.
Starting with OneDrive build 23.066, Files On-Demand is enabled by default for all users. Therefore, you only need to pay attention the file deletion method. Here are the steps:
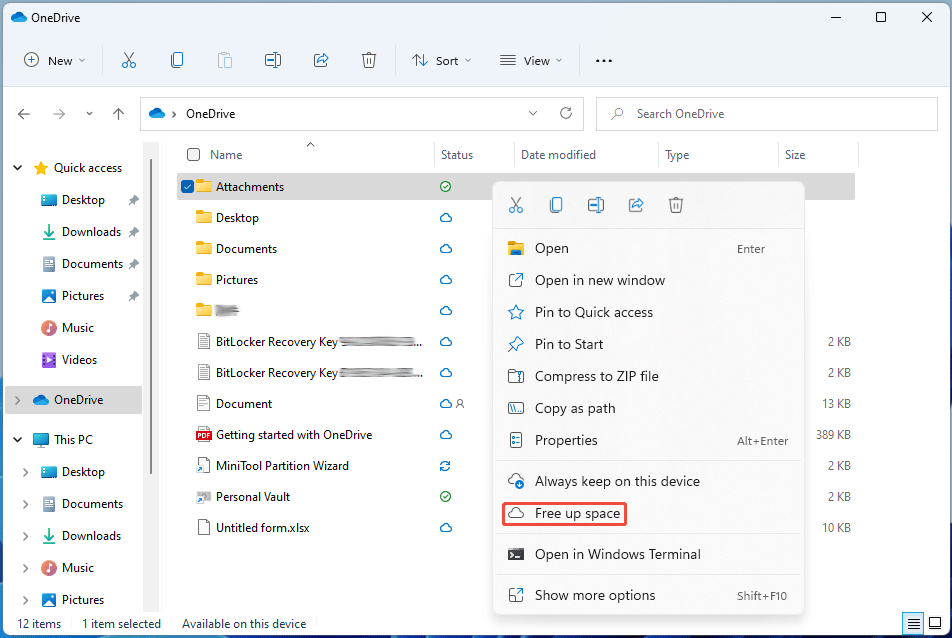
- Open the OneDrive folder.
- Find files whose status icon is a green tick, which means these files are local ones.
- Right-click these files and then select Free up space. This will delete the local files while keeping the online versions.
Method 6. Compress Large Files
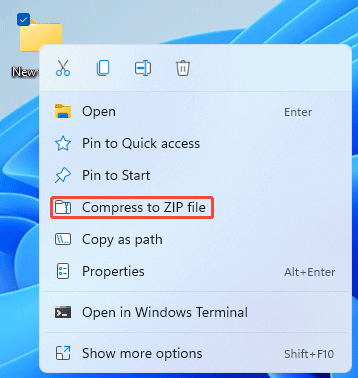
How to clear space on PC? If your personal files are large but you want to keep them, you can consider compressing them. On Windows 11, you can compress a file easily. You just need to right-click on a file or folder and then select Compress to ZIP file. Don’t forget to delete the original files.
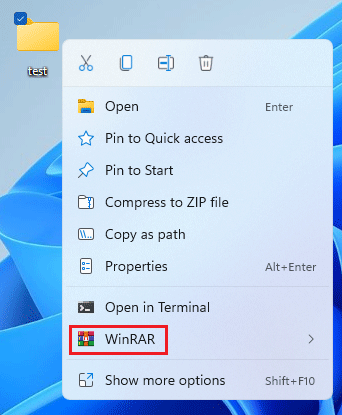
You can also use third-party compression software like WinRAR to compress your files. This software supports Windows 11/10/8/7. Here is the guide:
WinRAR (for Windows)Click to Download100%Clean & Safe
WinRAR-Download-button
- Download and install WinRAR.
- Right-click a file or folder and then select the WinRAR option.
- On the pop-up window, click OK directly.
Method 7. Move Files to Cloud or External Drive
How to clear disk space? Moving important files to cloud or external drives may be an effective way.
Most cloud services offer limited free cloud space for you. You can have a try. Of course, you can also buy an external drive and then use it exclusively for storing files. After making a backup of these files, delete them on PC.
Method 8. Disable Hibernation
The hibernation feature is very useful because it can shut down the computer preserving the current session, which helps you pick up where you left off when you turn on the computer again.
However, this feature requires a considerable amount of space on the hard drive to save the information inside the hiberfil.sys file. If your disk is full, you can disable hibernation to free up the space.
Here is the guide:
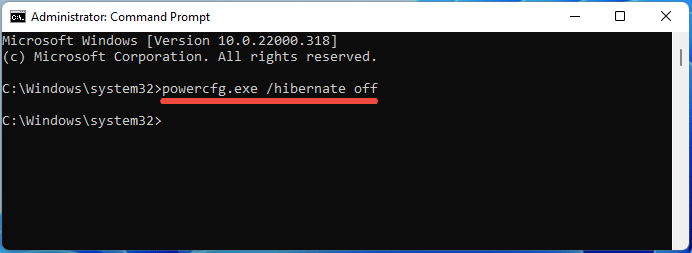
- Click the Search icon (magnifier) on the taskbar.
- Type “cmd” in the search bar.
- In the search results list, right-click Command Prompt and then select Run as Administrator.
- Once Command Prompt opens, type powercfg.exe /hibernate off, and then press Enter. Note that this command will also delete the hiberfil.sys file.
Method 9. Extend the Partition
How to get more storage on PC? Here is a workaround. If your hard drive is divided into multiple partitions, when a partition gets full, you can take free space from other partitions. Then, MiniTool Partition Wizard can help you do that.
This software is a multifunctional disk and partition management tool. You can use it to analyze disk space, move/resize partitions, extend partitions, clone hard drives, etc. Here, I will show you how to use it to extend a partition.
The steps are as follows:
MiniTool Partition Wizard FreeClick to Download100%Clean & Safe
Step 1: Enable the Extend feature in MiniTool Partition Wizard.
- Download and install MiniTool Partition Wizard.
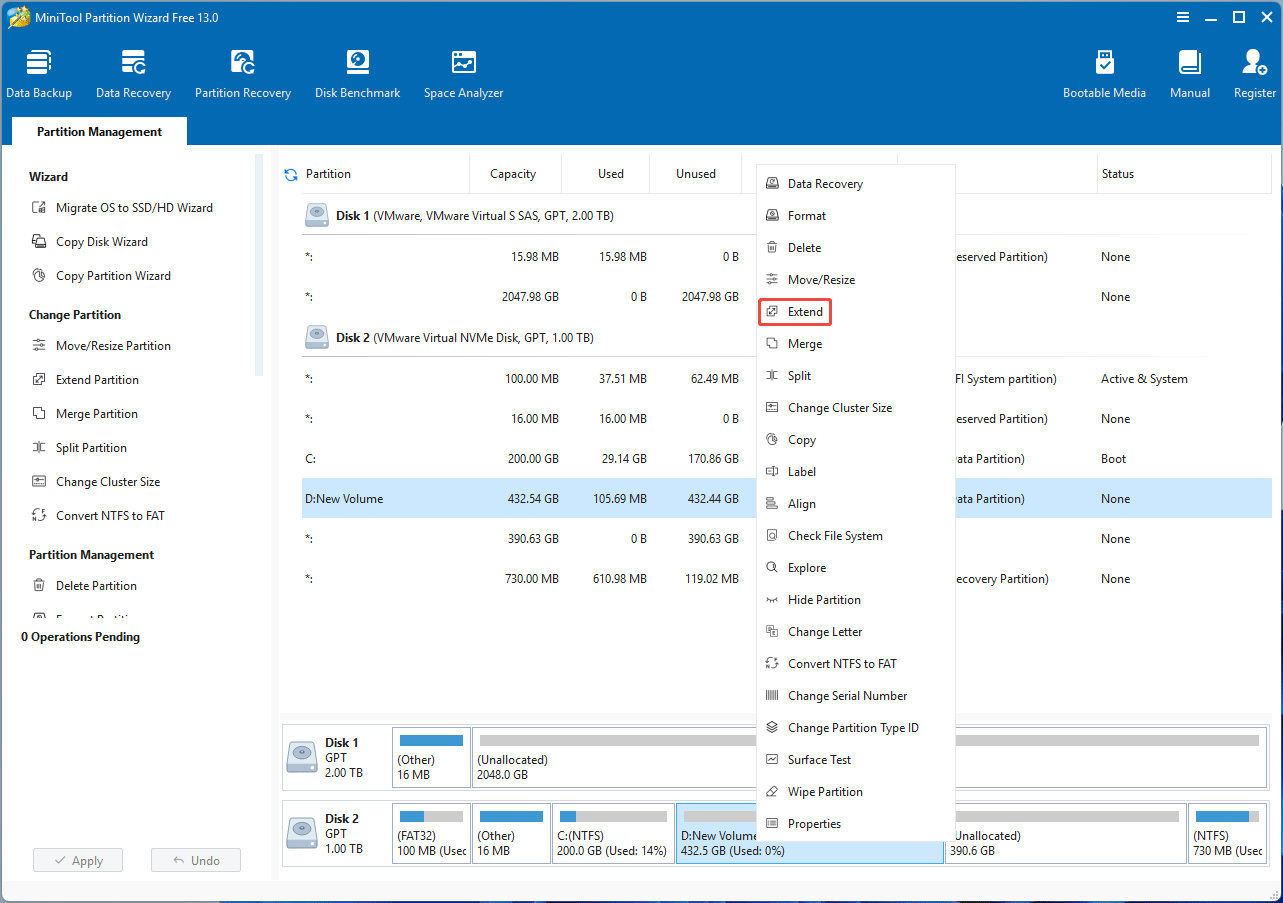
- Launch this software and right-click the partition lack of space.
- Select Extend from the menu.
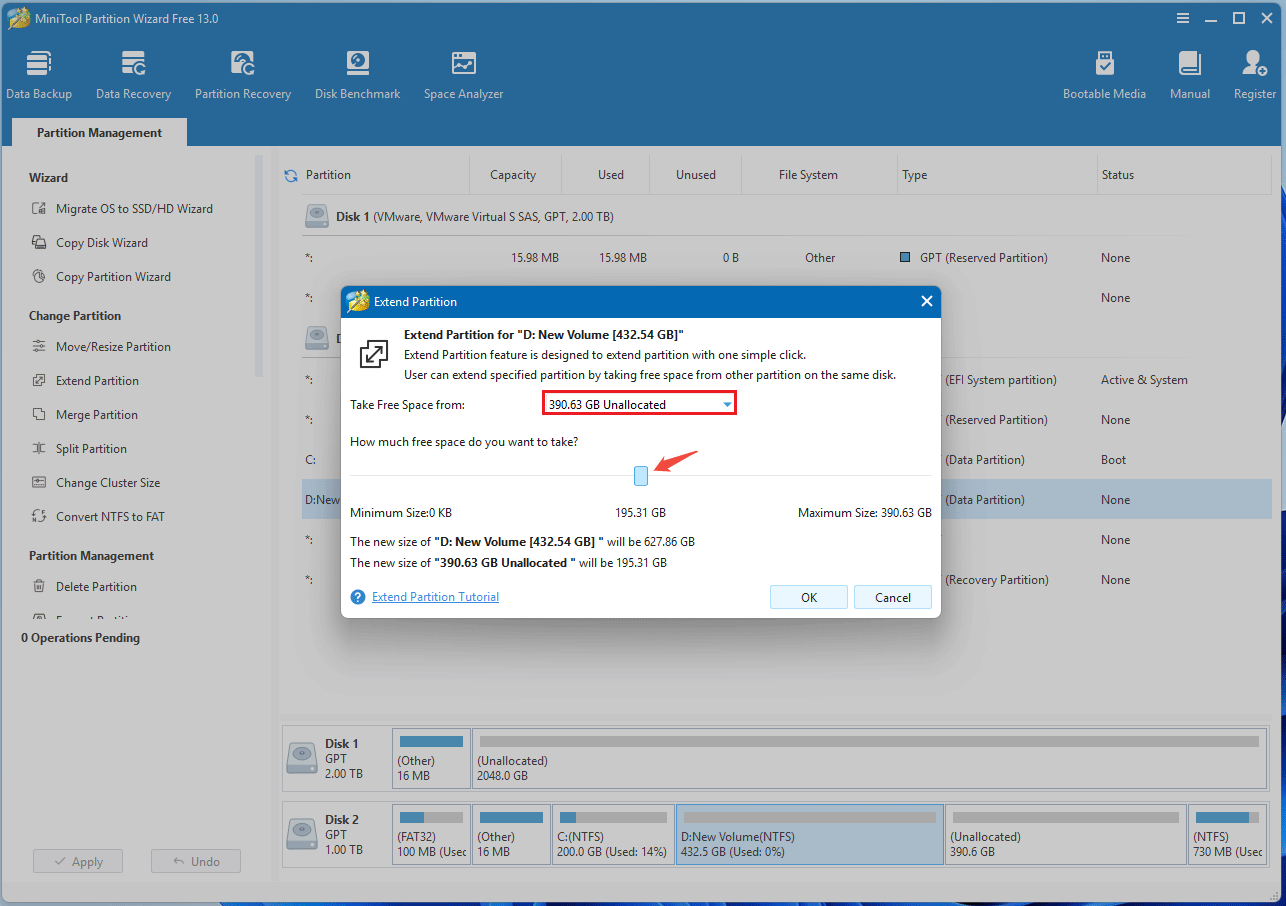
Step 2: Take free space from another partition.
- Expand the menu to determine where to take free space. You can choose an existing partition or unallocated space.
- Move the blue block to determine how much free space to take.
- Once all is done, click OK.
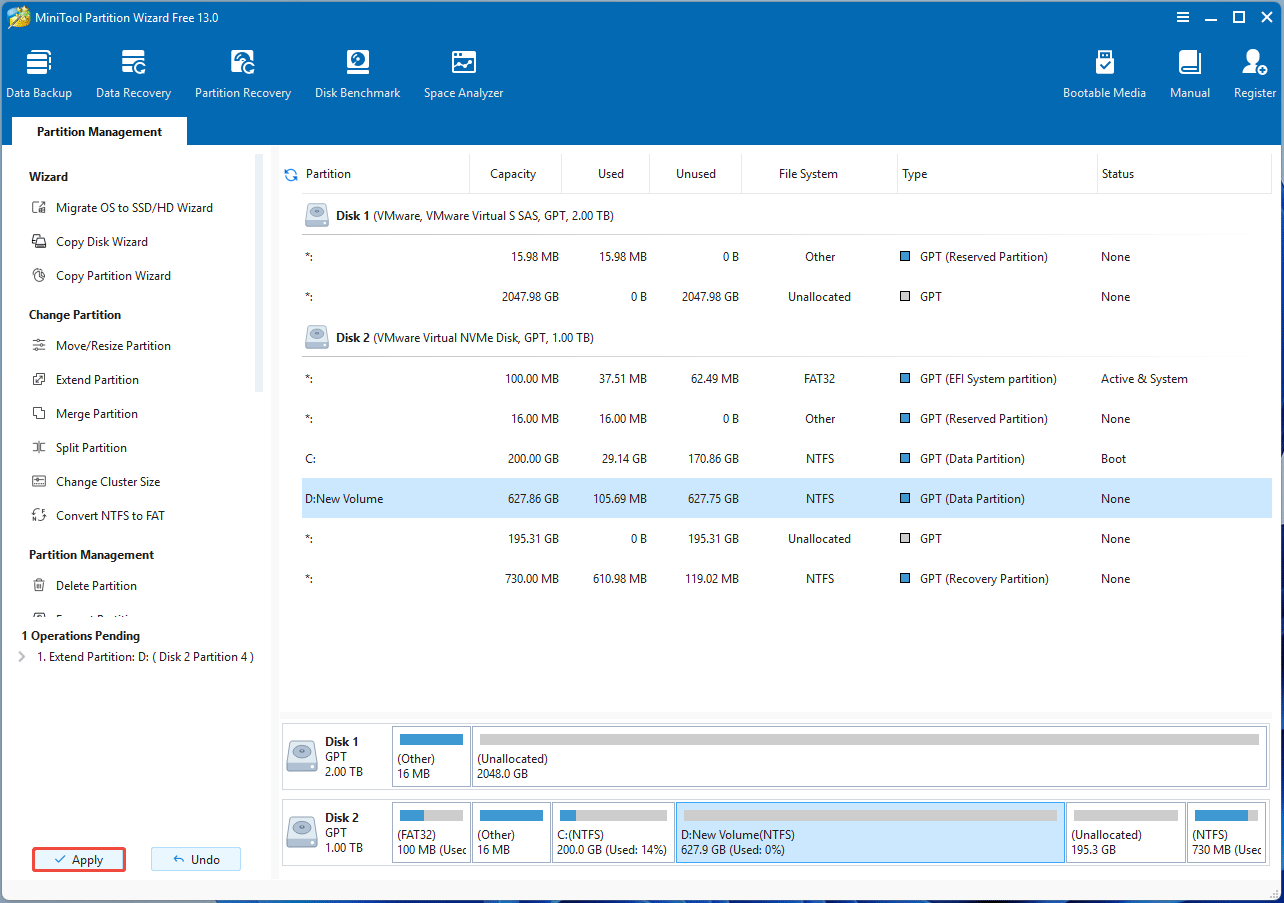
Step 3: Click Apply to execute the command.
Method 10. Upgrade to a Larger Hard Drive
How to add more storage to PC? The most direct way is to upgrade the hard drive to a larger one. Fortunately, MiniTool Partition Wizard has an OS migration feature to help you migrate the system and other data to the new disk. It can also clone HDD to SSD.
How to migrate the OS with this software? Here is the guide:
MiniTool Partition Wizard DemoClick to Download100%Clean & Safe
Step 1: Enable the OS migration feature and choose migration method in MiniTool Partition Wizard.
- Connect the new disk to the computer. For laptop users, an NVMe/SATA to USB adapter may be needed.
- Launch MiniTool Partition Wizard and click Migrate OS to SSD/HD Wizard in action panel.
- On the pop-up window, select migration method A or B. If you need to replace the original disk with the new one. Option A is recommended.
- Click Next.

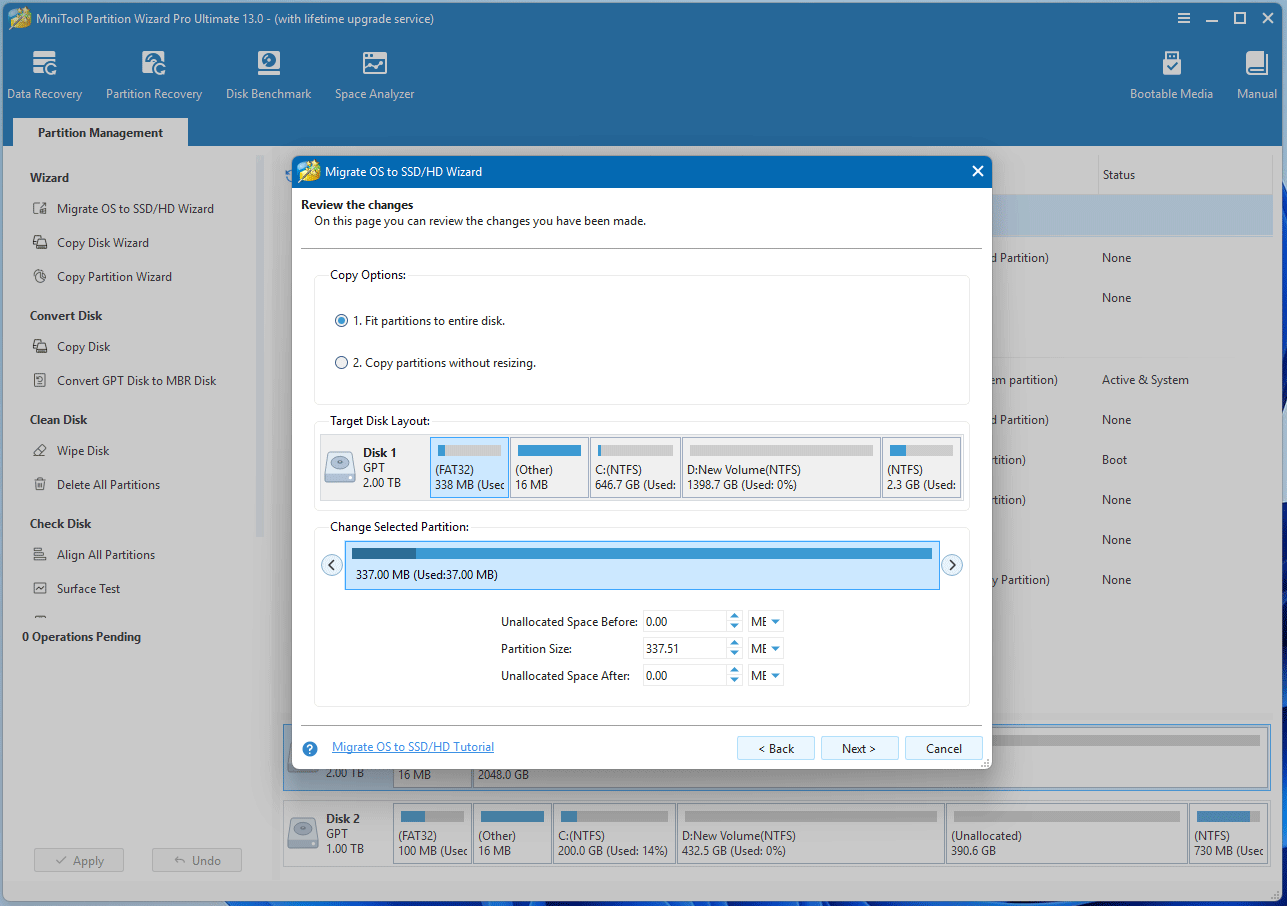
Step 2: Set the copy options.
- Select the new disk as the destination disk and then click Next.
- Review the copy options and disk layout. Keeping the default options is recommended. Then, click Next.
- Click Finish.
- Click Apply to execute the command.
Step 3: Make the computer boot from the new disk.
FAQ
2. Use Windows Storage settings to uninstall apps, delete temp files, move app location, and change file save location.
3. Restrict disk space used for system restore points.
4. Move files to cloud or external drives.
5. Compress files.
6. Disable hibernation.
7. Extend partitions.
8. Upgrade to a larger disk.
2. Unused programs and large personal files
3. Browser cache and cookies
4. Old Windows update files
5. System logs
Bottom Line
This post shows you how to clear disk space on your PC and extend partitions for more storage. If you encounter issues when using MiniTool Partition Wizard, contact us via [email protected]. We will get back to you as soon as possible.
About The Author

Position: Columnist
Vega enjoys helping people with computer problems, including disk management, data recovery, data backup, and more. She is constantly expanding her knowledge in related fields. And she will continue to bring more easy-to-understand professional articles to help people solve various problems on the PC.
User Comments :