A lot of users want to create a Windows Server 2022 Virtual Machine with VMware. Is there a complete guide for the creation? Of course, yes! This post from Partition Magic discusses almost everything about how to install Windows Server 2022 on VMware Workstation.
The Virtual Machine (VM) is a virtualization of a computer system that provides the actual function of a physical computer. If you want to run a different OS on the host, creating a VM with VMware Workstation is cost-effective and worth trying. This post will show you how to create a Windows Server 2022 Virtual Machine with VMware. Let’s keep reading.
Windows Server 2022 Virtual Machine Requirements
To create a Windows Server 2022 VM successfully, you need to make sure your host meets the basic requirements of the system. Here I summarize the hardware and software requirements of the Windows Server 2022 VM.
Hardware Requirements:
- Processor: a 1.4 GHz 64-bit processor supports CMPXCHG16b, LAHF/SAHF, and PrefetchW.
- RAM: at least 512MB, 2GB recommended for Server with Desktop Experience.
- Storage: at least 32GB of free disk space for installation and an extra 4GB for GUI.
- Network: an Ethernet adapter capable of 1GB per second at least.
- Graphics: monitor capable of Super VGA (1024 x 768) or higher resolution.
Software Requirements:
- VMware Workstation: This software can be used to create a Windows Server 2022 Virtual Machine using an ISO file.
- ISO Image: A Windows Server 2022 ISO file from the Microsoft Evaluation Center.
Preparatory Works for Creating a Windows Server 2022 VM
Before you create a Windows Server 2022 Virtual Machine with VMware, it’s necessary to do some preparations. Let’s follow the 3 steps below to do these preparatory works.
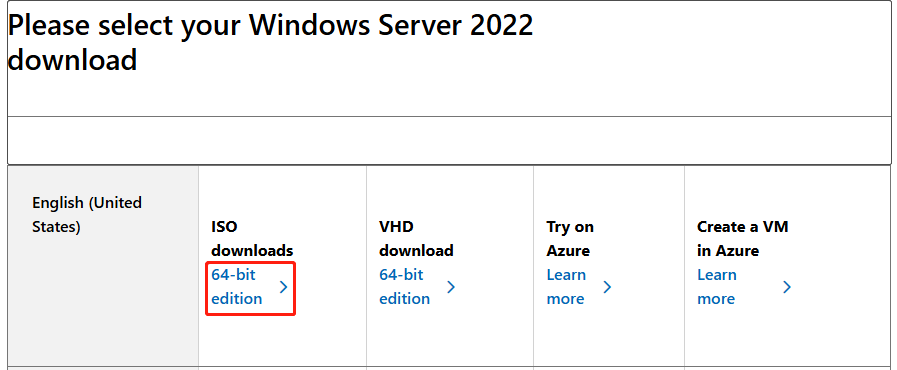
Step 1. Get Windows Server 2022 ISO
First of all, you need to get the Windows Server 2022 ISO file from the Microsoft official website. This file is about 4.7GB, which may take you a while to download. So, please wait for the downloading patiently. Here make sure you save the downloaded ISO file to a safe location.
Step 2. Install VMware Workstation on Your Host
Another important thing is to get VMware Workstation installed on your host. If you don’t know how to get the tool for free, follow the quick guide below.
Step 1. Navigate to the official website of VMware. Here you need to register an account with your email address. Once registered, log into your account.
Step 2. Select My Downloads from the left panel and the drop-down menu to choose VMware Workstation Cloud Foundation from the list.
Step 3. Then you can see a list of VMware Workstation versions. Select your desired version to download, like VMware Workstation Pro 17.0 for Personal Use (Windows).
Step 4. Once downloaded, run the exe file as administrator and follow the on-screen instructions to install it on your computer.
Step 3. Create a Partition for Your Windows Server 2022 Virtual Machine
It is well known that running a virtual machine will produce lots of disk fragmentation and slow down the running speed of other programs. If you perform disk defragmentation on the partition where the virtual machine files are stored, it may cause the virtual machine to be corrupted.
Thus, I highly recommend you create a dedicated partition to set up a Windows Server 2022 Virtual Machine. How to do that? MiniTool Partition Wizard is a multifunctional disk partition manager that can partition hard drive on Windows, including creating/extending/resizing/moving/merging partitions.
Besides, this tool can be used to clone hard drives, migrate Windows OS to SSD, change cluster size, convert MBR to GPT without data loss, convert NTFS to FAT32, recover data, and more. If there is unallocated space, you can directly create a partition on it using the Create Partition feature. If not, you can use the Move/Resize Partition feature. Here are the detailed steps.
MiniTool Partition Wizard FreeClick to Download100%Clean & Safe
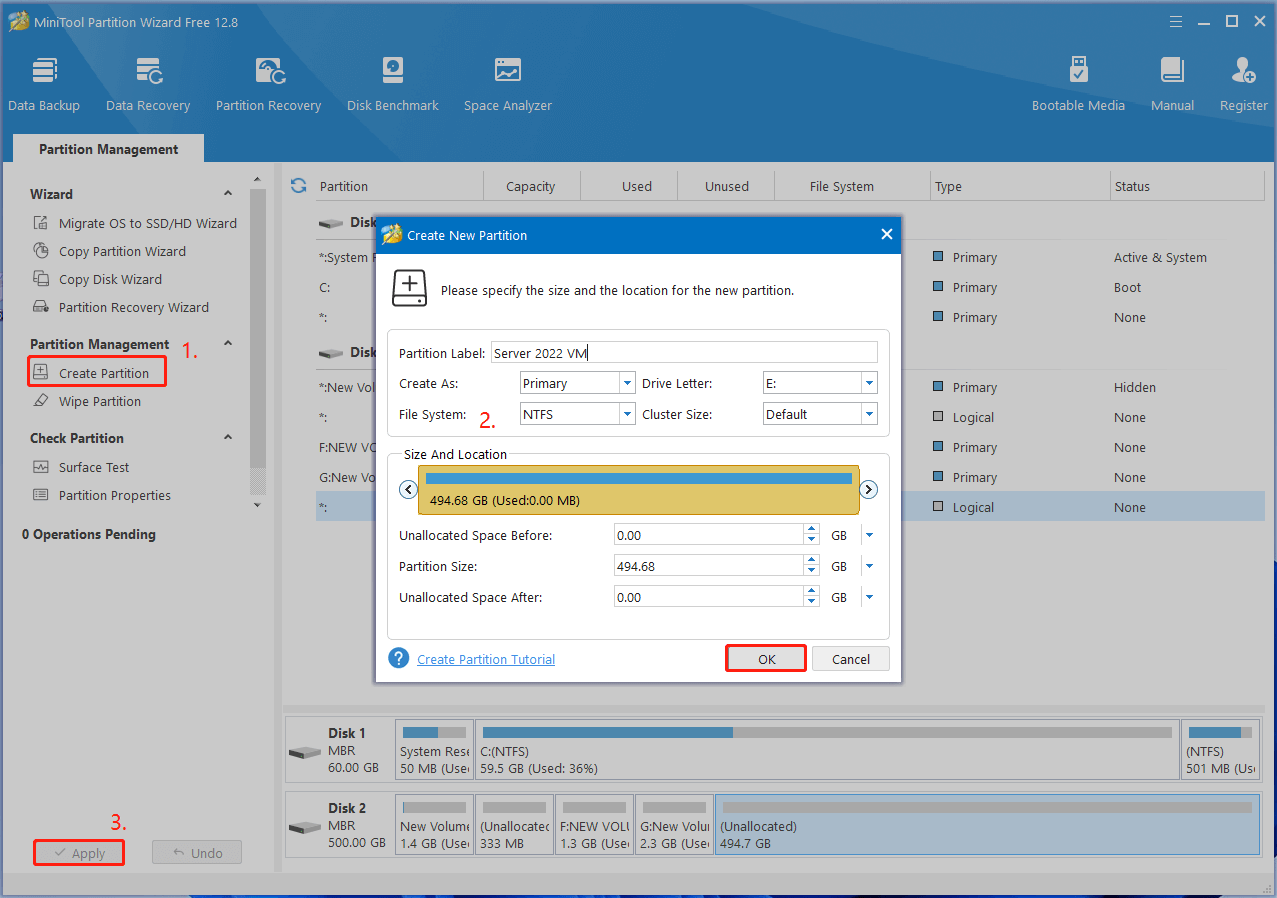
Step 1. Launch MiniTool Partition Wizard to enter its main interface, select the unallocated space, and click Create Partition from the left panel. If there is no allocation space on your hard disk, skip the first 2 steps and move to Step 3.
Step 2. In the pop-up window, determine the partition properties according to your needs, including Partition Label, File System, Drive Letter, Cluster Size, and so on. Then click on OK to save the changes and click Apply to execute them.
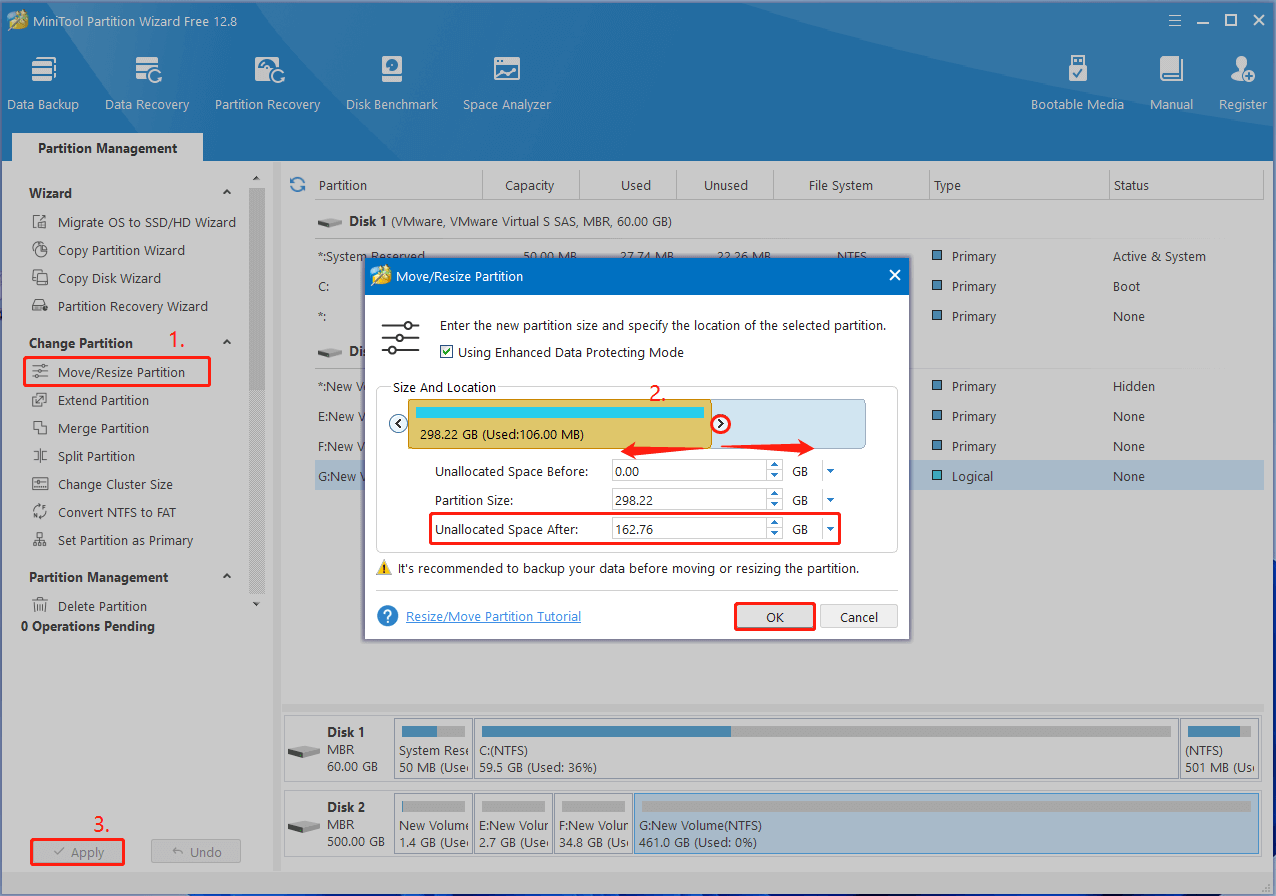
Step 3. Select the partition you want to shrink for unallocated space and click on Move/Resize Partition from the left panel.
Step 4. Drag the slider to determine how much partition size you want to shrink and click OK to continue. Also, you can enter a specific number in the Unallocated Space After box, which is the space size you reserve for the new partition.
Step 5. Click on Apply to execute the pending operation. Once done, you can create a dedicated partition on the allocated space as we showed in Step 1 and 2.
After you complete all the above steps, you can move to the following guide – how to create a Windows Server 2022 Virtual Machine with VMware WorkStation.
How to create a Windows Server 2022 Virtual Machine with VMware WorkStation
How to set up a Windows Server 2022 Virtual Machine with VMware Workstation? The process can be divided into 2 parts. The first part is to create a Windows Server 2022 VM, and the second part is to install Windows Server 2022 on VMware Workstation.
Part 1. Create a Windows Server 2022 Virtual Machine
If you have the VMware Workstation installed on your host, follow the steps below to create a Windows Server 2022 Virtual Machine.
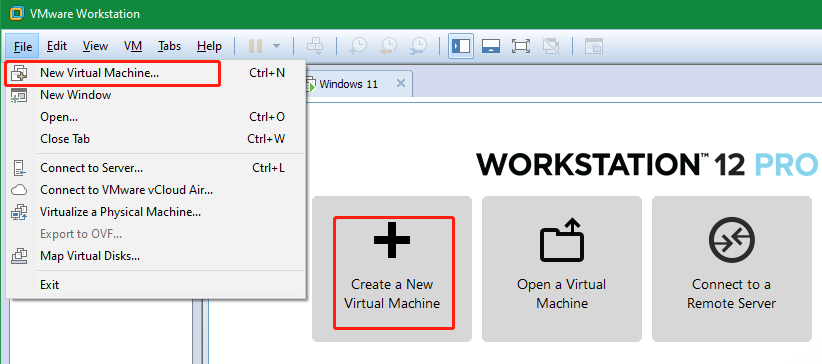
Step 1. Launch VMware Workstation Pro to enter the Home page and click on Create a New Virtual Machine. Alternatively, you can select File from the upper left corner and click New Virtual Machine.
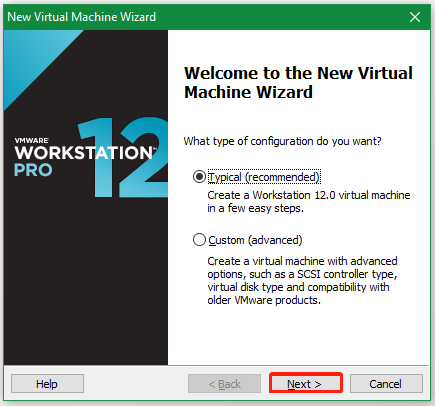
Step 2. Select the Typical (recommended) option for easier steps and click on Next.
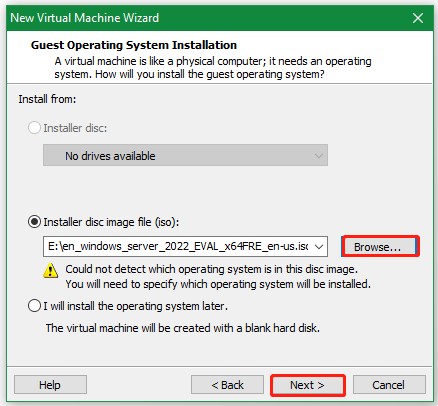
Step 3. Select the Installer disc image file (ISO) option, click Browse to locate the Windows Server ISO file you saved, and click Open. Then click on Next to continue.
Step 4. Select a guest operating system to be installed on the virtual machine and click Next. Here you need to select Microsoft Windows as the guest operating system and Windows Server 2022 as the version.
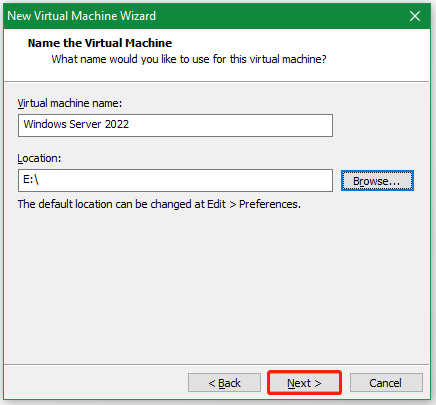
Step 5. Name the virtual machine Windows Server 2022 and choose a location to store the VM files. Here you can select the new partition created above.
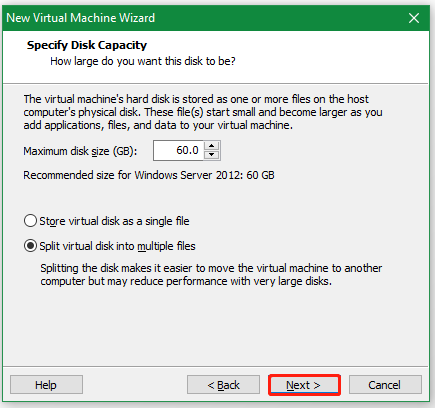
Step 6. Set the maximum disk size for the virtual machine (at least 32GB) and store the virtual disk as a single file or split it into multiple files. And click on Next.
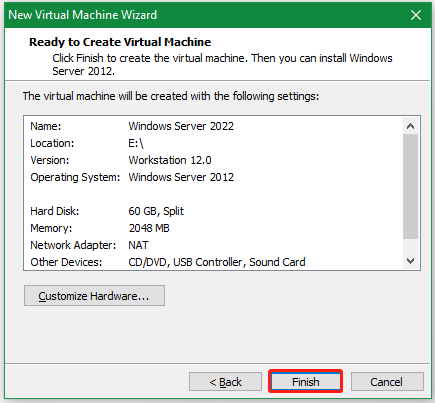
Step 7. Click Finish and VMware Workstation will automatically create a Windows 2022 VM. Then you can install Windows Server 2022 on VMware Workstation.
Part 2. Install Windows Server 2022 on VMware Workstation
How to install Windows Server 2022 on VM Workstation? With the virtual machine ready, you can follow the detailed steps below:
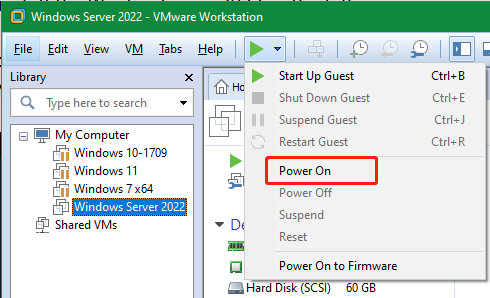
Step 1. Select Windows Server 2022 from the My Computer section and power on the virtual machine. Then it will automatically detect and boot from the Server 2022 ISO file. If not, make sure the virtual CD/DVD drive is set to use the ISO file in the VM Settings.
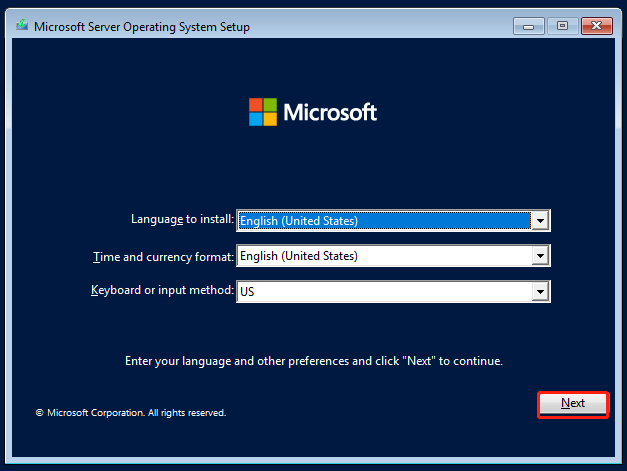
Step 2. Select your preferred language, time, and keyboard or input method to install Server 2022 and click Next.
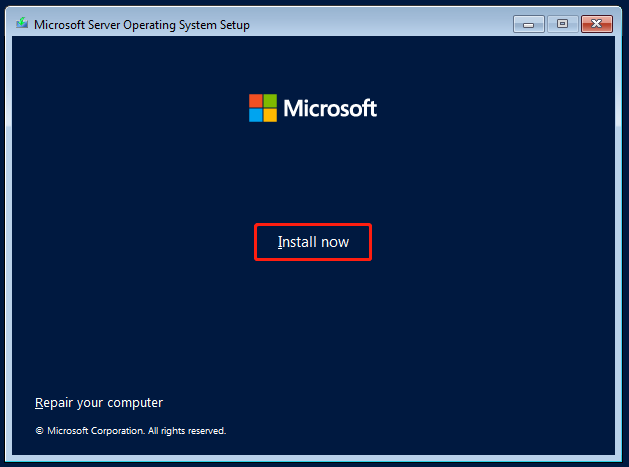
Step 3. Click Install Now to start the installation.
Step 4. Select your desired edition and click Next. Here I take Windows Server 2022 Standard Evaluation as an example. If you have a product key, type it in the prompted window.
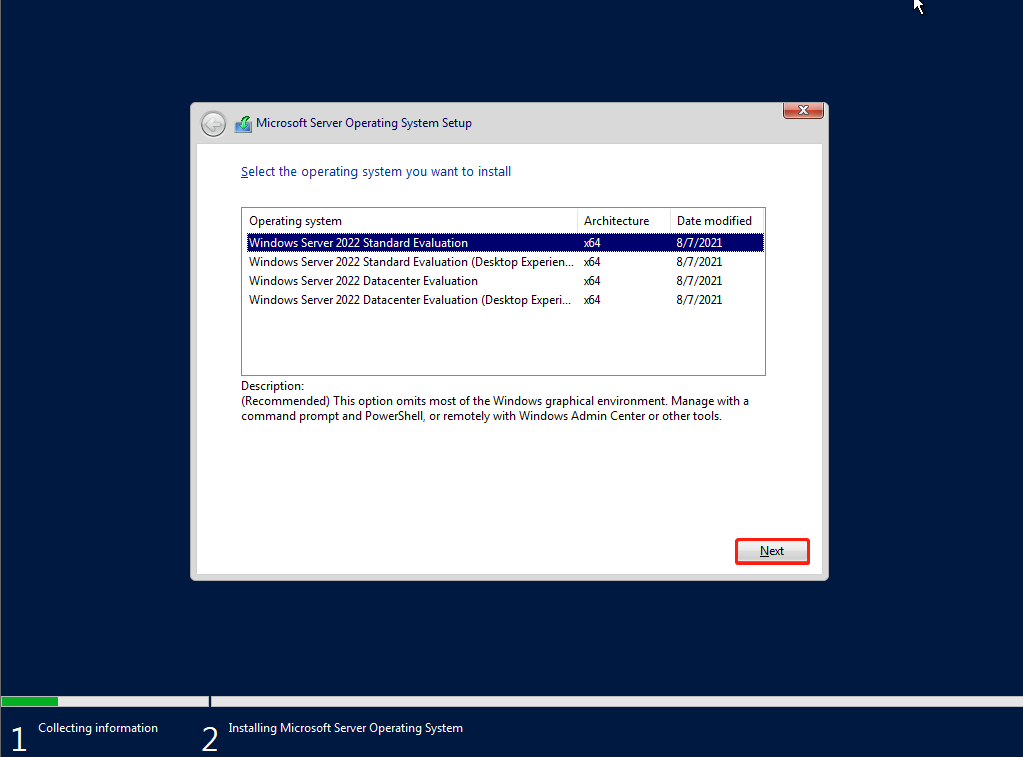
Step 5. Tick the checkbox to accept the Microsoft software license terms and click on Next.
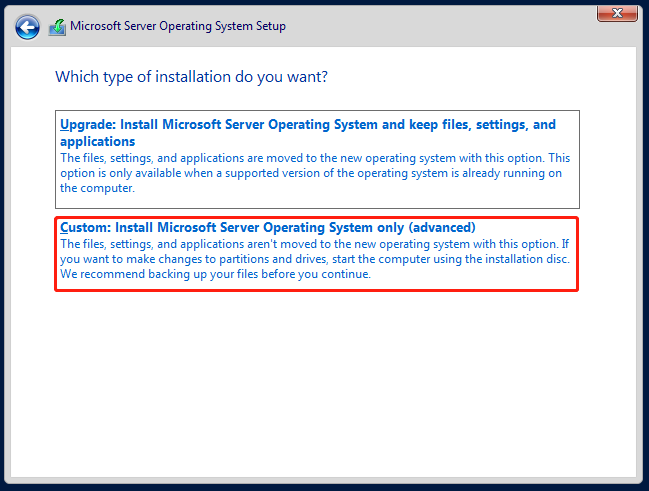
Step 6. Select the Custom: Install Microsoft Server Operating System only (advanced) option as the installation type to clean install Windows Server 2022 virtual machine.
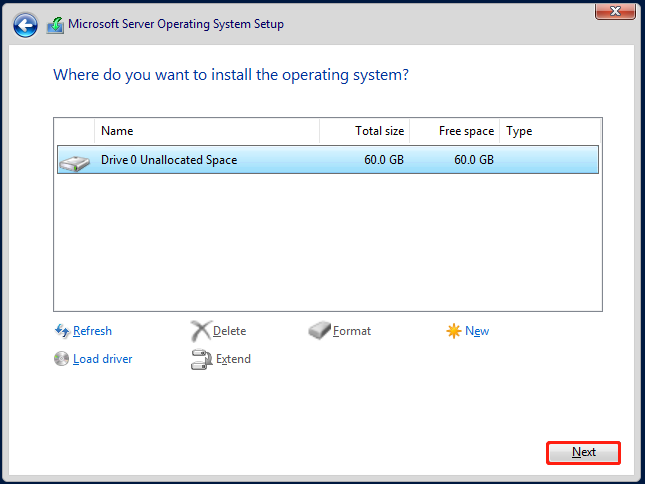
Step 7. Select the virtual disk you created earlier and click on Next to install the Server 2022 VM on the disk.
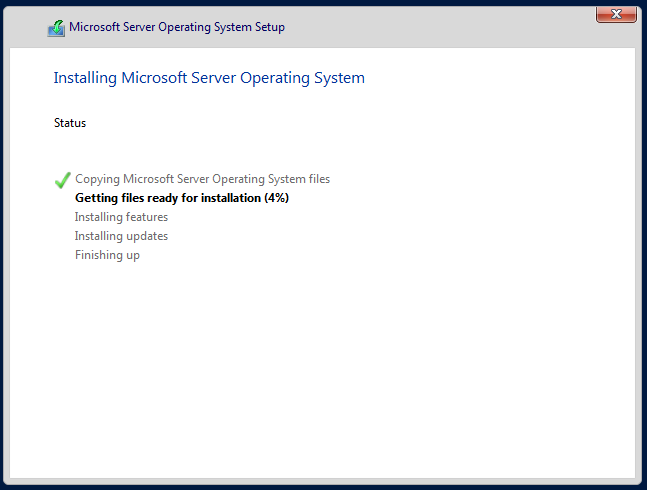
Step 8. The process may take you some time depending on the system’s performance. It will copy operating system files, install features and updates, and configure settings. So, patiently wait for the installation to complete.
Step 9. Once installed, you will be required to set up a password for the system. Follow the on-screen prompts to complete the process. After that, you can log in to the Windows Server 2022 VM and configure other settings on the VMware Workstation.
Have a Try Now
Here comes the end of the post. Now, you should know how to create a Windows Server 2022 Virtual Machine with VMware. I hope you enjoy this blog post, and you can share it on Twitter or other social communities to help more needy people.
If you have any questions or suggestions about MiniTool Partition Wizard, feel free to contact us by sending us an email via [email protected]. The technical support will reply to you as soon as possible.

![How to Install Hyper-V Server 2019 on Your Machine [Full Guide]](https://images.minitool.com/partitionwizard.com/images/uploads/2024/10/hyper-v-server-2019-download-install-guide-thumbnail.jpg)
User Comments :