Zoom Meetings is a popular and reliable video teleconferencing service. It is quite useful for remote work. In this post from the MiniTool Partition Wizard website, you can learn how to get, start, and use the Zoom desktop client on various devices.
Zoom, short for Zoom Meetings, is a cloud-based video teleconferencing software program released in 2011.
Zoom is quite popular. It is available on various platforms, including Microsoft Windows, macOS, Linx, Chrome OS, Android, and iOS. With this program, users can communicate with others online. It is mainly used for remove work, distance education, and online social relations.
If you are not familiar with Zoom but you want to have a try, this post can help you a lot. Keep reading to know how to get, start, and use the Zoom desktop client on Windows, macOS, and mobile devices.
How to Download Zoom Desktop Client
If you are planning to use Zoom on a computer, you can download the Zoom desktop client from the download center of Zoom’s official website. Then run the downloaded installer to install the client.
If you are using an Android or iOS device, you can go to the app store to search and download Zoom Meetings.
As for the detailed steps, you can refer to our previous post: Zoom Download for Windows 10/11, Mac, iPhone, Android.
How to Start Zoom Desktop Client
After downloading and installing the Zoom desktop client, you can run Zoom and log into your account. Here is how to start the Zoom desktop client on different devices.
On Windows 11/10/8/7
On a Windows computer, you can start the Zoom desktop client by double-clicking the Zoom shortcut on the desktop. If you don’t have such a shortcut, you can access your Zoom desktop client via the Start menu.
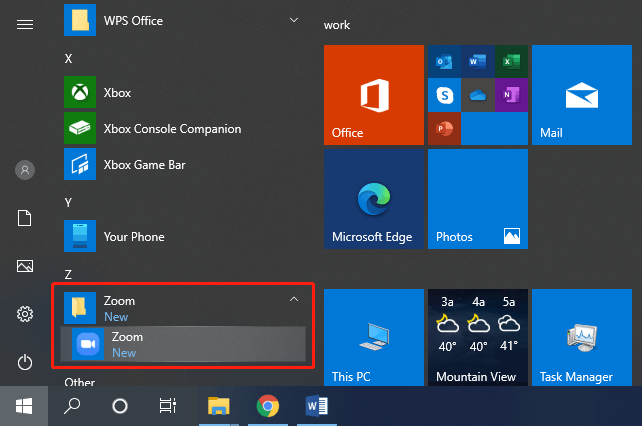
On Windows 11/10, you just need to:
Step 1: Click the Start button located on the bottom left corner.
Step 2: Scroll down to find the Zoom folder. Then click it.
Step 3: Click the Zoom app to launch the Zoom desktop client.

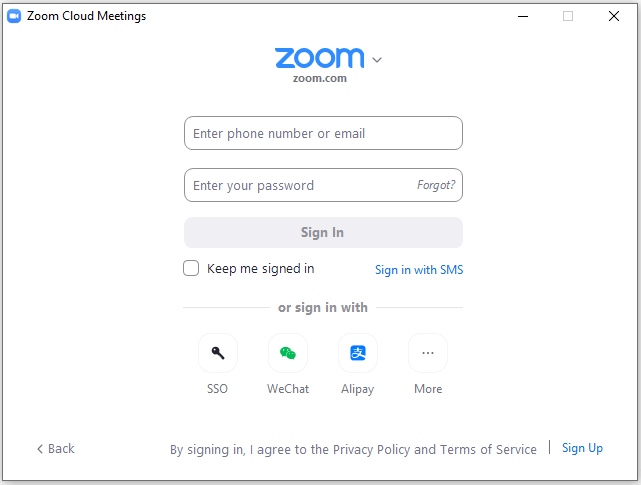
Step 4: Click Sign In and log into your Zoom account. If you don’t have such an account, click Sign Up.

After Zoom desktop client login, you can use this program as you wish.
On Windows 8, you can:
Step 1: Click the Start button.
Step 2: Select the Down arrow to access All Apps.
Step 3: Scroll down to find your Zoom program and click Start Zoom to access the Zoom desktop client.
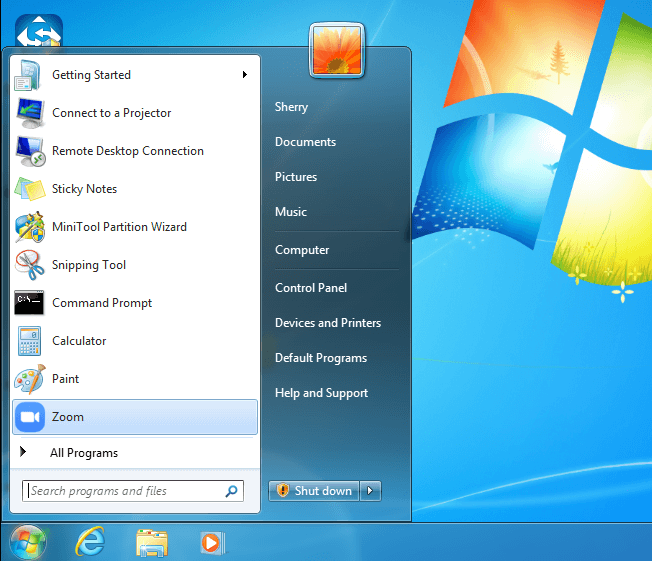
On Windows 7, you should:
Step 1: Click the Start button. Click Zoom if it is listed in the recent programs list. If it is not in the list, click All Programs to view your installed programs.

Step 2: Navigate to your Zoom folder.
Step 3: Click Start Zoom to start the Zoom desktop client.
On macOS
If you plan to use the Zoom desktop client for Mac, you need to right-click the Finder icon in your Dock and select New Finder Window. Then select Applications in the new window and find zoom.us. Double-click zoom.us and you can access the Zoom desktop client.
On Android/iOS
It is quite easy to start Zoom on an Android or iOS device. You just need to find the Zoom app on the Home Screen and then tap it.
How to Use Zoom Desktop Client for Mac/Windows/Android/iOS
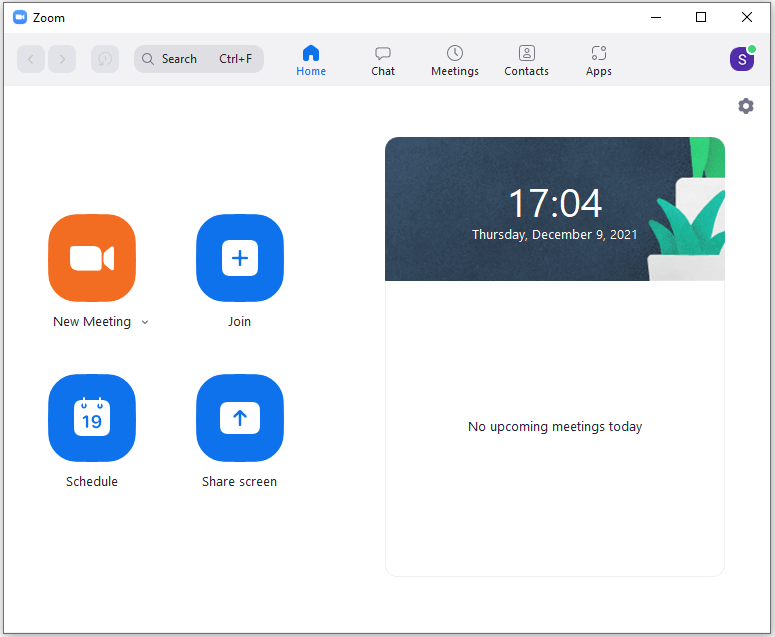
How to start or join a meeting after Zoom desktop client login? The Zoom desktop client is user-friendly and quite easy to use. On the main interface of the program, you can find its main features, including New Meeting, Join a Meeting, Schedule a Meeting, and Share Screen.

- New Meeting: click the down arrow next to the New Meeting feature, you can choose whether or not to start the meeting with video and use your personal meeting ID. To start a new meeting immediately, you just need to click the New Meeting icon.
- Join: click the Join icon and input the meeting ID or personal link name of the meeting you want to join. And then click the Join button to join a meeting.

User Comments :