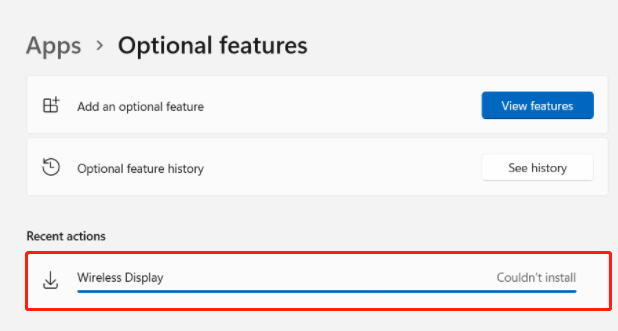
According to user reports, the Wireless Display install failed error often occurs when they install optional features in Windows 11/10. Here’s a true example from the answers.microsoft.com forum:
Install "Wireless Display" Optional Feature Fails. Getting an "Install failed" error when I try to install the "Wireless Display" optional feature. Below is my Windows 10 version information and the optional feature history page that shows the error I am getting.
https://answers.microsoft.com/en-us/insider/forum/all/install-wireless-display-optional-feature-fails/b677332c-20e9-4a2d-b9fb-31c5efc1d186?page=11
What causes the Windows 11 Wireless Display installation failed error? After investigating extensive user reports from different forums, we find the error is often related to an unstable Internet connection. In addition, other factors like metered connection, corrupt update cache, and antivirus software interference are also responsible for the error.
Here we summarize 7 feasible ways that have been proven by many people to be useful. Let’s try them in order until the problem gets fixed.
# 1. Check Your Internet Connection
If your computer is connecting to an unstable Internet, you will encounter the Wireless Display installation failed in Windows 11/10. To rule out this situation, you can try restarting your router and see if it works. Besides, you can try using a different Internet connection and installing the Wireless Display feature.
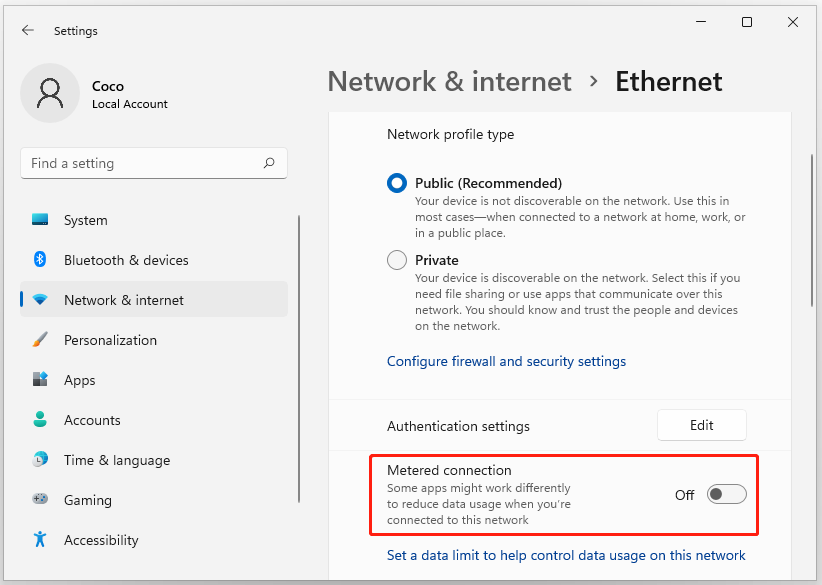
# 2. Turn off the Metered Connection
Many users find that the metered connection can interfere with the optional feature installation, causing the Wireless Display install failed error on Windows 11. In this case, the error can easily be resolved by disabling the Metered connection option. Here you can read this post “Windows 10/11 Metered Connections: When & How to Set up” to know more details.
# 3. Manually Install Wireless Display
If Windows 11 can’t install Wireless Display from the Settings menu, then you can try installing the feature manually via Command Prompt or PowerShell. Here’s how to do that:
Step 1. Type cmd in the Search box, and then right-click the Command Prompt window and select Run as administrator. Then click on Yes in the UAC window.
Step 2. In the elevated Command Prompt window, type the following command and hit Enter to start installing Wireless Display on Windows 11 manually. Also, you can open an elevated PowerShell window and run the same command to install the feature.
DISM /Online /Add-Capability /CapabilityName:App.WirelessDisplay.Connect~~~~0.0.1.0

# 4. Change Registry Keys to Install Wireless Display
Some users from the answersmicrosoft.com forum reported that the Wireless Display installation failed in Windows 11 error can be solved after editing the registry keys. Here you may have a try.
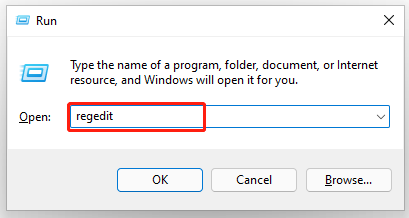
Step 1. Press the Win + R keys to open the Run dialog box, and then type regedit in it and hit Enter. Then click on Yes in the UAC window.
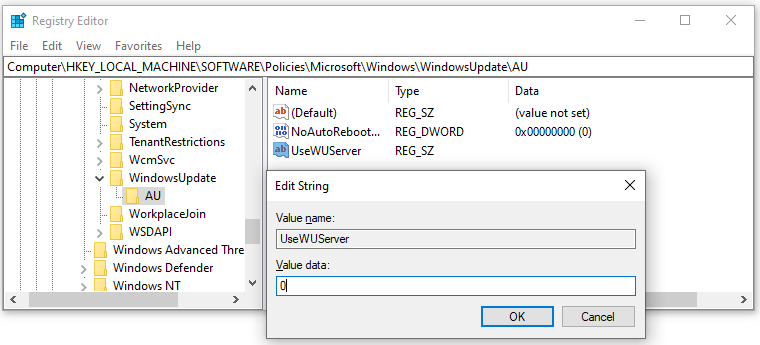
Step 2. In the Registry Editor window, locate the following path via the left navigation bar.
HKEY_LOCAL_MACHINESOFTWAREPoliciesMicrosoftWindowsWindowsUpdateAU
Step 3. With the AU folder selected on the left panel, double-click the UseWUServer REG file to open it. Set the Value data to 0 and click on OK to save the change.
Once done, you can restart your computer and check if the Wireless Display install failed in Windows 11 error gets fixed.
# 5. Clear the System Cache
Some users reported that Wireless Display can’t be installed on Windows 11 if the system cache gets corrupted. In this case, you can follow the steps below to clear the cache.
Step 1. Open the elevated Command Prompt window as we explained above.
Step 2. In the pop-up window, type the following commands in order and hit Enter after each one.
- net stop wuauserv
- net stop bits
- net stop cryptsvc
- rd /s /q c:WindowsSoftwareDistribution
- rd /s /q %temp%
- rd /s /q c:Windowstemp
- net start wuauserv
- sc config wuauserv start=auto
- net start bits
- sc config bits start=auto
- net start cryptsvc
- sc config cryptsvc start=auto
- exe
- DISM /Online /Cleanup-Image /RestoreHealth
# 6. Switch to a Different DNS Server
If you still failed to install Wireless Display in Windows 11/10, you can try switching to a different DNS server. This method has been proven by some users from the answers.mirosoft.com forum to be useful. Let’s try.
Step 1. Open your Control Panel, and then change the View by type to Category and navigate to Network and Internet > Network and Sharing Centre > Change adapter settings.
Step 2. Right-click your current network and select Properties.
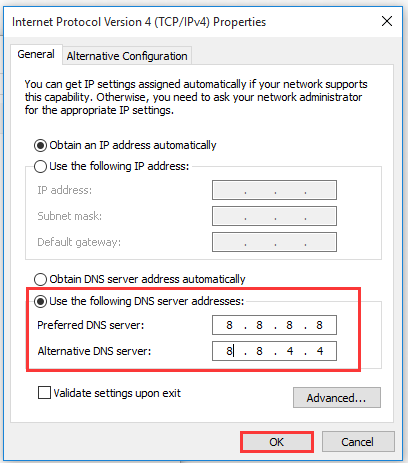
Step 3. Navigate to the Networking tab and select Internet Protocol Version 4 (TCP/IPv4), and then click on Properties.

Step 4. Select the Use the following DNS server addresses option, and then set the Preferred DNS server to 8.8.8.8 and Alternative DNS server to 8.8.4.4. After that, click on OK to save the changes.
Some users reported that it is useful to set the Preferred DNS server to 2.2.2.1 and the Alternate DNS server to 2.2.2.2.
Now, you can redownload the feature and check if the “Windows 11 can’t install Wireless Display” error gets solved.
# 7. Check the Antivirus Software Interference
If the Wireless Display install failed error on Windows 11 occurs after you install any third-party antivirus software, you can try quitting/disabling/uninstalling it and downloading the feature again. Once the problem is fixed, you can get the antivirus software back again.
Further reading: If you can’t download the Wireless Display feature in Windows 10/11 due to insufficient disk space, don’t worry. MiniTool Partition Wizard can help you fix it easily by analyzing disk space, extending partitions, upgrading to a larger hard drive, etc.
About The Author

Position: Columnist
Ariel has been working as a highly professional computer-relevant technology editor at MiniTool for many years. She has a strong passion for researching all knowledge related to the computer's disk, partition, and Windows OS. Up till now, she has finished thousands of articles covering a broad range of topics and helped lots of users fix various problems. She focuses on the fields of disk management, OS backup, and PDF editing and provides her readers with insightful and informative content.
User Comments :