Some Windows Server users reported that they failed to mount .iso files. If you are also bothered by this issue, you can find the solutions in this article. By the way, MniniTool Partition Wizard is a free program that can help you manage your hard drive in Windows Server with ease.
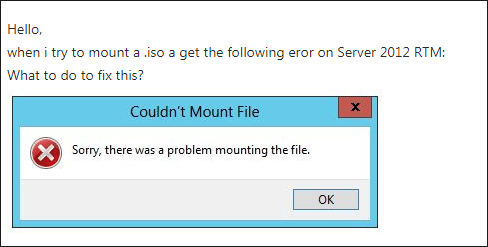
You may run into the same situation as the following image shows when mounting ISO file on Windows Server. Let’s see how to deal with this error easily.

Fix 1: Open ISO Files via Windows Explorer
If you use a third-party program to open such files to mount them, you may receive “couldn’t mount file” error. In this situation, you can try the built-in Windows program – Windows Explorer to mount ISO Files.
Step 1: Locate ISO file on your computer.
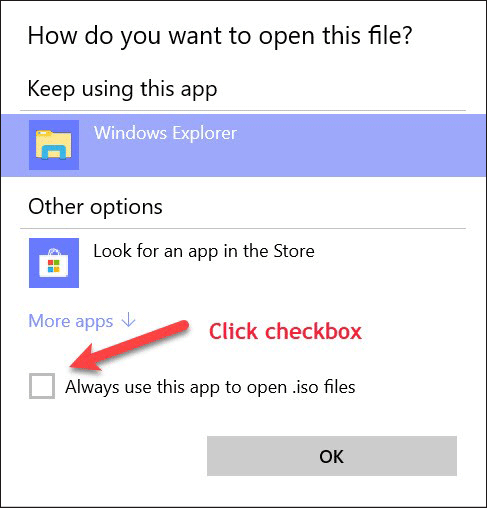
Step 2: Right-click the file and choose the Option with option and the Choose another app from the menu option.
Step 3: Select Windows Explorer from the list, check the Always use this app to open .iso files option and click OK to confirm the changes.

Step 4: Double-click the ISO file that you want to mount on Windows Sever and it should be mounted successfully.
Fix 2: Check the ISO File Is Completely Downloaded
If you have tried the Fix 1 and it didn’t help you solve that Windows Server couldn’t mount ISO files, you should check the ISO files is completely downloaded or not because a corrupted download can lead to this issue.
How to do that? If you don’t install any checksums, you should first check the file size and see if it matches. If not, it indicates that your download is ended prematurely.
Fix 3: Move the ISO File to Other Location
You can try moving the file to a different location to fix the issue. After doing that, please double-click the ISO file and check if it works. If it does not, please try moving the file to the root directory such as C: or D:.
Fix 4: Copy the ISO File or Change the Sparse Flag
Sometimes, Windows operating systems refuse to mount ISO file because image is sparse.
Further reading:
Sparse file, in computer science, is a type of computer file that attempts to use file system space more efficiently when the file itself is partially empty. This file is often related to ISO files, database snapshots, log files, and scientific applications.
Here is the tutorial on changing the sparse flag:
Step 1: Type Windows PowerShell in the Cortana search bar, choose the first search result, and run it as administrator.
Step 2: After accessing the Windows PowerShell window, please type the following commands and hit the Enter key:
- fsutil sparse queryflag <PathToYouISO> (This command helps you learn whether the specific ISO file is a sparse file.)
- fsutil sparse setflag <PathToYouISO> 0 (This command aims to turn off the sparse setting if the .iso file is set as sparse file.)
If you think typing these commands is a little bit troublesome. You can just create a copy of the ISO file and the program should be fixed.
All the fixes to “Windows Server not mount ISO files” have been displayed. Hope these solutions can help you.


User Comments :