Do you want to try Windows 3.1 on your PC? You may need to know how to download the Windows 3.1 ISO for free and install it on your PC. This post from MiniTool Partition Wizard will show you all.
Introduction to Windows 3.1
From 1990 to 1994, Microsoft released Windows 3.x series of OS based on MS-DOS. This series includes:
- Windows 3.0 (1990): Its main features include: supporting 256-color SVGA mode for the first time, introducing Recorder to record macros or sequences of key presses and mouse movements for the first time, and allowing Windows applications to use more memory more easily than DOS applications.
- Windows 3.1 (1992): It removed some old features to improve the system stability, added the support for TrueType fonts, and could access the max memory up to 256MB in reality, which broke the max memory limit (16MB) of Windows 3.0.
- Windows 3.11 (1993): This version does not add too many functional improvements, mainly including bug fixes for Windows 3.1.
- Windows 3.2 (1993): It is a Windows version specially developed by Microsoft for the Chinese mainland market, and only provides a simplified Chinese version.
Windows 3.1 ISO Download
Some people may want to try Windows 3.1 on their PCs. Then, they need to get the Windows 3.1 download first.
Windows 3.1 ISO download
Windows 3.1 for VirtualBox and VMWare
MS DOS 6.22 download
Update: The download link has been removed due to the copyright issue. You need to find the ISO file on other websites.
Click the first download link if you want to install Windows 3.1 on a physical PC or most virtual machine software.
Click the latter 2 download links if you want to install Windows 3.1 on Virtual Box or VMware.
- To install Windows 3.1, you need to install MS-DOS first, because Windows 3.1 is an operating environment that runs on top of MS-DOS. As for MS-DOS 6.22, it is the most official up-to-date version of MS-DOS currently.
- If you want to install a Windows 3.1 VM using the first ISO file, tutorials may vary depending on the software you use.
Windows 3.1 Install
If you want to install Windows 3.1 on a physical PC, you need to use a floppy disk. This may be a tough job. Therefore, many people will decide to install a Windows 3.1 VM. Here is a brief tutorial about Windows 3.1 installation on VirtualBox:
Step 1: Click the Windows 3.1 for VirtualBox and VMware and the MS DOS 6.22 download links to get 2 zip files. Unzip them and you will get 9 disk image files.
Step 2: Launch VirtualBox and click New. Follow the wizard to create a new VM named Windows 3.1.
- You can change the machine folder as your will.
- Change the memory size to 64MB.
- Keep the default choices until it asks you to choose the storage on physical hard disk. In this step, you should choose the Fixed size.
- In the File location and size window, change the size to 5GB.
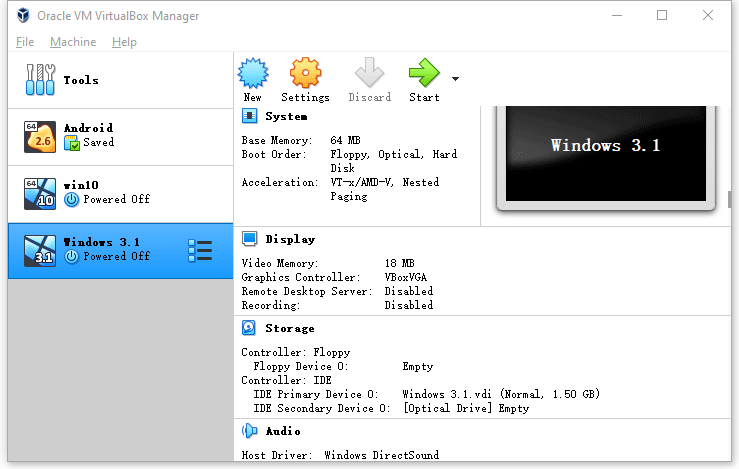
Step 3: Right-click Windows 3.1 and choose Settings to make some changes.
- Go to Display > Screen to change the Video Memory to 32MB.
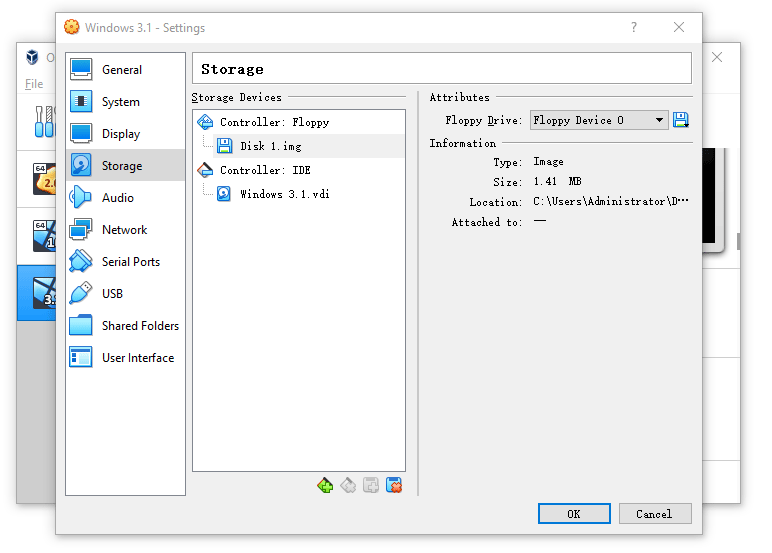
- Go to Storage, right-click the Empty entry under the Controller: IDE directory, and click Remove Attachment.
- Highlight the Empty entry under the Controller: Floppy directory, click the floppy disk icon on the right panel and choose the Choose/Create a Virtual Floppy Disk
- Click the Add icon and find the MS DOS 6.22
- Select the Disk 1.img
- Click the Start button to install the MS DOS environment.
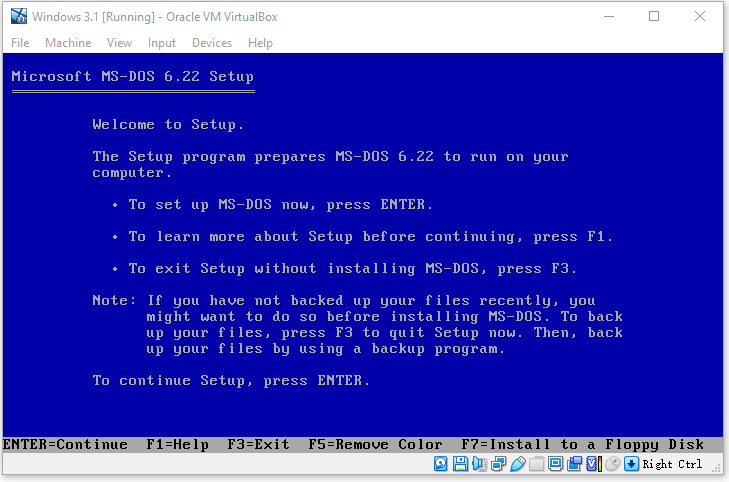
Step 4: Follow the wizard to set up MS DOS 6.22.
- During this process, you just need to keep the default choices.
- When it asks you to insert the setup disk 2, right-click the floppy disk icon at the bottom, choose the Choose/Create a Virtual Floppy Disk option, and add the MS DOS Disk 2.img. Then, press Enter for continue.
- Do the same to add the MS DOS Disk 3.img.
- When it asks you to remove disks from all floppy disk drives, right-click the floppy disk icon at the bottom and choose the Remove disk from virtual drive Then, press Enter.
- Press Enter again to start MS DOS.
Step 5: Right-click the floppy disk icon at the bottom to add the Windows 3.1 Disk01.img. Then, click Machine > Reset. Then, type commands “A:\”, “dir”, and “setup” one by one to start setting up Windows 3.1.
Step 6: Keep choosing the default options all the time until it asks you to insert Disk 2. Do as described in the above steps to insert Windows 3.1 image files one by one and follow the wizard to complete the installation process.
To get the detailed steps, you can refer to this video.

User Comments :