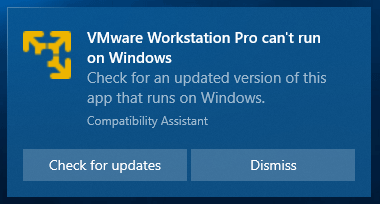
Are you facing error "VMware Workstation Pro can't run on Windows"? If so, you may want to know what causes this problem and how to solve it. In this post, MiniTool Partition Wizard offers you 4 solutions.
VMware Workstation Pro Can’t Run on Windows
I have discovered that my installation of three updates on Saturday has caused the failure of VMware Workstation Pro 14.1.7 to start. On Sunday, when I attempted to run VMware Workstation, it produced a Notification that said “VMware Workstation Pro can’t run on Windows”. — answers.microsoft.com
Some people report that they have encountered “VMware Workstation Pro can’t run on Windows” error.

Have you also encountered this problem? Why does this problem happen to you? Actually, this problem may occur if you have installed one of the following updates:
- October 24, 2019—KB4522355 (OS Build 18362.449)
- October 8, 2019—KB4517389 (OS Build 18362.418)
- October 3, 2019—KB4524147 (OS Build 18362.388)
- September 26, 2019—KB4517211 (OS Build 18362.387)
Once one of these cumulative updates is installed on Windows 10 devices, Compatibility Assistant will generate “VMware Workstation Pro can’t run on Windows” error when you try to run VMWare Workstation Pro.
As per AskWoody, Microsoft has recently removed VMWare from the Windows Application Compatibility database, which means that the app can’t run because it’s not considered a compatible product. But this problem only happens to all versions of VMWare Workstation Pro prior to 15.1.
How to Fix “VMware Workstation Pro Can’t Run on Windows” Error
To solve this problem, the easiest way is to buy the latest release of VMware Workstation Pro. But this isn’t necessarily the thing that everyone wants to do, especially given its rather high price.
Are there methods that can solve this error without fees? Yes, there are. In this part, I will introduce you 4 ways.
Way 1: Rename VMware
Some users report that renaming VMware can solve this problem. You can try this method first. Here is the tutorial.
- Right-click VMware desktop shortcut and choose Open file location.
- Find vmware.exe and rename it to something else.
Way 2: Uninstall Windows Updates
The second way is to uninstall windows updates and block them from reinstalling. To uninstall these updates, please follow the steps below:
- Press “Windows + R” keys, enter “control” in the dialog box, and then press Enter to open Control Panel.
- Make the Control Panel in the view of icons and then click Programs and Features.
- In the new window, right-click those Windows updates and click Uninstall to remove them.
- After removing these updates, reboot the computer to see whether the problem is solved.
If you want to block them from reinstalling, please refer to the following post:
Way 3: Use Registry Editor
Some people think they can solve this problem by changing Windows Compatibility Assitant in Registry Editor. Here is the guide:
- Open Registry Editor (regedit.exe) and navigate to ComputerHKEY_LOCAL_MACHINESOFTWAREMicrosoftWindows NTCurrentVersionAppCompatFlags.
- Create the following DWORDtype key:
- Value: {3d9912c3-cb54-4f34-ab71-1d429553bf96}.
- Data: 77(Decimal).
Way 4: Use Windows ADK
Some users report that they have solved this problem with Windows ADK (Assessment and Deployment Kit). Here is the tutorial:
- Download and install the Windows ADK (please choose the correct version). Please run adksetup as administrator, and be sure ‘Application Compability Tools‘ is selected and upgrade.
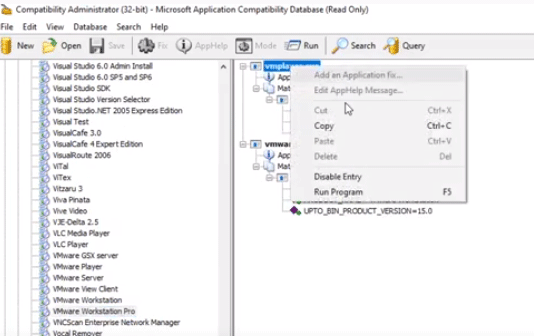
- Search Compatibility Administrator Utility and run it as administrator.
- Click Applicationsunder Sytem Database(xx-bit).
- Scroll down to find VMware Workstation Pro and highlight it.
- Right-click exe and click Disable Entry. Do so to vmware.exe again.

Top 10 Solutions to Fix This App Can’t Run on Your PC in Win 10


User Comments :