The calculator graphing mode will come to Windows 10 soon. Do you want to try the graphing calculator right now? In this post, MiniTool offers you a detailed guide on how to use Windows 10 graphing calculator in preview builds. Follow this guide to try it by yourself!
About Windows 10 Graphing Calculator
Last March, Microsoft made the Windows 10 calculator open-sourced on GitHub and started work on expanding the app with new features like graphing mode (it is the first open-sourced suggestion to be chosen).
Then, what can the Windows 10 graphing calculator do? As its name implies, Windows 10 graphing calculator will allow users to create graphs based on mathematical equations. This will help students learn linear algebra easier and assist them in more advanced mathematics and other science courses.
In addition, the Windows 10 graphing calculator is also expected to support the common core math curriculum of the United States. Among those include the ability to create and interpret functions as well as comprehend quadratic, linear, and exponential models.
While your math teacher might not let you lug a laptop into their calculus class, the upcoming Windows 10 graphing calculator is awesome. Read the following content to start playing with this new graphing calculator today.
How to Use Windows 10 Graphing Calculator (in Preview Builds)
At present, you can only access the graphing calculator via one of Microsoft’s preview builds of Windows 10. So you have to trade away a little potential stability to calculate sine curves. If you still want to try it right now, here are some suggestions for you:
- Make a System Restore point via Control Panel > System > System protection just in case.
- Drop out of the Windows Insider program once you encounter issues with its Windows 10 previews.
After making a System Restore point, you can try the Windows 10 graphing calculator in a preview build without worries. Follow the steps below to begin:
Step 1: Hit up the Settings app > Update & Security, scroll down to the Windows Insider Program, and begin the process of signing up. Make sure you’ve enrolled yourself in the Fast track.
Step 2: Once your computer restarts, visit that same section again and stick with the Windows Update screen instead of clicking on Windows Insider Program. Check for updates and install anything that’s offered, which will undoubtedly require a second restart of your PC.
Step 3: After the restart, you should see something like this in the lower-right corner of your desktop, which means that you have a beta build of Windows 10 now.

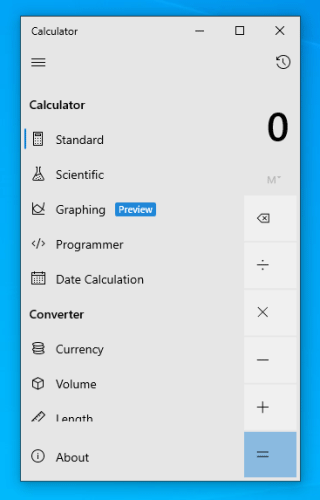
Step 4: You can pull up the Calculator now, but you might not see anything new. If so, go visit Windows Calculator’s listing in the Microsoft Store, click on Get to reinstall it. Then, you can pull up Calculator on your desktop and you’ll see the fancy new Graphic option via the upper-left hamburger icon menu.
5 Solutions to Fix Windows 10 Calculator Not Installed Error
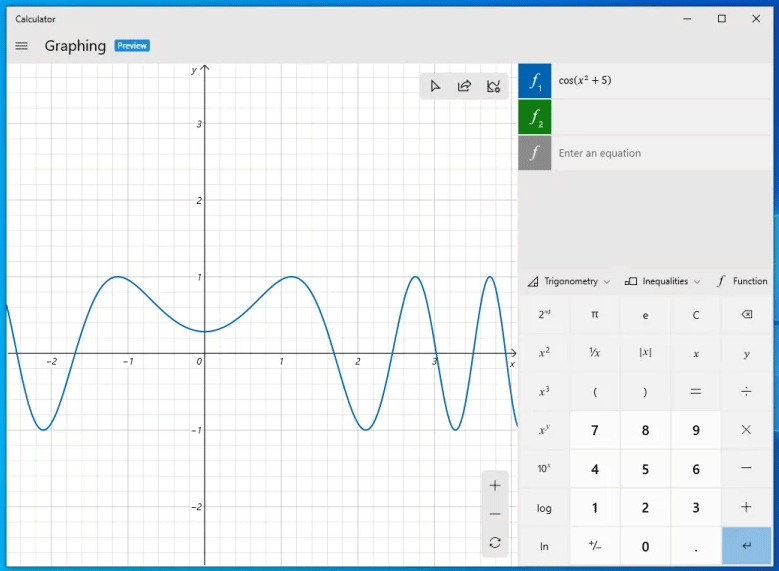
Step 5: Click on the Graphing and then type in your favorite equation. Hit Enter and you’ll see the results graphed to your left. In addition, you can also enter multiple equations at once—color-coded! And you can use the tracing feature to see the exact x and y coordinates of any point.
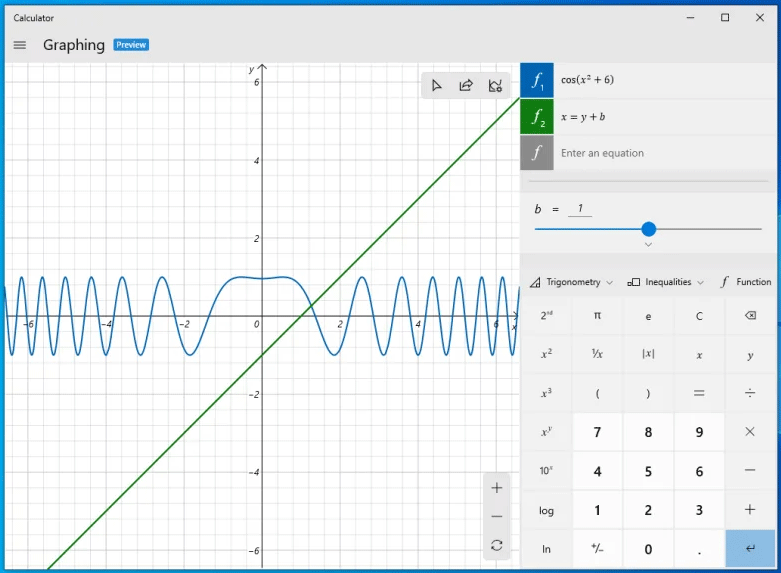
If you enter two equations that relate to one another—for example, using “x” in one and defining “x” in another—you get a little adjustment bar that shows you how different values impact the primary equation.
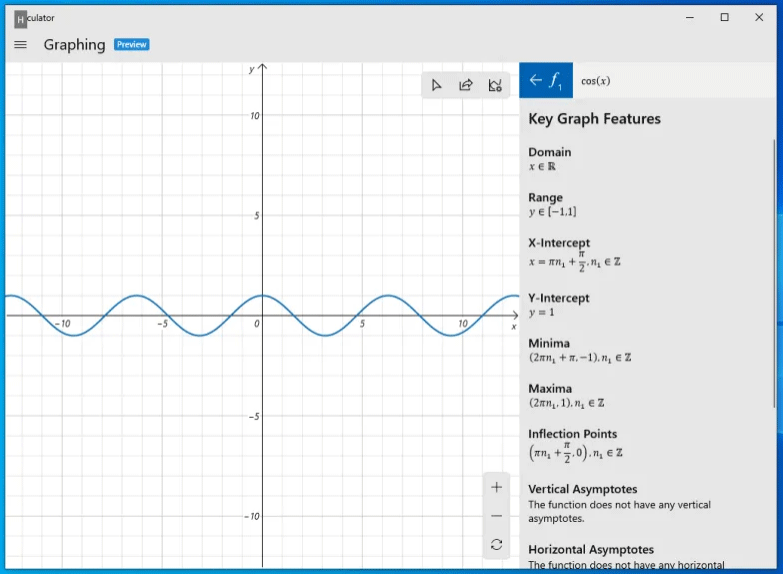
When you hover over your equation, Calculator will even give you a quick analysis that shows you key information: the domain and range, the x-intercept, the y-intercept, inflection points, et cetera.
Now, if you are interested in this calculator, you can follow this guide and try it by yourself.



User Comments :