Do you know how to turn on BitLocker without TPM and turn off it on Windows 10? If not, you should read this post, in which MiniTool shows you how to do that.
What Is BitLocker and TPM?
BitLocker is a new security feature integrated in Windows Server 2008, Windows Vista, and later versions. It will encrypt the Windows installation partition or other partitions used to save files, and then save the key outside the hard drive. Through this way, it can make sure your computer is not tampered with even if it is unattended, lost, or stolen, reducing the risk of data loss.
As for TPM (Trusted Platform Module), it is a microchip mounted on the motherboard responsible for keeping keys. With TPM enabled, BitLocker will become safer and more convenient. With TPM, you don’t have to enter the unlock password and TPM will ensure that no one will use WinPE to peek into the files on the hard drive.
What if there is no TPM on my computer? Can I enable BitLocker without TPM? Of course you can. Please read the following content to know how to turn on or off BitLocker to encrypt or decrypt operating system drives without a TPM in Windows 10.
Turn on BitLocker Without TPM on Windows 10
If you don’t have a TPM chip on your PC or just don’t want to use it, you can store the startup key on a USB flash drive or use a password to encrypt and decrypt drives. As for how to do that, please refer to the following steps:
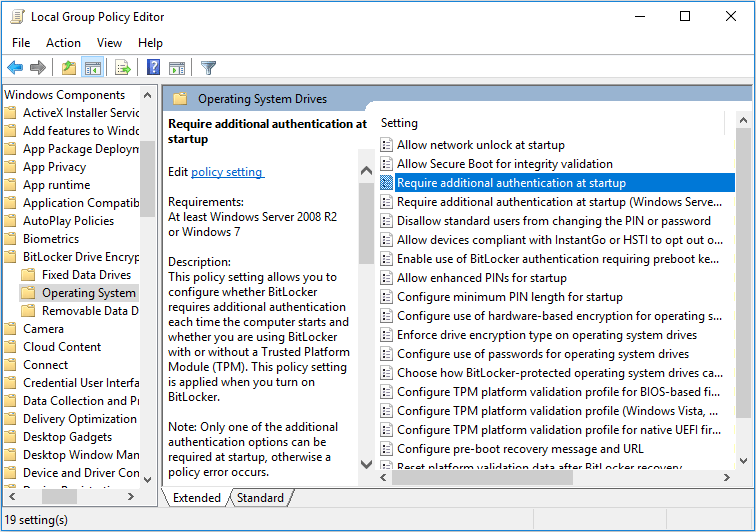
Step 1: Press “Windows + R” keys and type “gpedit.msc” into the Run box. Then, click the OK button or hit the Enter key to open the Local Group Policy Editor.
Step 2: Navigate to Computer Configuration > Administrative Templates > Windows Components > BitLocker Drive Encryption > Operating System Drives.
Step 3: Highlight Operating System Drives and then double-click Require additional authentication at startup policy on the right pane.
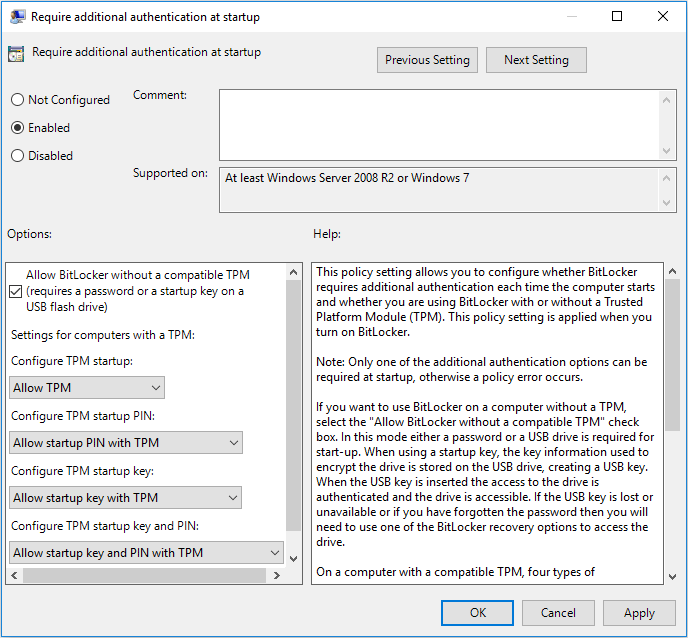
Step 4: Select Enabled at the top and check the Allow BitLocker without a compatible TPM (requires a password or a startup key on a USB flash drive) box under Options. Then, click the Apply and the OK button to save changes.
Step 5: Exit Local Group Policy Editor and launch File Explorer. Then, right click the operating system drive that you want to encrypt and choose Turn on BitLocker.
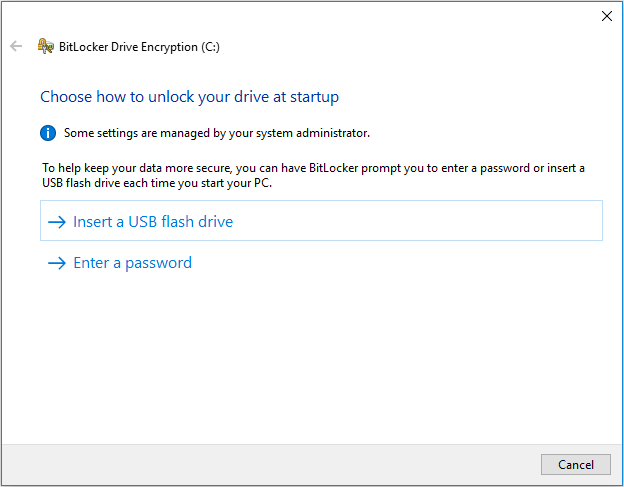
Step 6: Choose how to unlock your drive at startup: Insert USB flash drive or Enter a password. (In this step, I choose Enter a password.) The former option allows you to unlock the operating system drive at startup with a connected USB flash drive saving startup key. The latter option allows you to unlock the operating system drive with a password.
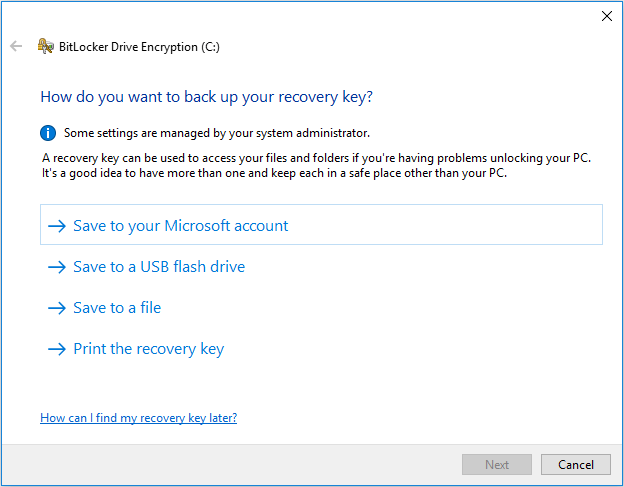
Step 7: Set a password and then choose how to back up the BitLocker recovery key. After that, click the Next button.
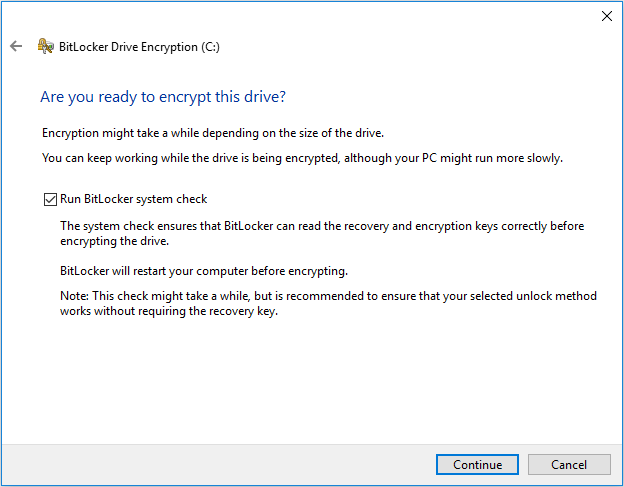
Step 8: Choose how much of your drive to encrypt and which encryption mode to use. Then, choose whether to Run BitLocker system check. After that, click Continue button to start encrypting.
Turn off BitLocker
Whether you encrypted your Windows OS drives with TPM or without TPM, the procedure to decrypt is the same for both cases. Please refer to the following steps:
Step 1: Type “cmd” into the Windows search box. Right-click Command Prompt and choose Run as administrator.
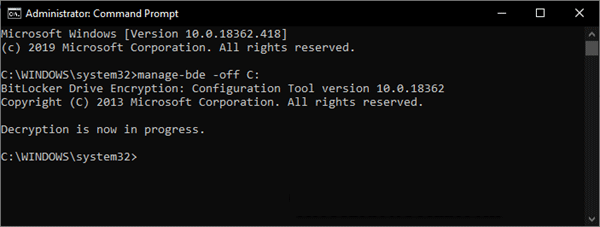
Step 2: Type the following command: manage-bde -off C: .Then, hit Enter key. Please note that the driver letter C should be substituted with the actual drive letter of the encrypted drive you want to decrypt.


User Comments :