A large number of users find that Temp folder keeps filling up on Windows 10/11. What causes the “Temp folder filling quickly” issue? Now, let’s explore the possible reasons and troubleshooting methods together with Partition Magic.
What Is Temp Folder
The Temp folder, or Temporary directory, is a location on your computer that stores the temporary files produced by your application and progresses. The folder includes temporary copies of documents, installation files, downloaded files, cached data, and temporary backups. It is mainly located in the C:\Windows\Temp and C:\Users\username\AppData\Local\Temp.
Usually, the content of the Temp folder will be deleted automatically by your operating system and software at bootup or at regular intervals. Sometimes, however, the Temp folder keeps filling up C drive even if you delete files manually. The following is a user from the answers.microsoft.com forum who encountered the issue on Windows 10.
The Temp Folder keeps filling up my C drive, PLEASE HELP! Hi, the problem started when I updated my Windows 10 to the latest version and then after one day, my C drive was almost full. Then I installed WinDirStat to see where the problem was, then I noticed that the TEMP folder is around 90-95 GB!!!! It keeps filling up my drive, and the speed is unbelievable around 1000 files in 10 minutes.https://answers.microsoft.com/en-us/windows/forum/all/the-temp-folder-keeps-filling-up-my-c-drive-please/27710071-0f71-4db1-a8f7-f25a4b3f941f
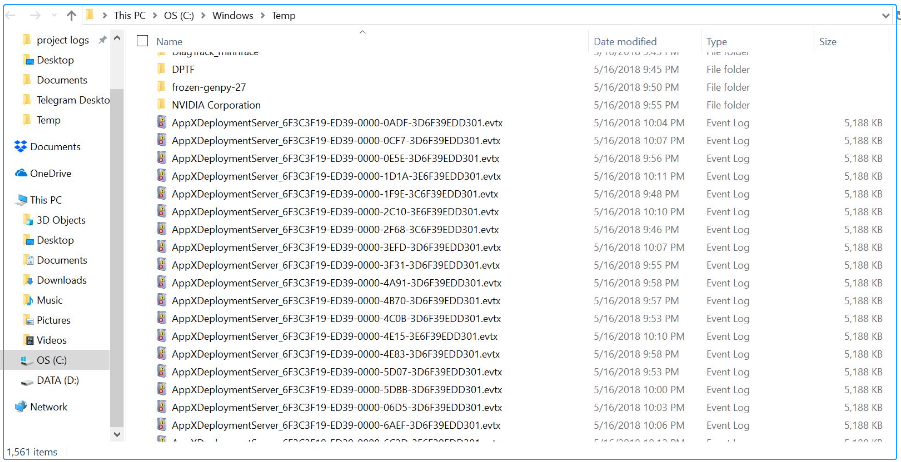
Why Temp Folder Keeps Filling up
Why Temp folder keeps building up on Windows 10/11? According to user reports, the full Temp folder mainly occurs after updating to the latest Windows update. There are too many active temporary files used by applications and they keep filling up the hard drive. The main reason is that the Windows operating system can’t clear them timely.
Besides, some users of Microsoft reported that the “Temp folder filling quickly” issue is related to the Windows Store bug. Other factors, such as Windows Event log and virus infections, are also responsible for the problem.
How to Fix the Temp Folder Keeps Filling up on Windows 11/10
This part shows you how to fix the Temp folder filling up C drive issue on Windows 11/10. Before proceeding, you should check if you have installed or downloaded any suspicious applications. If so, uninstall them. Then you can follow the 9 fixes below in order until the problem gets solved.
Fix 1. Run Disk Cleanup
If there are a large amount of temporary system files on the C drive, you can run Disk Cleanup. It is a Windows built-in hard disk cleaner that can remove unnecessary files, including the Temp files. Here’s how to fix the full Temp folder issue using Disk Cleanup.
Step 1. Press the Win + E keys to open the File Explorer and select This PC on the left pane. Then right-click the C drive and select Properties.
Step 2. Click on the Disk Clean-up button in the pop-up window to scan the drive C automatically. Then wait for the process to complete.
Step 3. Tick the checkbox next to Temporary files or other files you want to delete and click on OK. After that, click Delete Files to clean up them.
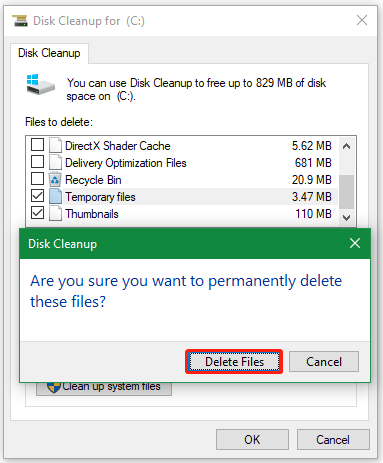
However, many users from the Windows forum have tested that the Disk Cleanup tool doesn’t do a good job of removing a large number of temp files. If the Temp folder keeps filling up C drive, you may consider using a professional file deleter like MiniTool Partition Wizard.
Fix 2. Empty Temp Folder Using MiniTool Partition Wizard
MiniTool Partition Wizard is an all-in-one partition and disk manager that helps you analyze disk space, extend/resize partition, change cluster size, partition hard drive, recover hard drive data, clone Windows 10 to SSD, etc. This will not only show detailed information about your disk usage but also delete the Temp folder permanently.
MiniTool Partition Wizard FreeClick to Download100%Clean & Safe
Here’s how to delete the full Temp folder using the tool:
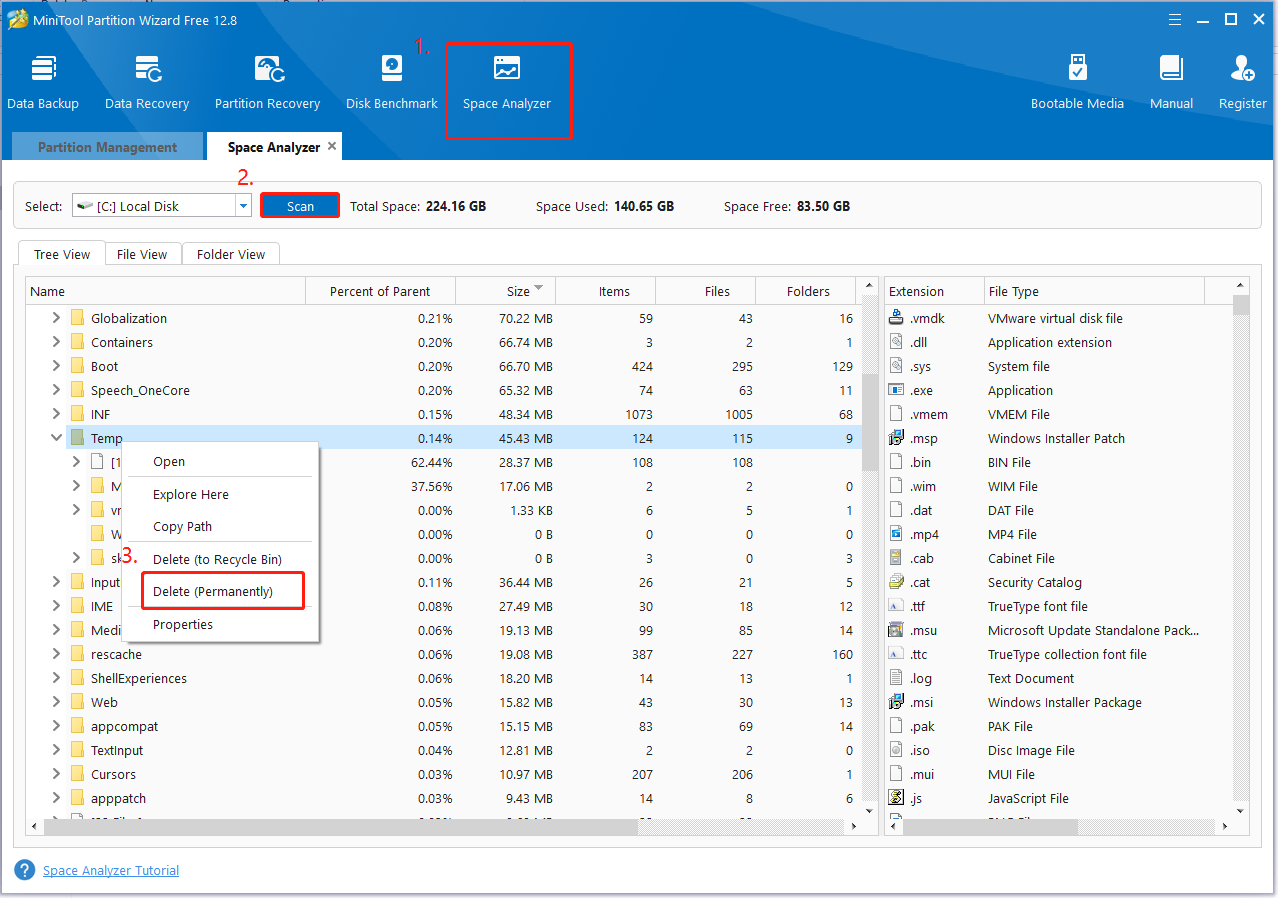
Step 1. Launch the MiniTool software to get its main interface and click Space Analyzer from the top toolbar.
Step 2. Select the C drive from the drop-down menu and click on Scan.
Step 3. Wait for the scanning process to complete. Once done, you can expand the Temp folder to see what large files are taking up your disk space, right-click it, and select Delete (permanently).
Fix 3. Run Windows Store and Windows Update Troubleshooters
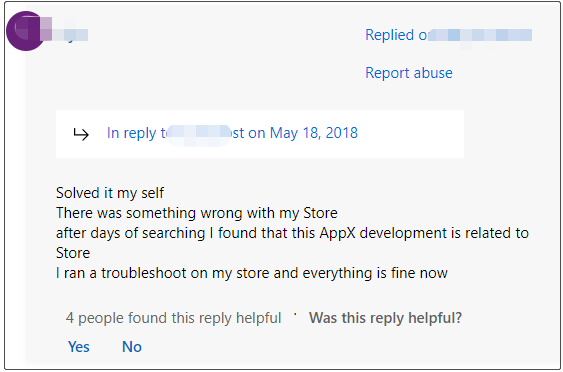
According to the information from Microsoft support, the Temp folder filling up C drive issue is related to the buggy Windows update and Store. If the Temp folder keeps building up even if you have deleted them, you can try running the Windows Store and Update troubleshooters. This has been proven by many people to be useful.
Step 1. Press the Win + I keys to open Windows Settings and select Update & Security.
Step 2. Select Troubleshoot from the left panel and click Additional troubleshooters from the right panel.
Step 3. Go to the Windows Store Apps section and click Run the troubleshooter. Wait for the troubleshooter to detect problems with the Store and apply any recommended fixes if available. After that, restart your PC and see if the Temp folder keeps filling up.
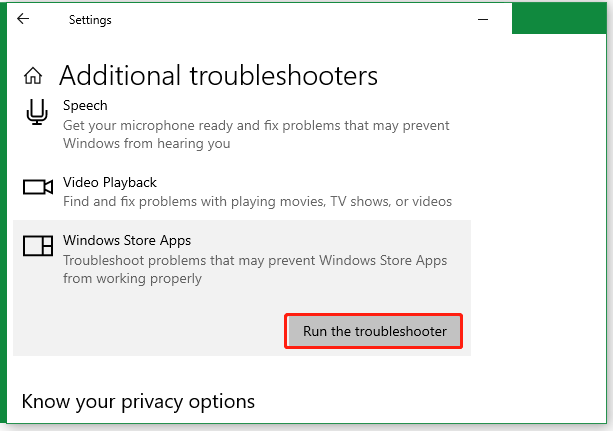
Step 4. Then you can run the Windows Update troubleshooter as the above steps.
Fix 4. Clear the Windows Store Cache
In addition, the corrupted Windows Store cache can trigger the Temp folder filling quickly issue as well. Let’s follow the guide below to clear the Windows Store cache.
Step 1. Press the Win + R keys to open the Run dialog box, and then type wsreset.exe in it and press OK.
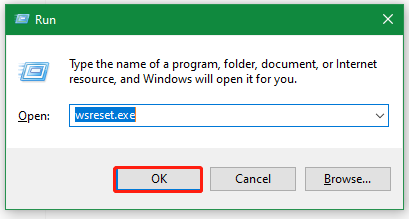
Step 2. Then a Command Prompt window will pop up to run the command. Wait for a while and the Windows Store app will automatically open.
After you cleared the cache, open File Explorer to delete the temp files and see if the issue gets solved.
Fix 5. Disable Windows Event Log Temporarily
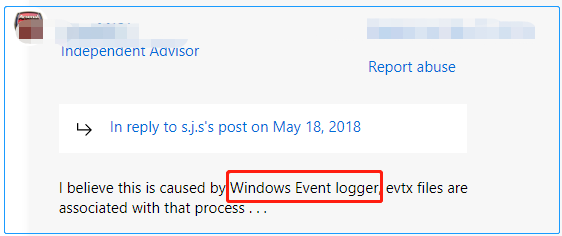
Some users from the answers.microsoft.com forum believed that the Temp folder taking up much space issue is associated with Windows Event log. Here you can try disabling the service and see if it works.
Step 1. Open the Run dialog box again, type services.msc in it, and click OK.
Step 2. Scroll down the list of services to the Window Event Log section and double-click it to open the Properties window.
Sep 3. Change the Startup type to Disabled and click Apply > OK to save the change.
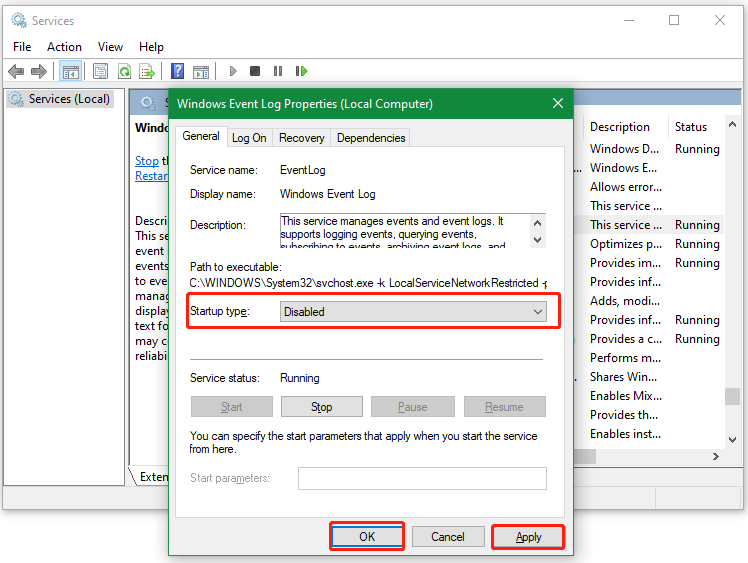
Step 4. Restart your PC and see if the Temp folder keeps building up C drive. If it is, re-enable the service.
Fix 6. Use the Empty Temp Folders Program
Some Windows 11 forum users found that the Temp folder filling up C drive issue can be fixed by using the Empty Temp Folders software. Try this tool if the Temp folder filling quickly issue persists even if you delete the files several times. It can clear the content of the TEMP folder easily.
To do this work, you can download the program from its official website and launch the software. Then navigate to the Temp folder from the left panel, select the files you want to delete, and click the Delete button from the top toolbar.

Fix 7. Turn on Storage Sense
Storage Sense is a useful tool that can help you automatically free up disk space. If you are always troubled by the Temp folder taking up much space issue, you can try using the Storage Sense utility. For that:
Step 1. Open the Settings window by pressing the Win + I keys, select System, and choose Storage.
Step 2. Turn on the switch Configure Storage Sense or run it now.
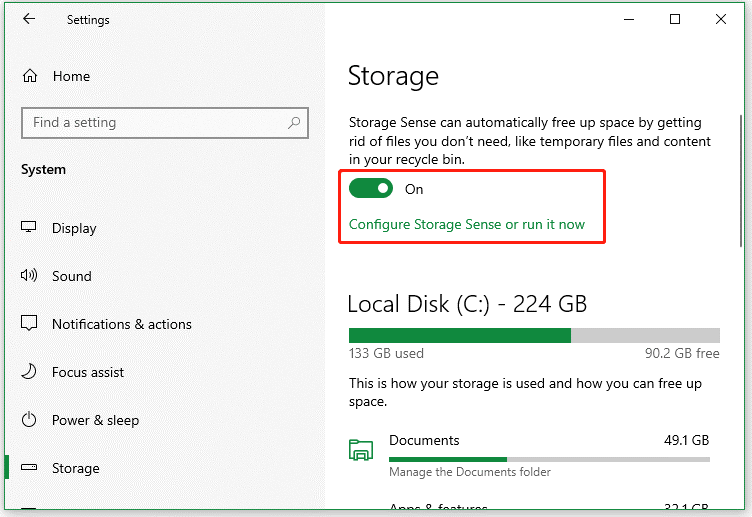
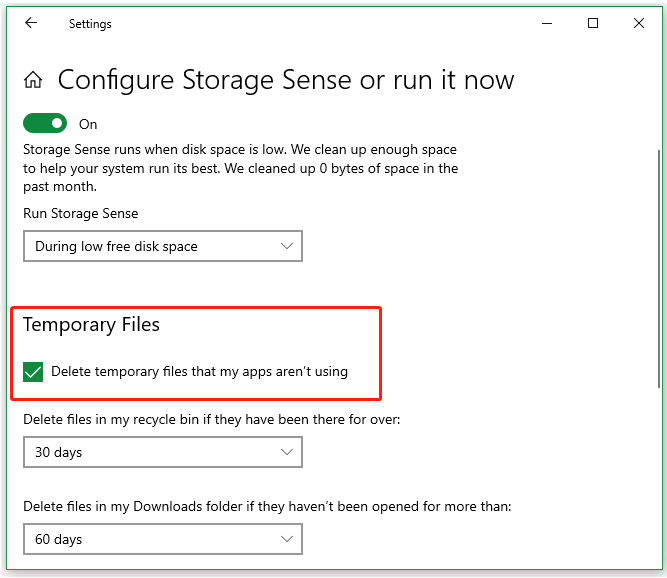
Step 3. Then click Configure Storage Sense or run it now and set when to run Storage Sense or delete temporary files that apps aren’t using.
Fix 8. Clean Install Windows 10/11
Sometimes your Windows operating system may get corrupt, which causes it can’t clear the temp files timely. If none of the above methods can’t solve the Temp folder filling up C drive issue, you may consider reinstalling Windows 10/11.
However, this operation will delete all data on the system drive and reset your system to its normal state. So, make sure you have backed up all important data before proceeding. MiniTool ShadowMaker is a professional backup utility that can not only back up operating systems, and clone hard disks/partitions but also back up personal files on Windows.
MiniTool ShadowMaker TrialClick to Download100%Clean & Safe
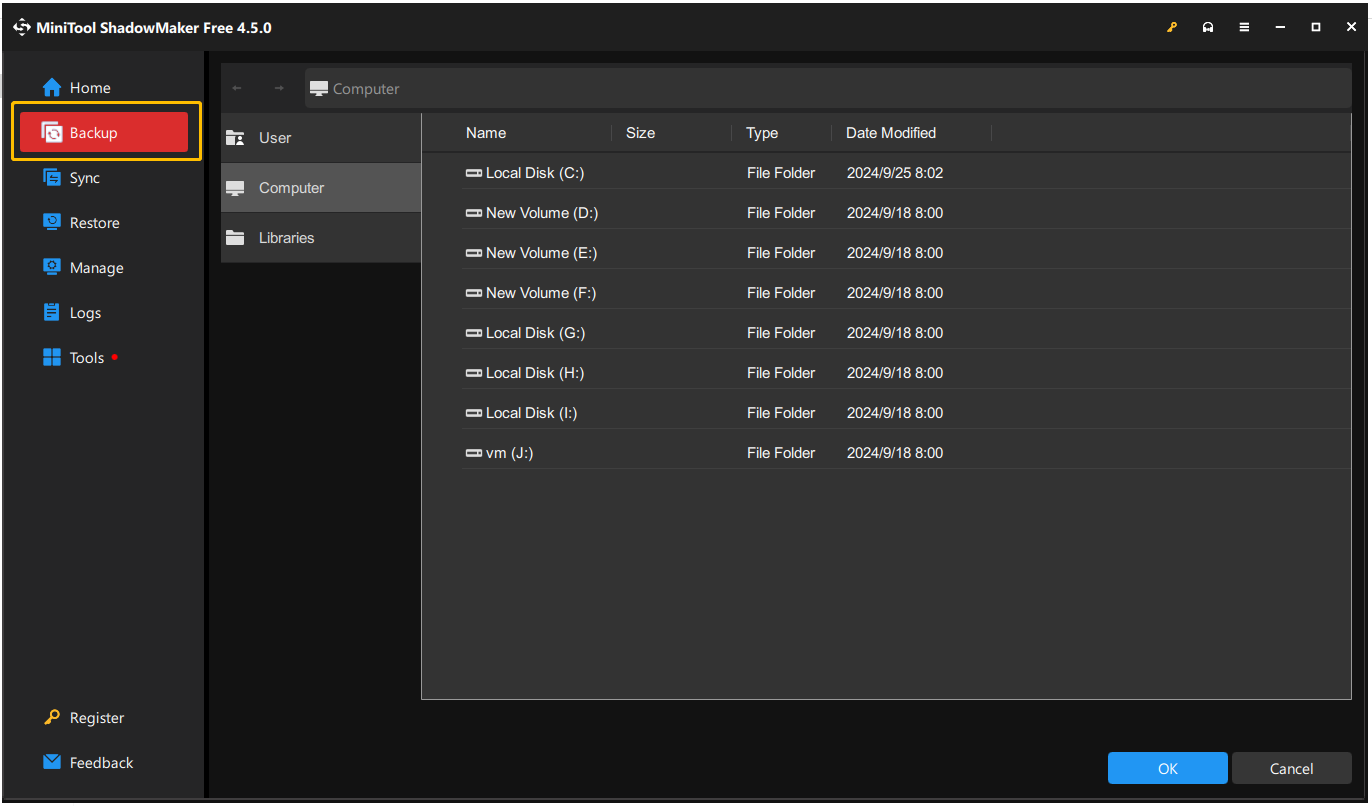
After you have all the important data backed up, you can refer to the following guides to reinstall Windows 11/10.
Detailed Steps and Instructions to Reinstall Windows 10
How to Clean Install Windows 11? Here Are 5 Options
Fix 9. Upgrade to a Larger SSD/HDD
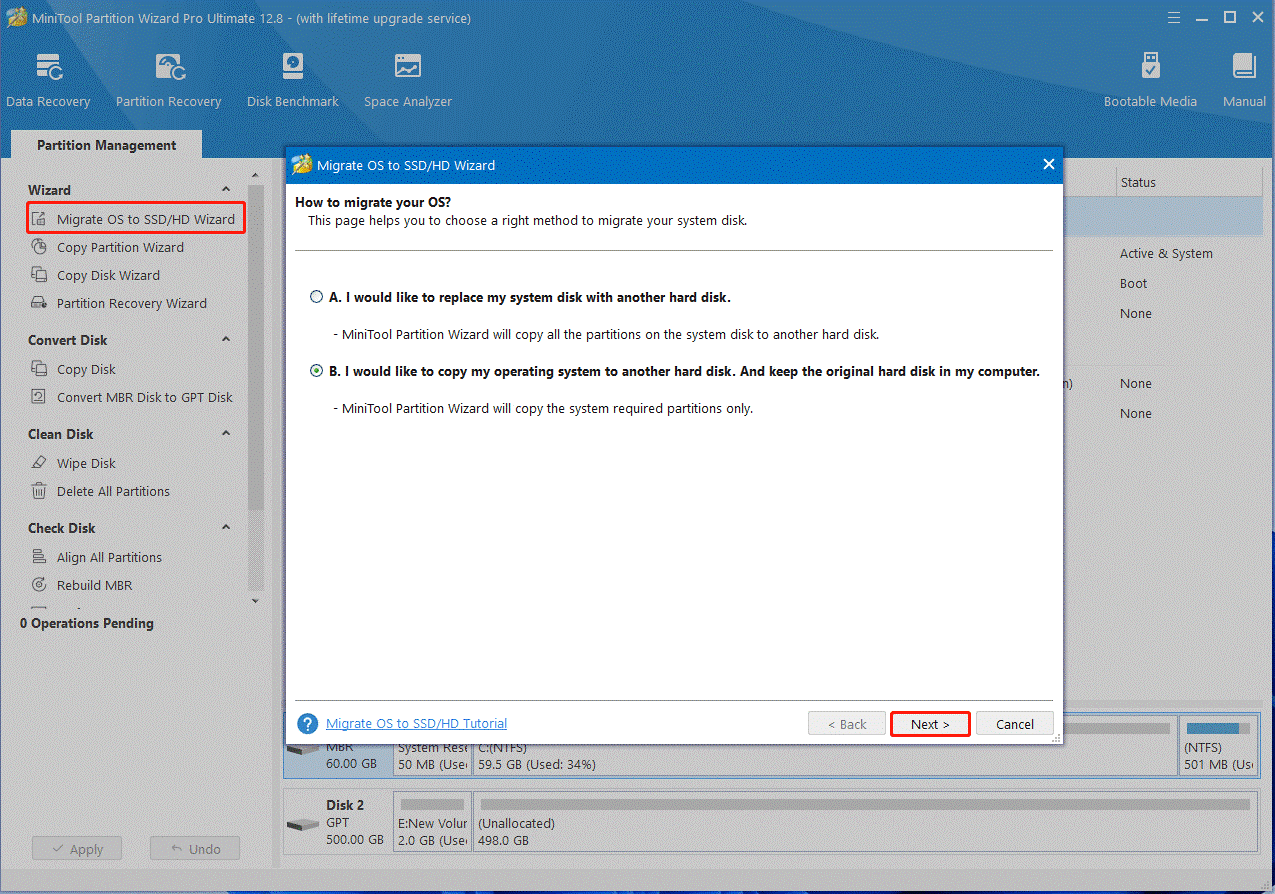
Well, if you have a small hard drive, then the most fundamental solution is to upgrade your hard drive to a larger SSD/HDD. By doing so, your computer will have more storage space to hold the temp files. Then How to upgrade HDD to SSD without reinstalling OS? MiniTool Partition Wizard is a good choice that provides the Migrate OS to SSD/HD or Copy Disk features to do the work.
MiniTool Partition Wizard DemoClick to Download100%Clean & Safe
Have a Try Now
This post provides 9 effective ways to help you solve the problem if the Temp folder keeps building up on Windows 10/11. You can use MiniTool Partition Wizard to delete all unnecessary temp files permanently or try other solutions, such as resetting Windows Store, turning on Storage Sense, etc.
In addition, if you have any issues when using the MiniTool software, don’t hesitate to get in touch with us via [email protected]. We will send you a reply as soon as possible.

User Comments :