Steam is a popular video game distribution but lots of people complained about an annoying Steam issue Steam won’t go online. This post from MiniTool Partition Wizard focuses on the issue and provides several solutions to the issue.
Steam Won’t Online
There are many causes for the issue and the common ones are network devices not working, corrupted Steam files, etc. No matter which one causes “Steam won’t go online Windows 10”, you can try the following solutions to get rid of the issue.
Fix 1: Modify Your Steam Shortcut
First, try modifying your Steam shortcut. The steps are detailed below:
Step 1: Locate your Steam client. If you have never customized the Steam location, you can find your Steam through the path: C:/Program Files (x86)/Steam.
Step 2: Create a shortcut of Steam in the same directory.
Step 3: Right-click the shortcut you just created and then choose the Properties option.
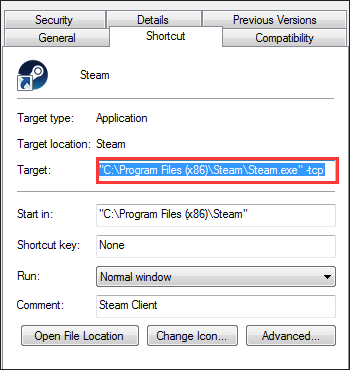
Step 4: On the properties window, head over to the Shortcut tab. Then, add -tcp in the end in the Target dialogue box and save the change.
Step 5: Open Task Manager and end all Steam processes.
Now you can open Steam using the shortcut and see if the issue gets solved.
Fix 2: Clear the Steam Download Cache
If the first solution doesn’t work, next you can try clearing the Steam download cache.
Step 1: Open Steam and head over to Settings.
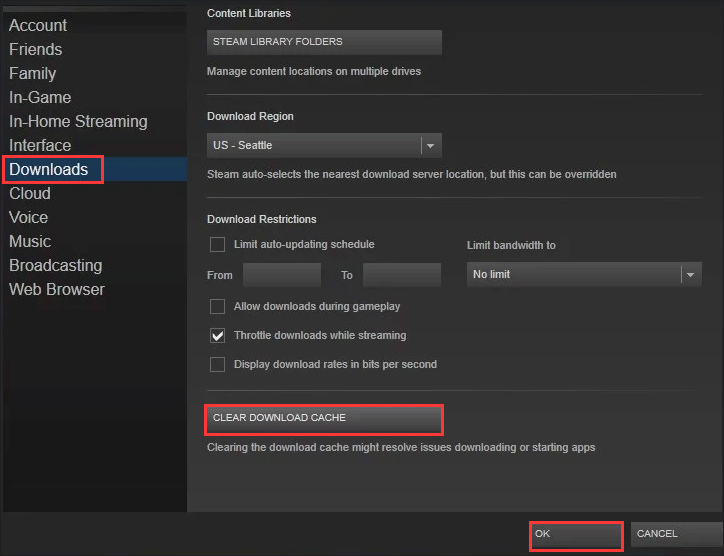
Step 2: Choose Downloads in the Settings panel
Step 3: Click CLEAR DOWNLOAD CACHE in the right panel and click OK to confirm. After a while, Steam will ask for your login credentials.
After logging in, check if Steam will work as expected.
Fix 3: Change the Internet Settings
You can also try changing the Internet settings to fix “Steam won’t go online’.
Step 1: Click the network connection icon on your taskbar and then click Network & internet settings.
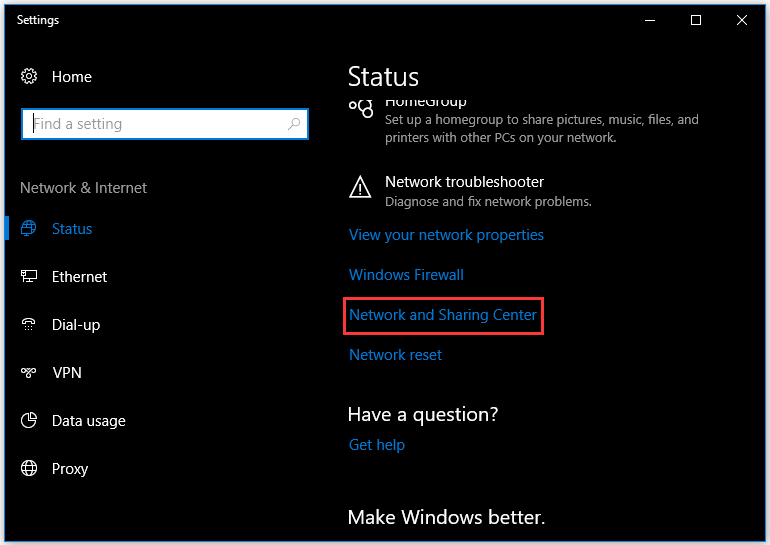
Step 2: On the Settings window, click Network and Sharing Center in the right panel.
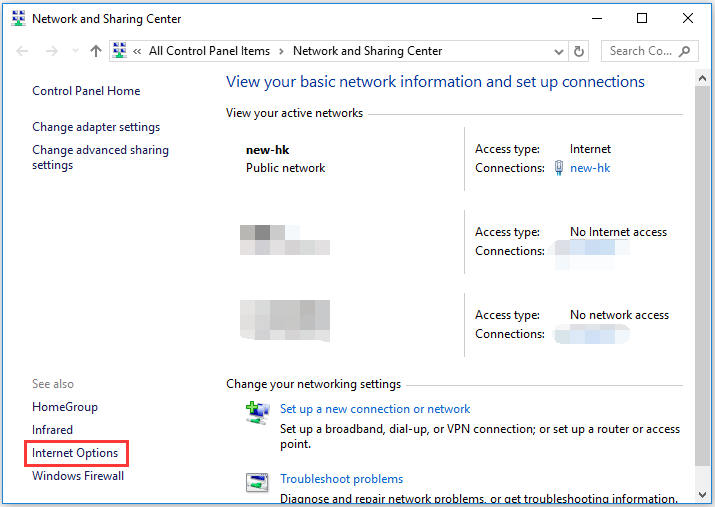
Step 3: Click Internet Options in the bottom left corner of the Network and Sharing Center window.
Step 4: Head over the Advanced tab on the Internet Properties window. Then, scroll down the Security listings and uncheck Enable Enhanced Protected Mode. Finally, do not forget to save the change.
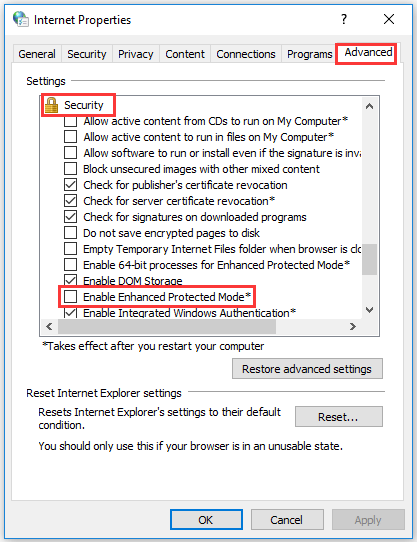
After changing your Internet setting, you should restart your PC and then launch Steam to check if it is still stuck in offline mode.
Fix 4: Reset Winsock
When Steam won’t go online, resetting Winsock via Command prompt might be helpful.
Step 1: Launch Command Prompt by typing cmd in the Windows search bar and then hitting the Enter key.
Step 2: Once the Command prompt window opens, run the below command and press the Enter key to run it.
netsh winsock reset catalog
Step 3: Run the following command.
netsh int ip reset reset.log
Now reboot your computer and launch Steam to see if it will work as expected.
Fix 5: Rename ClientRegistry.blob
The fifth solution to get rid of “Steam won’t go online” is renaming the ClientRegistry.blob file.
Here is the tutorial.
Step 1: Locate your Steam directory and find the file named ClientRegistry.blob.
Step 2: Rename the file to ClientRegistryOld.blob
Step 3: Relaunch Steam to allow the file to be regenerated.
Fix 6: Reinstall Steam
If you still have the issue “Steam won’t go online Windows 10”, please reinstall Steam.
Step 1: Locate the Steam directory on your computer.
Step 2: Delete all the related files and folders except the ones listed below.
- SteamApps
- exe
Step 3: Restart your computer and launch Steam with administrative privileges. Steam will start updating itself to replace the missing files.

User Comments :