Some Windows 10 users get an error message “There was a problem starting StartUpCheckLibrary.dll The specified module could not be found” when they boot their computer or update their system. Why does this happen, and how to fix this issue? Well, this post from MiniTool Partition Wizard will tell you all.
What Causes the StartUpCheckLibrary.dll Missing Error?
The StartUpCheckLibrary.dll file is developed and created by Microsoft Corporation, which helps Windows users to perform various startup functions easily. However, some users encounter the StartUpCheckLibrary.dll missing notification when they power on the system.
So, what causes the StartUpCheckLibrary.dll missing error? According to some Windows experts, this error may be caused by the following reasons:
- The DLL file is quarantined by the security product
- Corrupt or missing system files
- The installation of the latest Windows update
Now you know the possible reasons for the StartUpCheckLibrary.dll missing error, so how to solve this problem? Scroll down to know the detail.
How to Fix the StartUpCheckLibrary.dll Missing Error?
Whatever case you are in, you can fix the StartUpCheckLibrary.dll missing error in a few steps. There are three methods below, and you can choose one of them to solve this problem.
Method 1: Ensure Windows Security is quarantined the StartUpCheckLibrary.dll
Sometimes, if the StartUpCheckLibrary.dll file is quarantined by Windows Defender/Security on Windows 10, you may receive the error message “There was a problem starting StartUpCheckLibrary.dll”. In this case, follow the steps below to restore or remove the StartUpCheckLibrary.dll file:
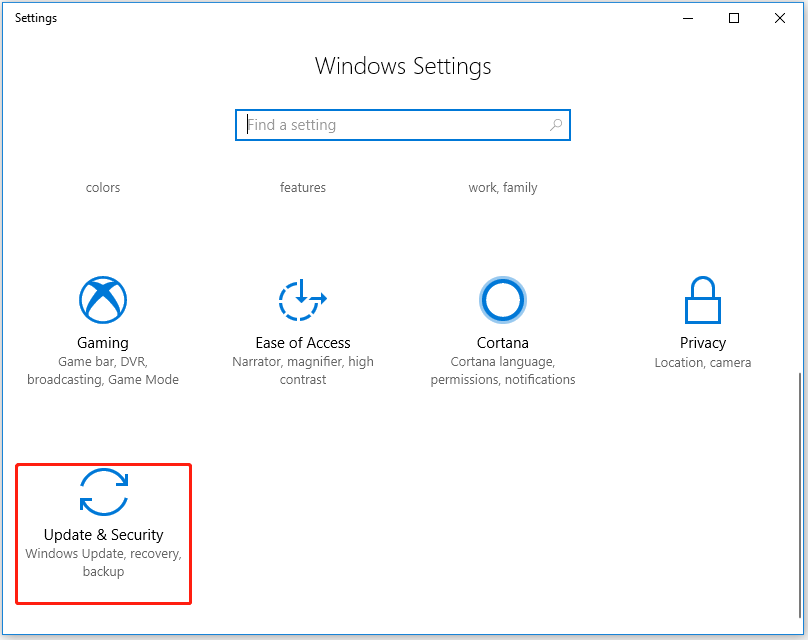
Step 1: Click the Start button, then click the Settings button, and then choose Update & Security.
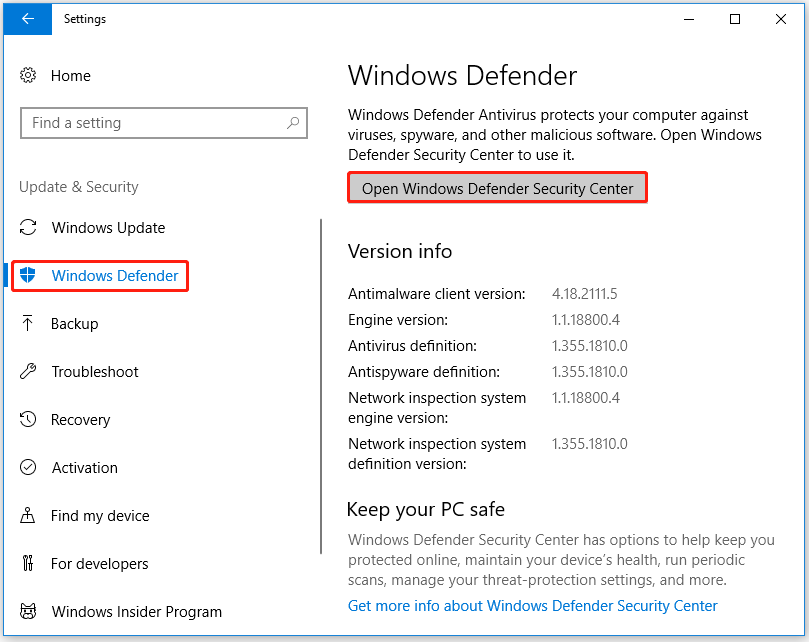
Step 2: Click Windows Defender in the left panel, and then click the Open Windows Security Center Service option.
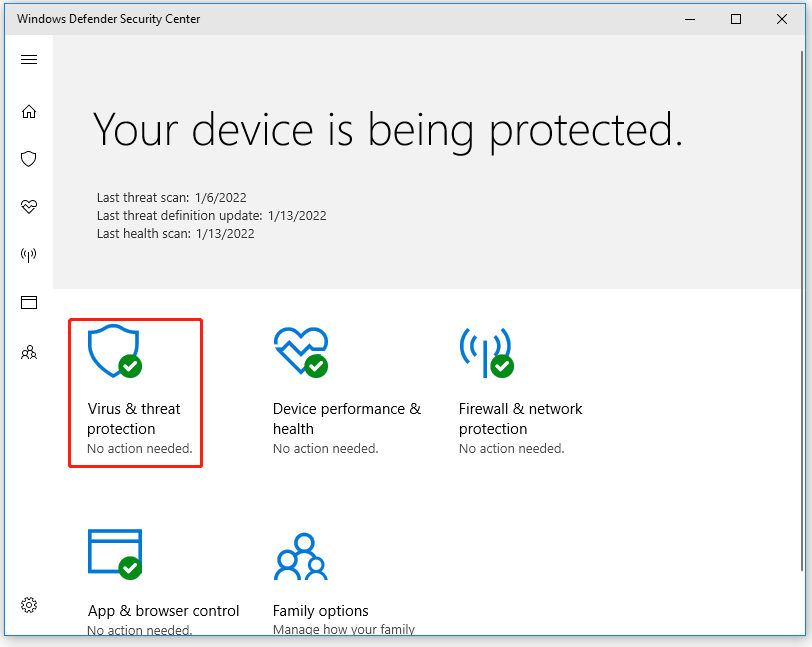
Step 3: In the Windows Security Center Service window, choose Virus & threat protection.
Step 4: If you find the StartUpCheckLibrary.dll file under the Quarantine threats option, remove this file.
Once done, restart your computer to see if the missing StartUpCheckLibrary.dll error is fixed.
4 Solutions to Windows Security Center Service Can’t Be Started
Method 2: Perform an SFC Scan
Another way to fix the StartUpCheckLibrary.dll file missing error is to use the SFC (System File Checker) tool to repair missing or corrupted system files. How to do that? Here is the guide:
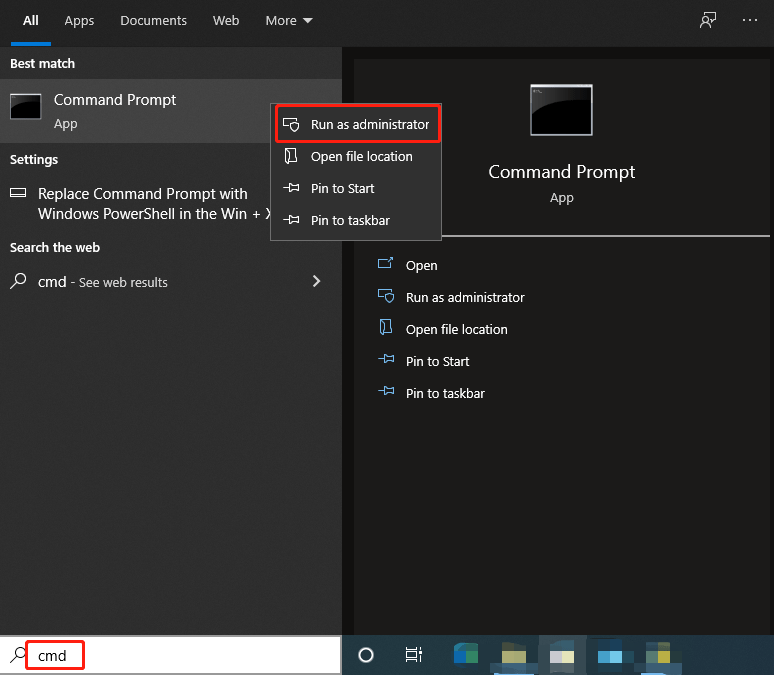
Step 1: Press the Win + S keys, type cmd in the search box, and then right-click Command Prompt to choose Run as administrator.
Step 2: Type sfc /scannow in the elevated Command Prompt and press Enter. Then, the damaged system files will be found and replaced.
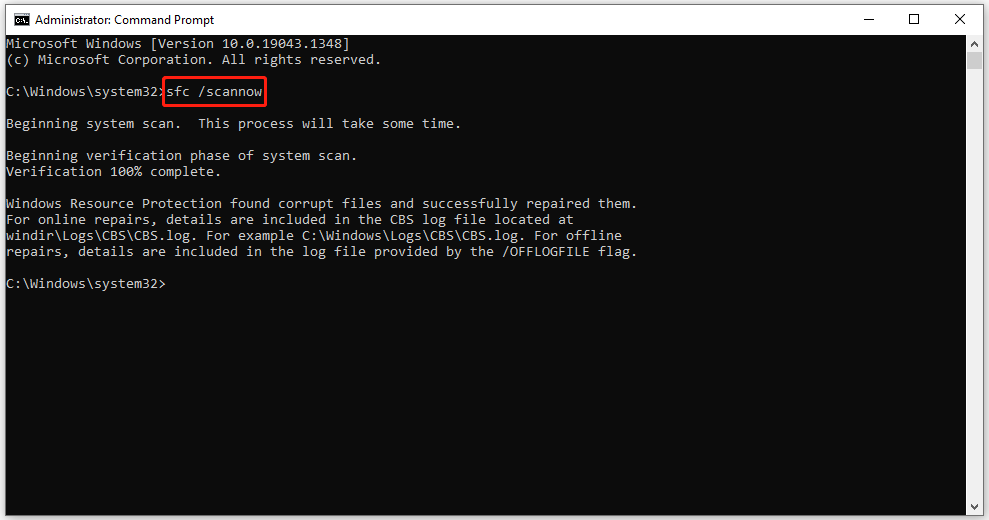
After that, please reboot your computer to see if there is still the error message “There was a problem starting StartUpCheckLibrary.dll”.
Method 3: Rollback the Latest Windows 10 Update
If neither of the above methods fixes the StartUpCheckLibrary.dll missing error, trying to roll back to the latest Windows 10 version may solve this problem. Here is how to remove the recent updates:
Step 1: Press the Win + I keys on the keyboard to open the Settings app. Then, choose Update & Security.
Step 2: Choose Windows Update in the left panel, and then click View update history.
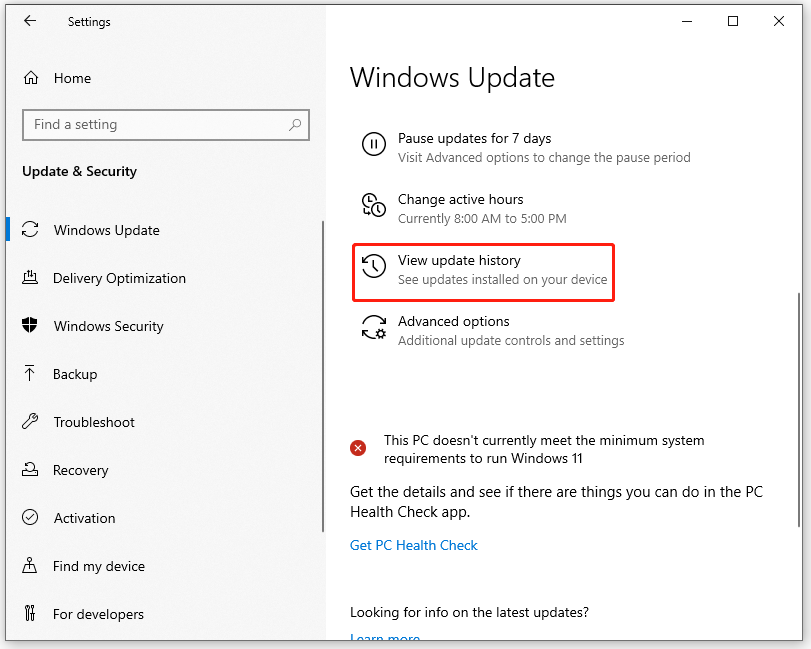
Step 3: Then, choose the Uninstall updates option.
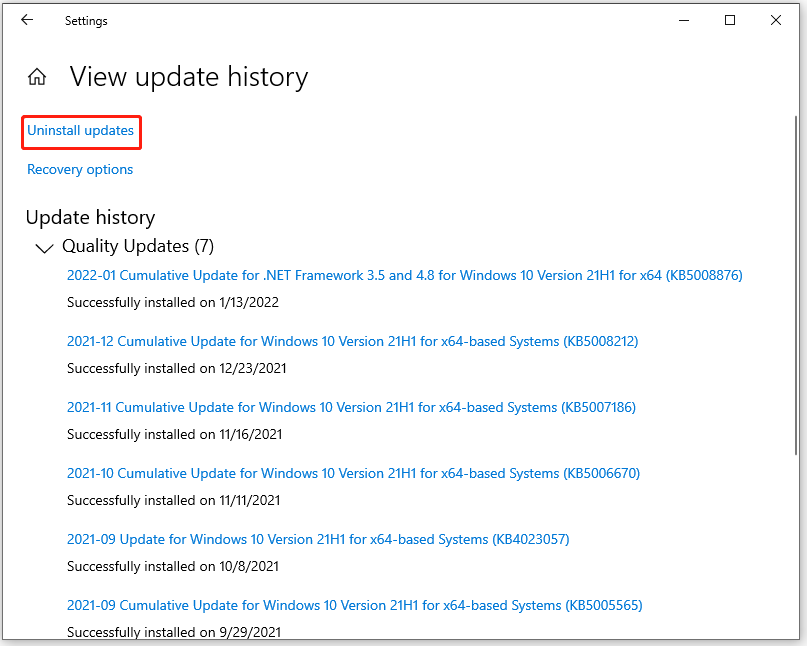
Step 4: In this interface, pick the recently installed patch and then click Uninstall at the top bar.
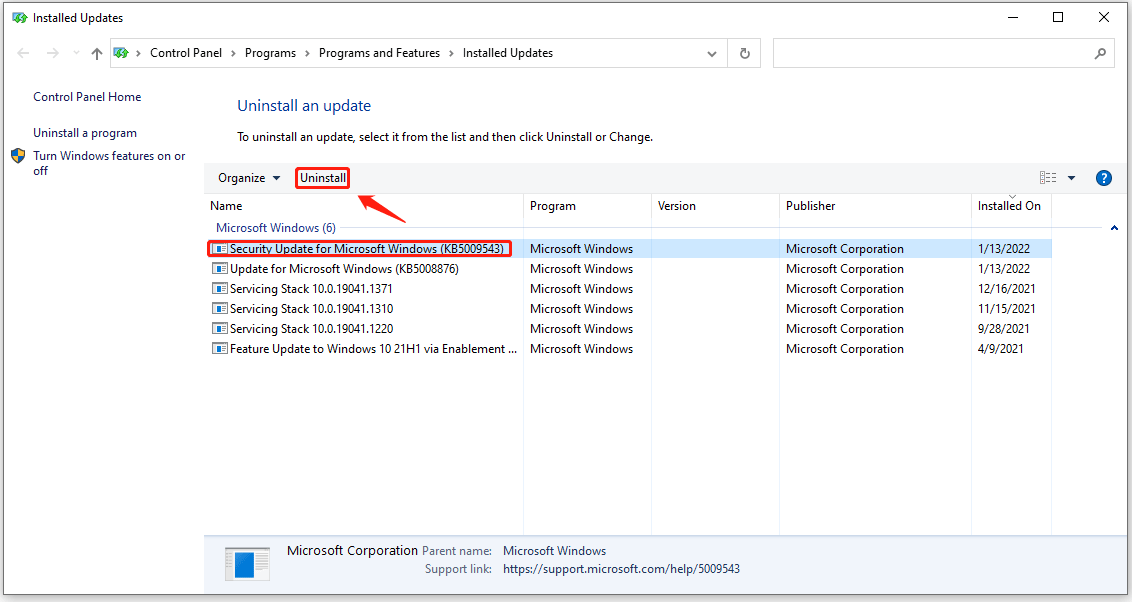
Once you remove the latest Windows 10 version, restart your computer so as to implement the changes.
That’s all about how to fix the StartUpCheckLibrary.dll missing error on Windows 10. If you have any questions about this topic, please leave them in the comment zone and we will try to answer them as soon as possible.


User Comments :