Do you want to store your sensitive and important files in a rather safe place? It is a wise choice to use OneDrive Personal Vault. In this article, MiniTool gives you a quick guide to help you set up OneDrive Personal Vault Storage on Windows 10.
Personal Vault is a helpful feature built in OneDrive. It stores important files, such as sensitive files and personal pictures, in a protected area within your cloud account. Although your files are safe in OneDrive, this feature can keep files more secure.
Personal Vault uses stronger security with two-factor authentication. Apart from the typical sign-in way to access OneDrive, you can choose to set another authentication of fingerprint, face recognition, PIN and email or phone code. And the extra layer of security makes it more difficult for malicious people to access your files.
Eager to employ OneDrive Personal Vault now? To help you use it more easily, I will show you how to set up and disable OneDrive Personal Vault in the following content.
How to Set Up OneDrive Personal Vault
Although Personal Vault is a built-in feature of OneDrive, you should set it up on every device. Let’s see the details.
On Devices Running Windows 10
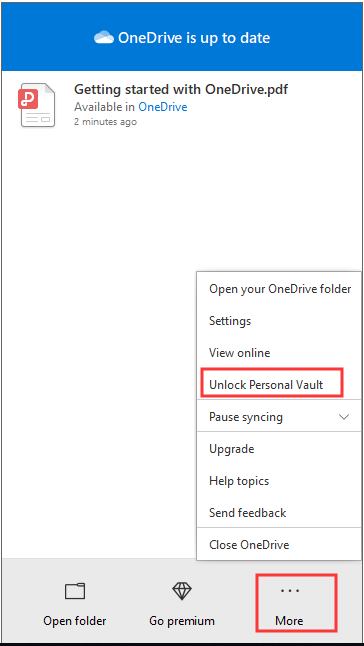
Step 1: Click the OneDrive icon from the bottom right corner of the taskbar.
Step 2: Click More button.
Step 3: In the pop-up menu, choose the Unlock Personal Vault option.
Step 4: A new window will appear. Just click Next button.
Step 5: Then, OneDrive will ask for your permission to continue. You should click Allow button to finish setting up.
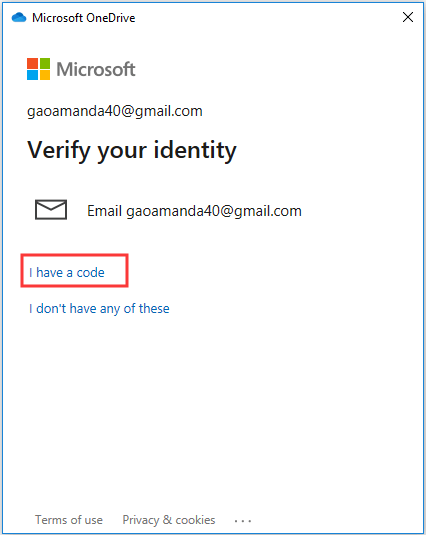
Step 6: Click I have a code in the following page. In another page, enter your Microsoft account password and click Verify. If you haven’t set password for your Microsoft account, click I don’t have any of these here.
Step 7: Click Sign in button and follow the instructions on screen.
If you have more than one device, please repeat the steps on other devices where you want to access your files.
On OneDrive Web
Here’s how to set up Personal Vault on OneDrive web. The detailed steps are displayed below.
Step 1: Open and sign in your OneDrive with your browser.
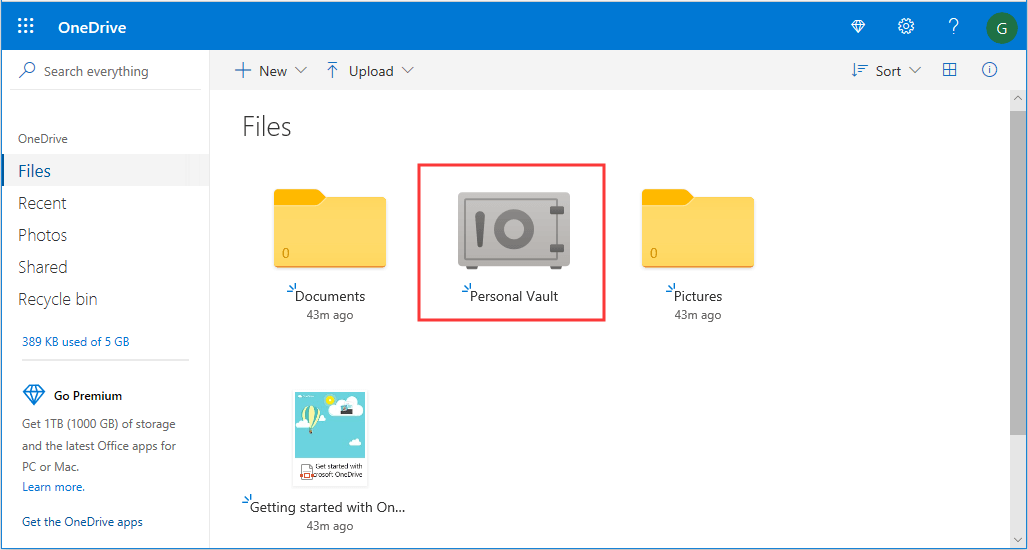
Step 2: Switch to File section and click Personal Vault icon.
Step 3: Click Next button.
Step 4: Click Verify button and verify your Microsoft account in the new page.
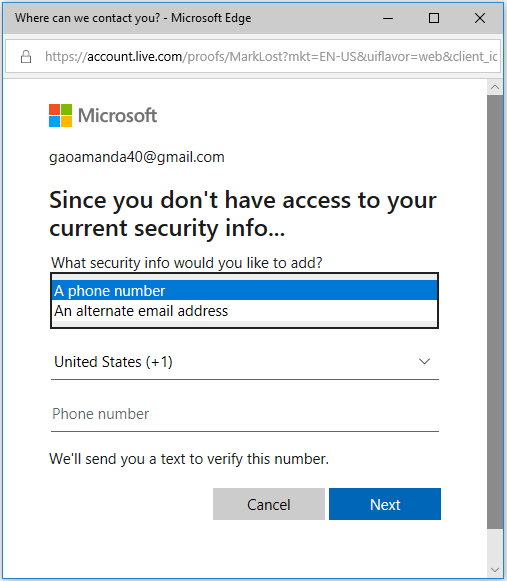
Step 5: You will be required to add your security info. Just select an authentication method and input the specific information. Then, follow the instruction on screen to complete the operation.
On Mobile Device
In addition, you can also configure OneDrive Personal Fault on your mobile device.
Step 1: Open OneDrive on your mobile device.
Step 2: Tap the Personal Vault from the list.
Step 3: Tap Continue button and then Verify Identify button.
Step 4: After signing in to your account, select an authentication method and create a Personal Vault PIN.
Step 5: Do as the onscreen instruction shows.
Disable Personal Vault Settings on OneDrive
If you don’t want to use OneDrive Personal Vault anymore, you can disable this feature in OneDrive. It’s also a simple operation and you can make it with the following steps.
Step 1: Open OneDrive with your browser.
Step 2: Click the Personal Vault icon in the top-right corner and choose Personal Vault settings option.
Step 3: Hit Disable button in the new page.
Step 4: There will be a window requiring you to confirm this operation. Just click Disable again.
After that, the Personal Vault folder will be removed from your OneDrive account. If you want to use it again, you can enable this feature referring to the steps above, but clicking the Enable button instead in Step 3.




User Comments :