Windows 10 allows you to change your computer’s password every once in a while by setting a password expiration date. In this way, you can maintain your cybersecurity. In this post, MiniTool shows you how to set a password expiration date on Windows 10.
The steps to set a password expiration date on Windows 10 vary, depending on whether you use a local or Microsoft account to log into your Windows PC. Read the following contents to know the details.
Windows 10 Local Account VS Microsoft Account, Which One to Use?
Set a Password Expiration Date for Microsoft Account
If you are using a linked Microsoft account to sign in your Windows PC, you can set a password expiration date for your Microsoft account online. Please refer to the following steps:
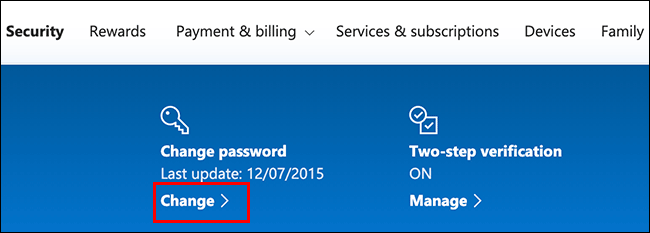
Step 1: Head to the Microsoft account security area and sign in. In the Change Password section at the top, click Change.
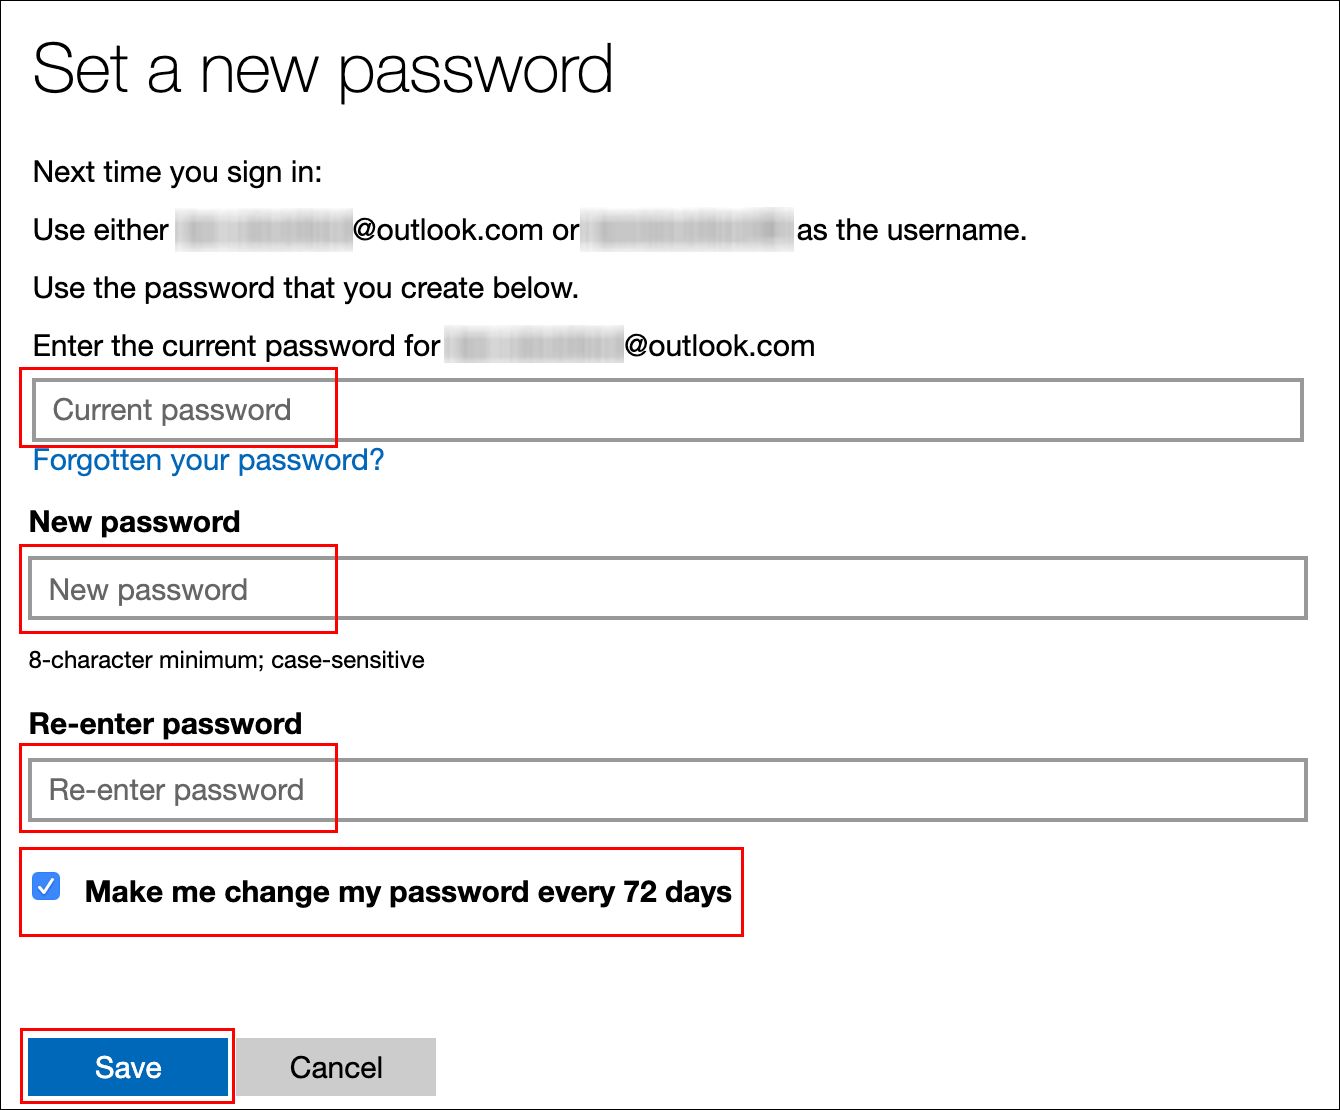
Step 2: Enter your existing password, as well as a new one. Please note that you can’t reuse your existing one, so type a new, secure password instead. Then, click the box next to Make Me Change My Password Every 72 Days, which allows you to reset your password every 72 days. Finally, click Save to apply your new password and expiration date.
Step 3: If the password expiration date is set successfully, you’re redirected back to the Microsoft account security page. Please sign in and out of Windows to use your new password. Then, the password will expire after 72 days, and you’ll be prompted to change it after your next sign in.
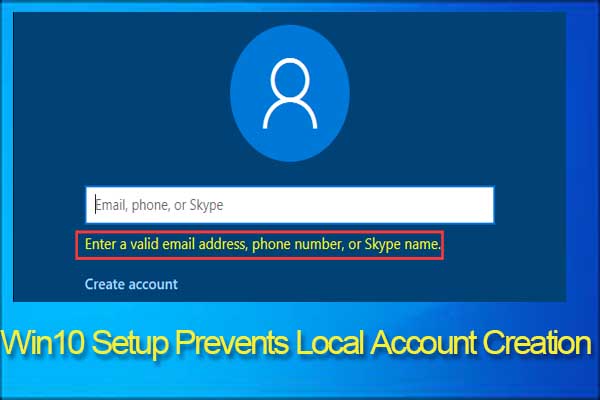
How to Bypass Microsoft Account Windows 10 Setup? Get the Way!
Set a Password Expiration Date for Local Account
If you are using a local account to sign in your Windows PC, you can set an expiration date through the following steps:
Step 1: Enable password expiration. This step will disable a setting that prevents your password from ever expiring.
- Press “Windows+R” keys to open the Run dialogue box.
- Type “netplwiz” and then click OK button to open your User Accounts settings.
- Skip to Advanced tab and then click the Advanced button in the Advanced user management box to open the lusrmgr window.
- Navigate to Local Users and Groups (Local) > Users and then right-click your user account to choose Properties.
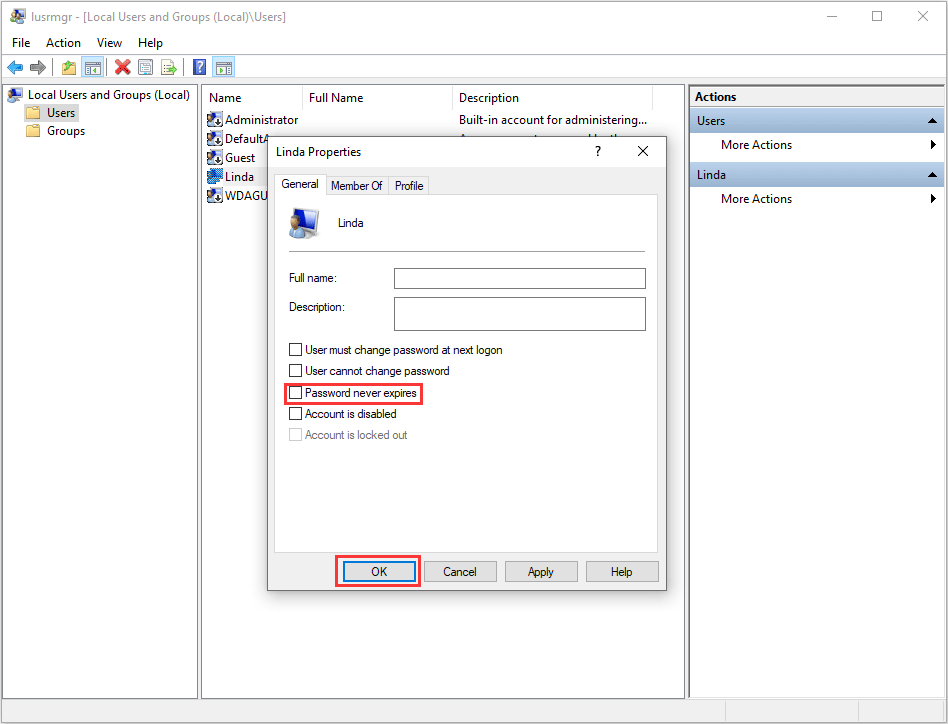
- In the user Properties window, uncheck the Password Never Expires option and then click OK button to save changes.
Step 2: Set the maximum password age. Unlike a Microsoft account, you can set the password for your local account to expire at any time you want. If you don’t want to set the maximum password age, the default maximum password age on Windows 10 is 42 days. When it’s time to reset your password, you’ll be prompted to change it.
1. Set the maximum password age via Local Group Policy Editor:
- Press “Windows+R” to open the Run launch box.
- Type “msc” and then click OK button to open the Local Group Policy Editor.
- Navigate to Computer Configuration > Windows Settings > Security Settings > Account Policies > Password Policy.
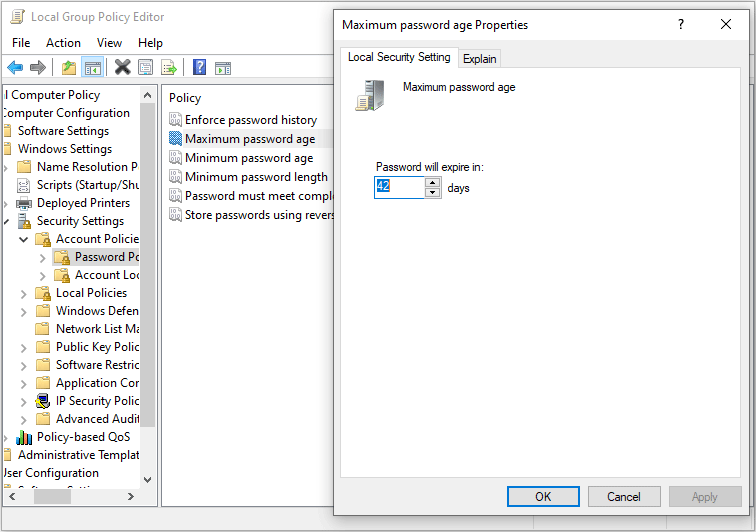
- Highlight Password Policy and double-click Maximum Password Age in the right panel.
- Change the value from 42 to your preferred length of days.
- Click OK button to save the setting.
2. Set the maximum password age via Windows PowerShell:
- Right-click the Start menu, and then click Windows PowerShell (Admin) or Command Prompt (Admin), depending on your version of Windows.
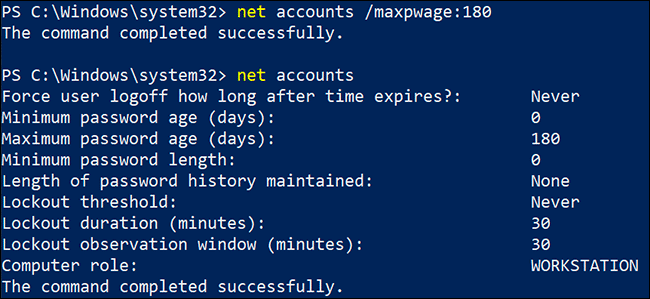
- In the PowerShell window, type “net accounts” to find the existing maximum password age for your accounts.
- Type “net accounts /maxpwage:#” to change the maximum password age. Please note that “#” stands for the length of time (in days) you want to use and you should replace it accordingly.

User Comments :