After January 14th, 2020, you'll have to pay extended support for Windows 7 support. Maybe, it's time to upgrade to Windows 10. In this post, MiniTool shows you how to prepare your SCCM Server to deploy Windows 10.
Preparatory Work Before Deploying Windows 10
Before preparing your SCCM Server to deploy Windows 10, you should check SCCM and Windows ADK version. First, click here to check if your SCCM version supports the Windows 10 version you want. If not, you should update your SCCM.
Second, click here to check whether you’re running a supported version of the Windows ADK, which is a required external dependency when you deploy operating systems with Configuration. If it is not a supported version, you should update it, too.
Then, you can follow the content below to deploy Windows 10 in SCCM.
How to Deploy Windows 10 in SCCM
Step 1: Import Windows 10 OS. If you don’t have the Windows 10 ISO, you can download it from Microsoft Site.
- Open the SCCM Console and go to Software Library / Operating Systems / Operating System Images.
- Right-click Operating System Images and select Add Operating System Image.
- On the Data Source tab, browse to your WIM file. The path must be in UNC format.
- On the General tab, enter the Name, Version and Comment, click Next.
- On the Summary tab, review your information and click Next. Complete the wizard and close this window.
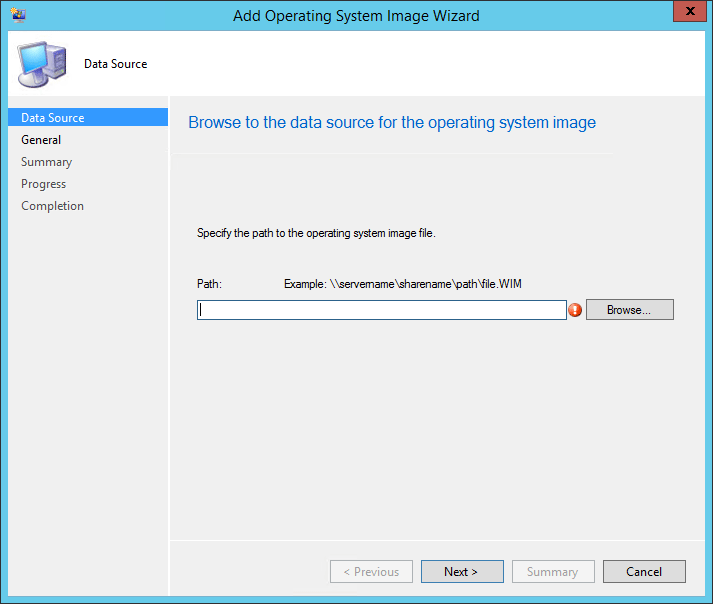
Step 2: Send the Operating System Image (WIM file) to distribution points by right-clicking the Operating System Image and selecting Distribute Content.
Step 3: Import the complete Windows 10 media in Operating System Upgrade Packages, which is used to upgrade an existing Windows 10 or a Windows 7 (or 8.1) device to Windows 10 using an Upgrade Task Sequence.
- Open the SCCM Console and go to Software Library / Operating Systems / Operating System Upgrade Packages.
- Right-click Operating System Upgrade Packages and select Add Operating System Upgrade Packages.
- In the Data Source tab, browse to the path of your full Windows 10 media.
- In the General tab, enter the Name, Version, and Comment, click Next.
- On the Summary tab, review your information, click Next, and complete the wizard.
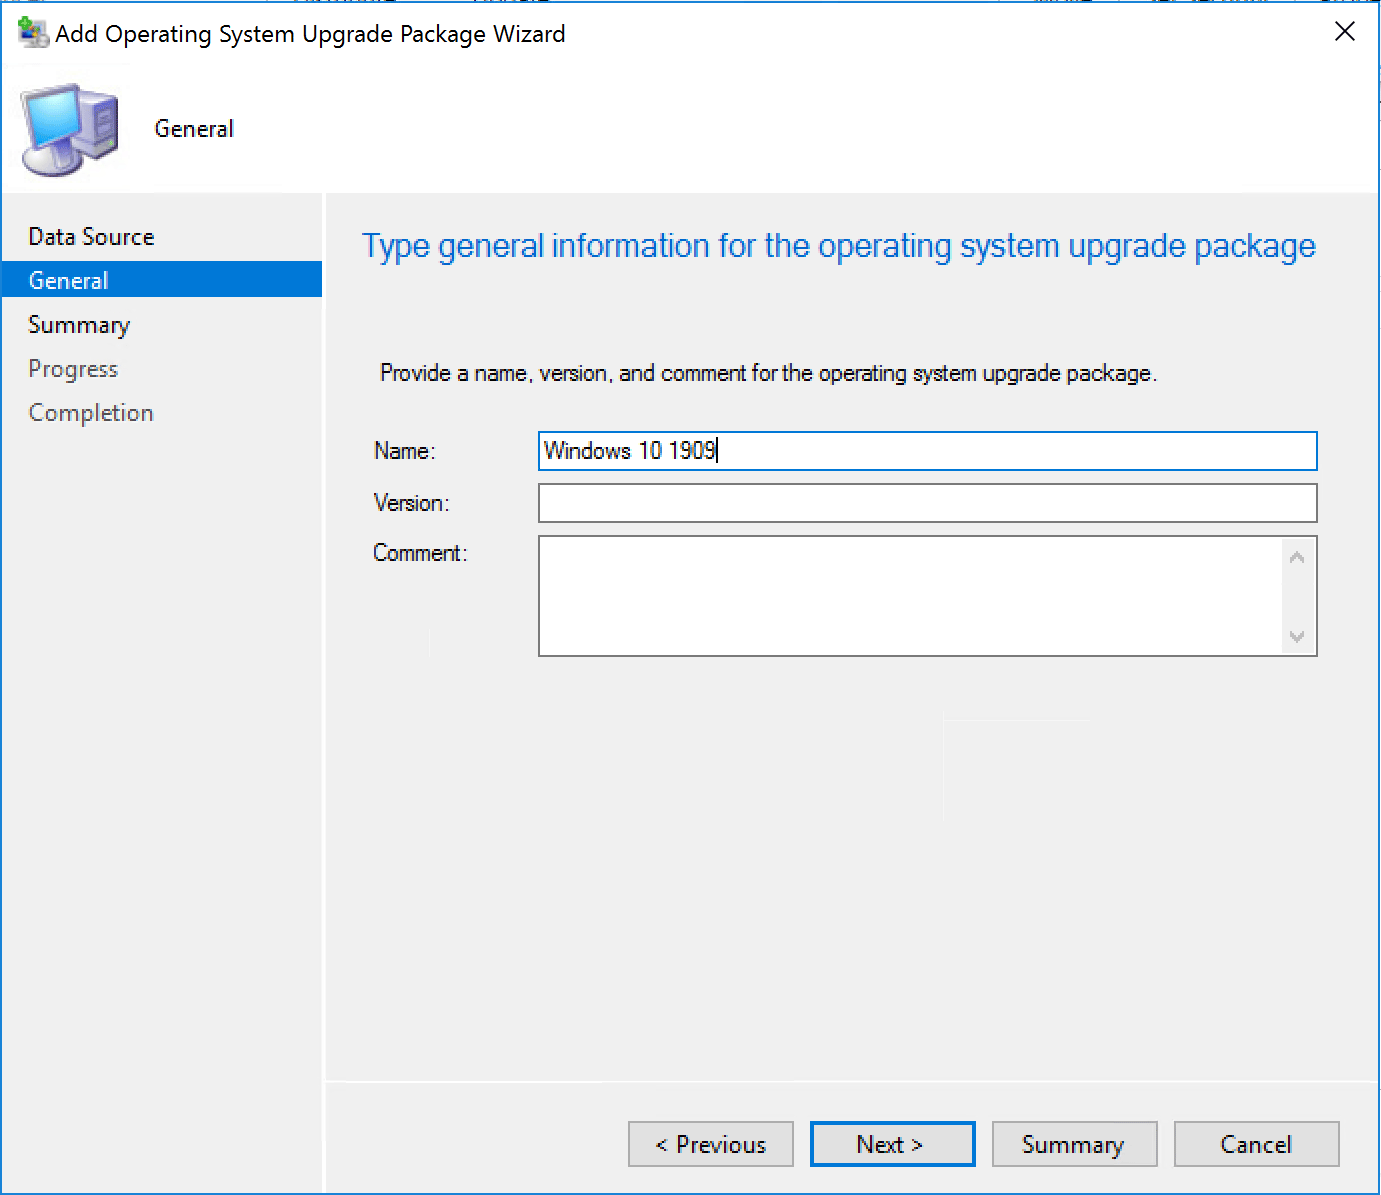
Step 4: Send the Operating System Upgrade Package to the distribution points.
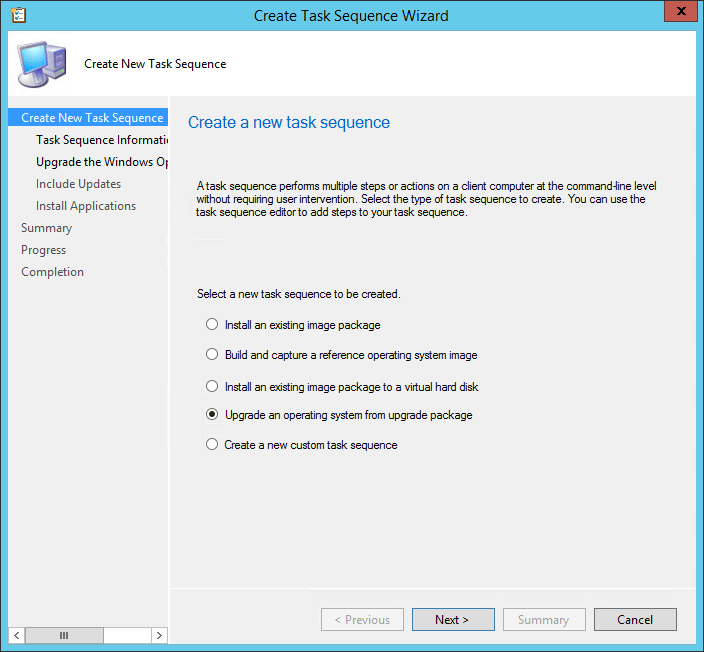
Step 5: Create an SCCM task sequence upgrade.
- Open the SCCM Console and go to Software Library Operating Systems Task Sequences.
- Right-click Task Sequences and select Upgrade an operating system from upgrade package.
- In the Task Sequence Information tab, enter a Task Sequence Name and Description.
- On the Upgrade the Windows Operating System tab, select your upgrade package by using the Browse. Then, select your Edition Index depending on the edition you want to deploy.
- On the Include Updates tab, select the desired Software Update task.
- On the Install Applications tab, select any application you want to add to your upgrade process.
- On the Summary tab, review your choices and click Next. Then, click Close.
Step 6: Go to Software Library Operating Systems Task Sequences and right-click your upgrade task sequences to select Edit. Then, you will see the upgrading steps to be applied by SCCM. In this step, you should ensure that you have chosen the right Windows 10 Edition.
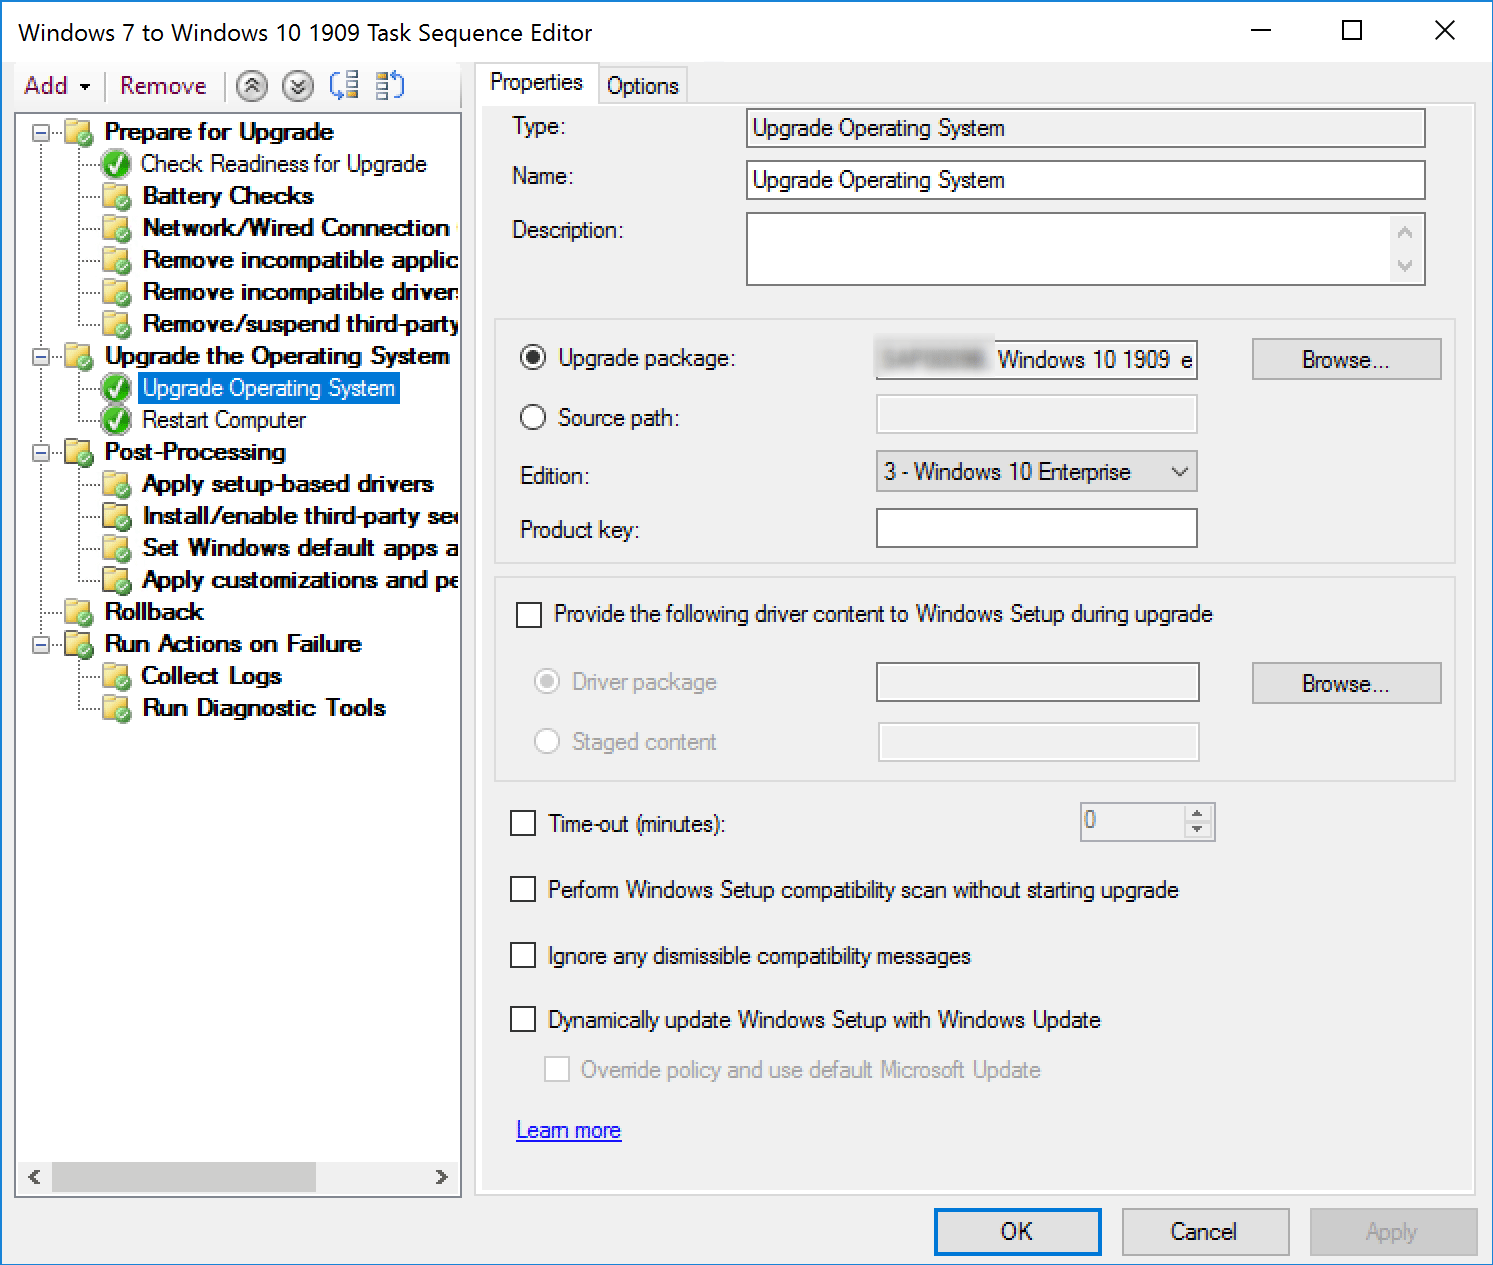
Step 7: Deploy the task sequence to the Windows 7 computer.
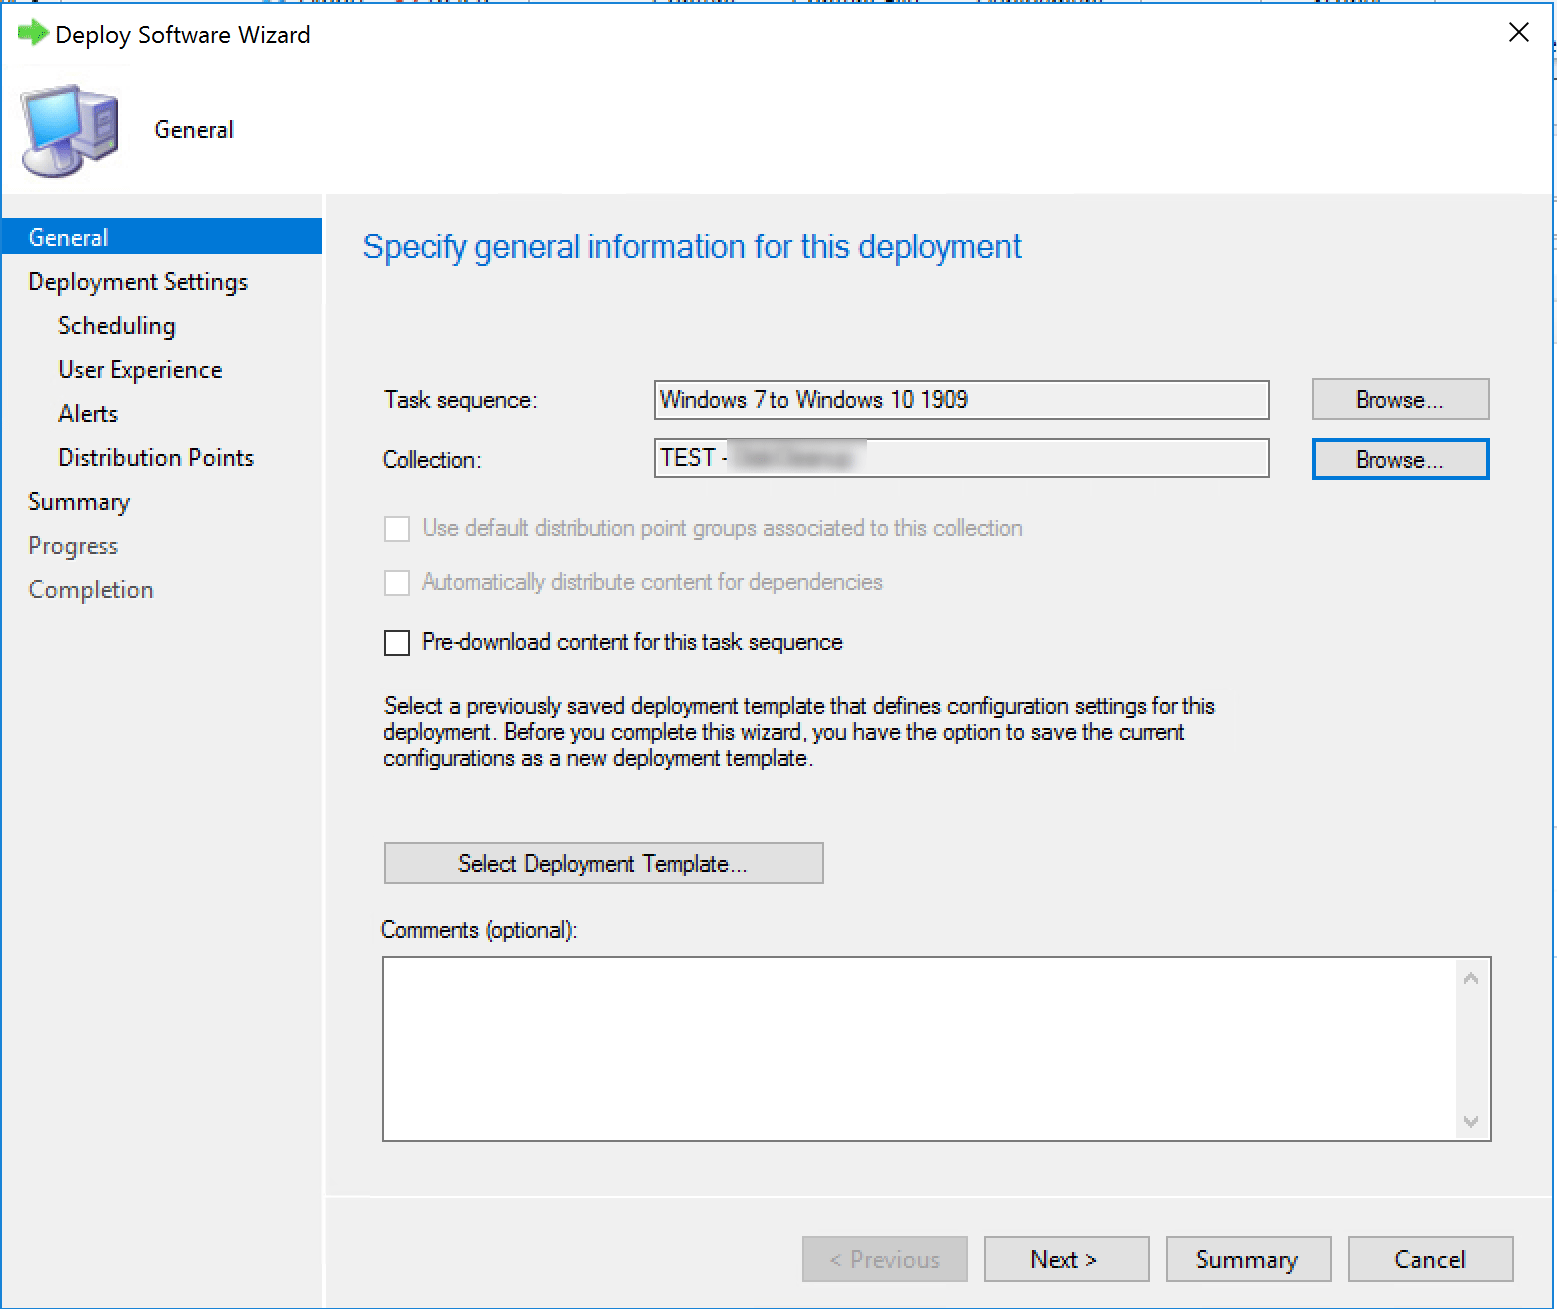
- Go to Software Library Operating Systems Task Sequences. Then, right-click Task Sequences and select Deploy.
- On the General pane, select a collection that you want to receive the Windows 10 upgrade.
- On the Deployment Settings tab, select the Purpose of the deployment.
- On the Scheduling tab, enter the desired available date and time.
- On other panes, select the desired options. Then, complete the wizard.
Step 8: Log on the Windows 7 computer and launch a Machine Policy Retrieval & Evaluation Cycle from Control Panel / Configuration Manager Icon. After that, the Windows 7 computer will restart to upgrade to Windows 10.


User Comments :