Do you want to run Android 12L on your Windows 11? If you want to try this, you can refer to this post, in which MiniTool Partition Wizard introduces the way how to install and run Android 12L on your Windows 11.
What is Android 12L?
Android 12L is a new version of OS based on the mobile OS Android 12 released by Google last year. It is designed for multiple form factor devices, including phones, tablets, foldable, and Chromebooks.
It has a special feature that makes Android 12L become better on large screens. And it’s not only optimized for large screens but also has a powerful and intuitive multitasking ability and the compatibility ability is improved at the same time.
If you want to try this OS on your Windows 11 computer, you can download an Android Studio on your computer to experience this system.
Android Studio is the official Integrated Development Environment (IDE) for Android app development. It is also an Android Virtual Device (AVD) that can simulate the characteristics of an Android phone, tablet, Wear OS, Android TV, or Automotive OS device.
Here are the ways below!
How to install and run Android 12L on Windows 11?
Before you install and run Android 12L on Windows 11, you need to have an Android Studio on your Windows 11 at first. After you have installed Android Studio on your computer then you can install and run Android 12L on your Windows 11.
Step 1: Download and Configure Android Studio.
- Go to the Canary build of Android Studio, and then click “Download Dolphin (2021.3.1) Canary 8” to download the Android Studio.
- Unzip the compressed files which you just have downloaded on your computer.
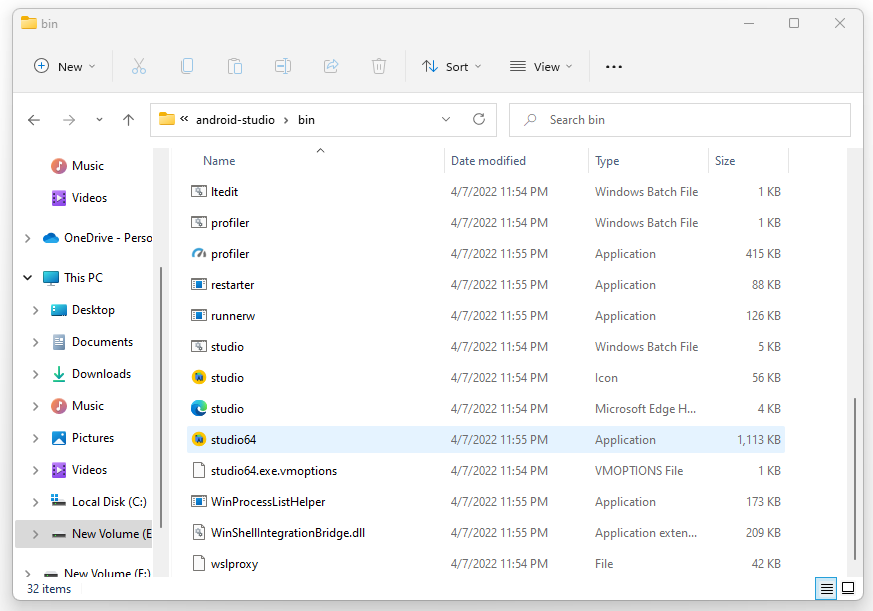
- Then open the android-studio folder and find the bin folder on it.
- Open the bin folder and find an exe file named “studiox64”.
- Run the executor and you will see a pop-up window, then select Do not import settings, and click OK on this window.
- Then choose the type of setup as Standard. Then you need to keep clicking Next to keep everything as default until you are on the License page.
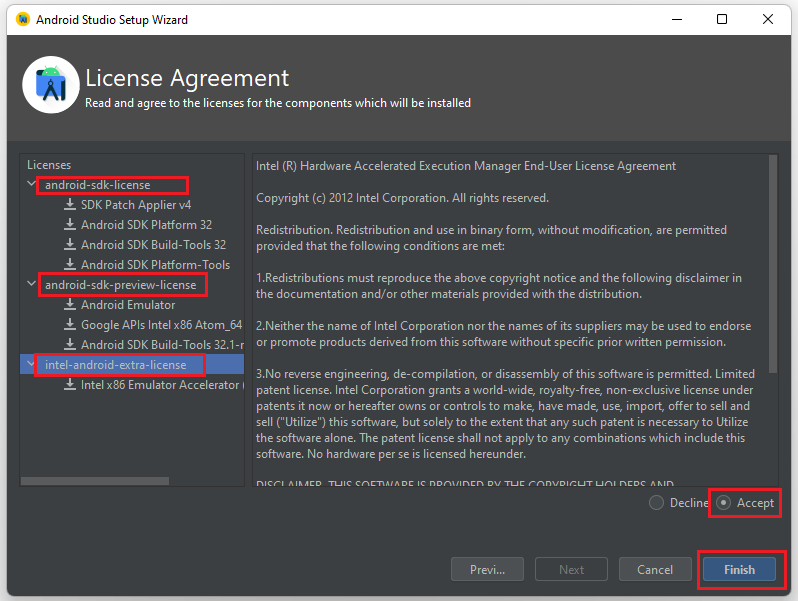
- On the license page click on android-sdk-license, android-sdk-preview-license, and intel-android-extra-license one by one to click Accept. Then click Finish.
- After you accept all the licenses, it will start to download the Android Studio.
Step 2: Download and Use Android 12L
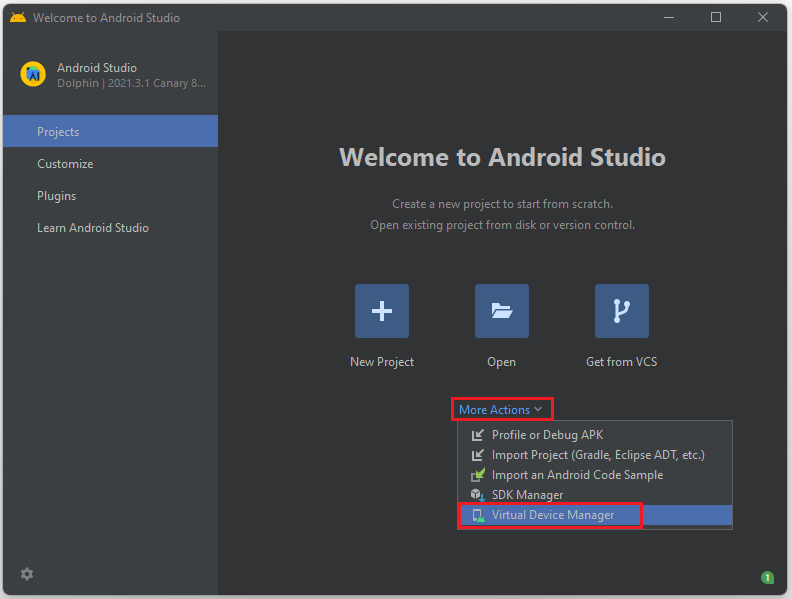
- After you have done all the above, you will go to the Android Studio window automobility. Then you need to click on the More Actions button and choose the Virtual Device Manager option from the drop-down menu.
- Next, click on the Create virtual device button on the Device Manager page.
- You will enter the Select Hardware page, click Tablet, and choose Pixel C or other devices you like. No matter what tablet you choose, this software can simulate what Android12L will look like on that device.
- Then click Next. And it will open the System Image window.
- In the new interface, click the Download button beside the Then scroll down the agreement and accept it.
- Be patient to wait because the file is a bit large. When the downloading is complete, click the Finish
- Go back to the Device Manager, and click Next to the Android Virtual Device (AVD) window.
- In the new window, you can name the device and choose the Startup orientation to be like Portrait or Landscape according to your preferences. Finally, click Finish and you will back to Device Manager again.
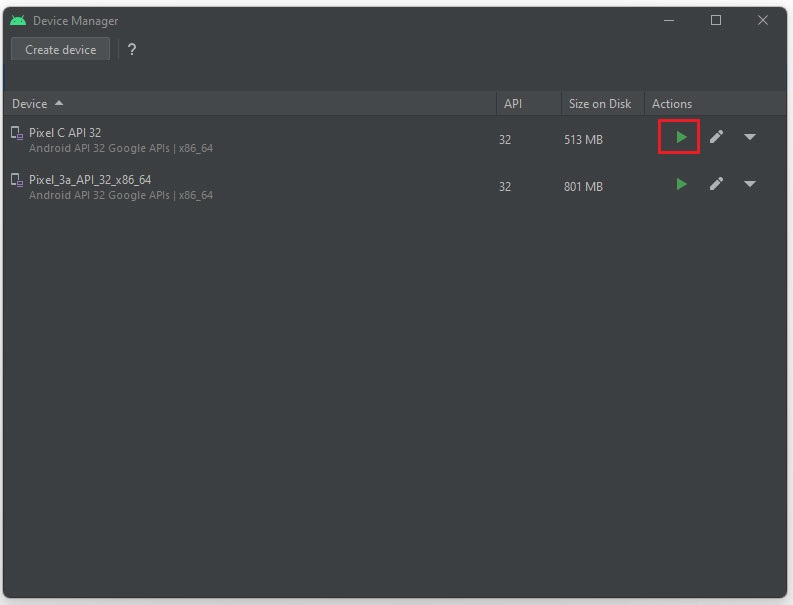
- Click the Play icon behind Actions to run the Android 12L in the Pixel C tab.
These are the way to run Android 12L on your Windows 11. If you want to run Android 12L on your computer, you can try this way. For any questions about how to run Android 12L on your Windows 11 computer, leave comments below. We will get back to you as soon as possible.


