Print Screen Button Not Working
Hello, I’m a gamer and sometimes have need to take screenshots of what I’m doing for reference, forum posts, etc…You can imagine my surprise when I hit the “Prt Sc” key on my Windows 10 PC only to have nothing on the clipboard when I tried pasting into Windows Paint…What might be the cause of this and how can I fix it? —answers.microsoft.com
Where is the Print Screen key? What does Print Screen button look like? In general, the Print Screen key is located at the upper right corner of the keyboard and it is usually marked as “Print Screen”, “PrtSc”, “PrtScn”, “PrtScrn”, “Prt Scr”, or something like that.
The Print Screen button is used to capture your desktop screen. In Windows 10/11, if you just press the Print Screen (PrtSc) key, a screen shot will be saved to the Windows clipboard.
However, many people may encounter the Print Screen button not working issue on Windows 10/11. If the PrintScreen button doesn’t work, you can follow the solutions below to solve it.
Solution 1. Stop Background Programs
Many background programs such as OneDrive, Snippet tool or Dropbox etc. can take over the Print Screen key and prevent you from taking screenshots on your computer. For example, OneDrive may automatically save screenshots you capture to its server.
You can change the settings of these apps to solve the Print Screen button not working issue. But for convenience, I recommend you close these programs one by one through the following steps:
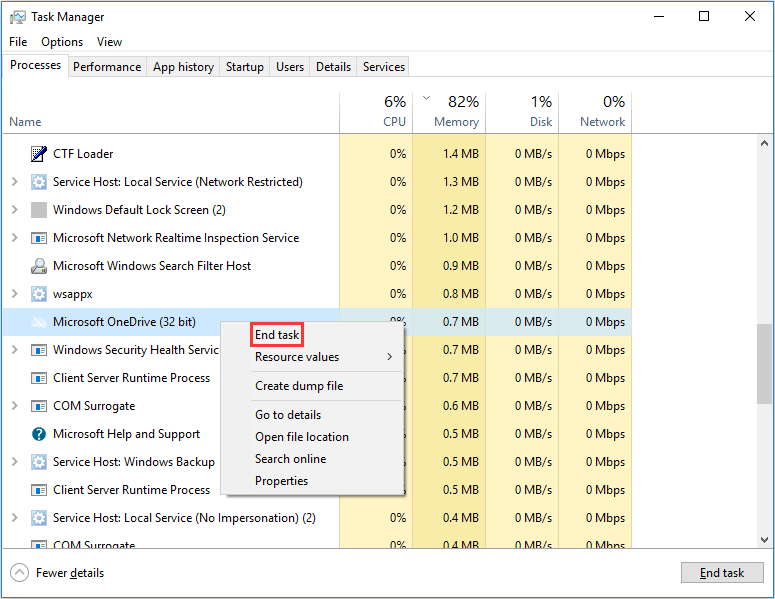
Step 1: Press “Ctrl + Shift + Esc” key together to open Task Manager.
Step 2: Right-click on programs and select End Task to close them.
Solution 2. Make Sure the Print Screen Shortcut Is Enabled
Only when the Print Screen shortcut is enabled in Windows, you can use the Print Screen key to capture the screen.
- Press Windows + U keys to open Ease of Access.
- Click Keyboard.
- Find the Print Screen shortcut section and turn it ON.
Solution 3. Use Hotkey Combination
If pressing single PrtSc key doesn’t work, you can try the following keyboard shortcut buttons:
- Alt key + PrintScreen: This hotkeys button will capture the currently selected window and allow you to save this image by using the paint or any other editing application.
- WinKey + PrintScreen: This hotkeys button will capture the screenshot and save this image to the Screenshots folder with the name Screesnshot (NUMBER). You can find this folder in Pictures on PC. Please note that you should use “Fn + WinKey + PrintScreen” for laptops.
Solution 4. Check If There Is an F Mode or F Lock Key on the Keyboard
If there is an F Mode key or F Lock key on your keyboard, the Print Screen not working Windows 10/11 may be caused by them, because such keys can disable the PrintScreen key. If so, you should enable the Print Screen key by pressing F Mode key or F Lock key again.
Solution 5. Update Keyboard Driver
An old or incorrect keyboard driver may also cause Print Screen not working Windows 10/11. Thus, you can try updating the keyboard driver to solve this problem. Please refer to the following steps:
Step 1: Press “Windows + X” keys and then choose Device Manager from the shortcut menu to open it.
Step 2: Expand Keyboards directory and then right-click on Standard PS/2 Keyboard. Then, select Update driver.
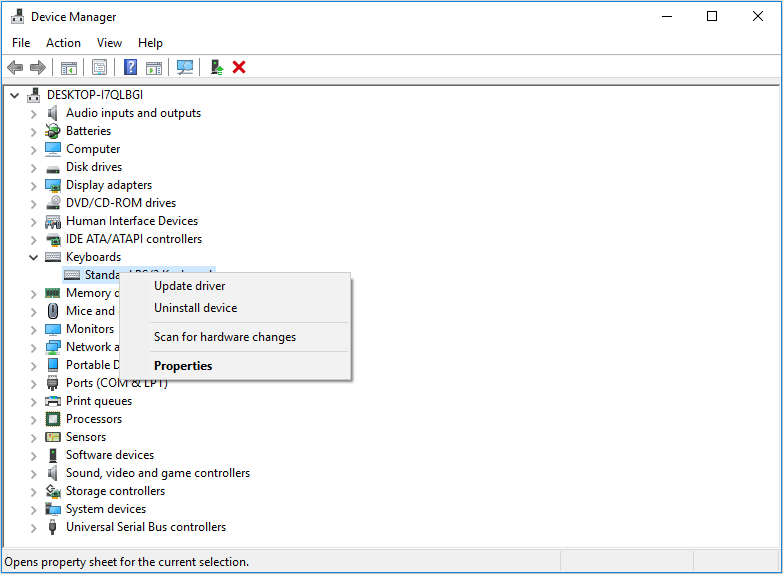
Step 3: Select Search automatically for updated driver software and wait for Windows to automatically install the latest driver.
Then, reboot your PC and see if you’re able to fix the issue. If not, you should then perform the following steps to update keyboard driver again:
Step 1: Head over to your manufacturer’s website and download the required drivers accordingly. Then, you should extract the driver file if it is a compressed file.
Step 2: Similarly, open Device Manager, expand Keyboards, right-click on Standard PS/2 Keyboard and choose Update driver.
Step 3: Select Browse my computer for driver software. Then, click on Let me pick from a list of available drivers on my computer. Finally, select the new driver from the list and click Next.
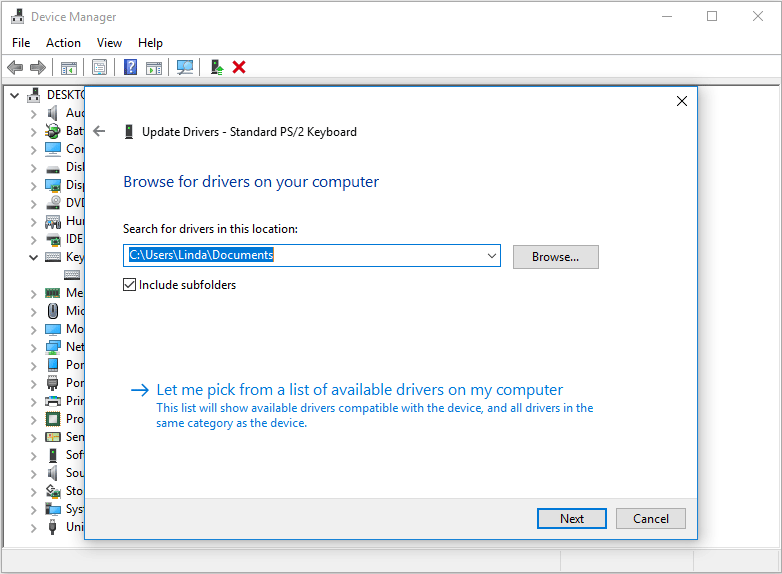
Then, reboot your PC to save changes and see if you have fixed Print Screen not working Windows 10/11 issue.
If you don’t know how to update a driver still, you can try using Driver Easy. The Driver Easy free version only allows you to detect devices with outdated drivers and download available latest drivers for those devices. To install those drivers, you should do that manually, but this is a tough job.
Therefore, I recommend you use Driver Easy Pro, with which you can update outdated drivers with just one click. Here is the guide:
Step 1: Install Driver Easy and launch it. Click the Scan Now button.
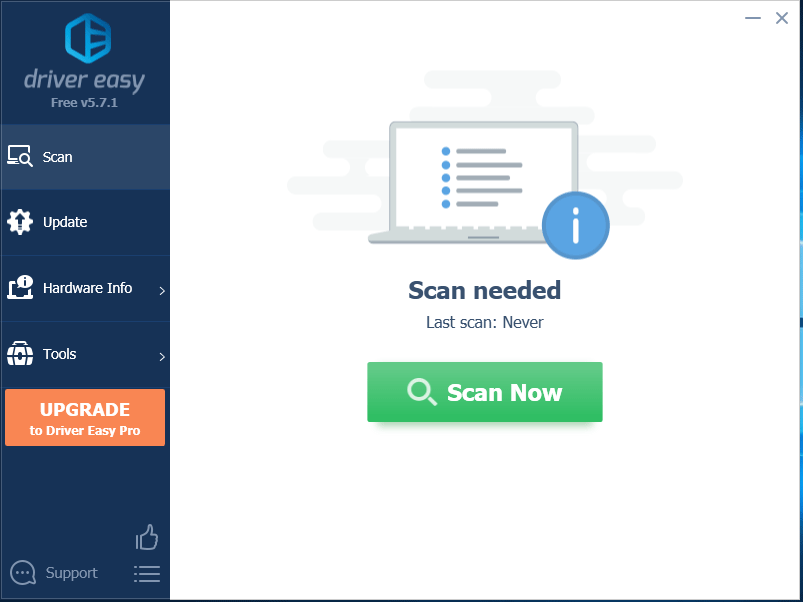
Step 2: After the scanning process is completed, click the Update All button to download and install the latest drivers for all devices with outdated drivers.
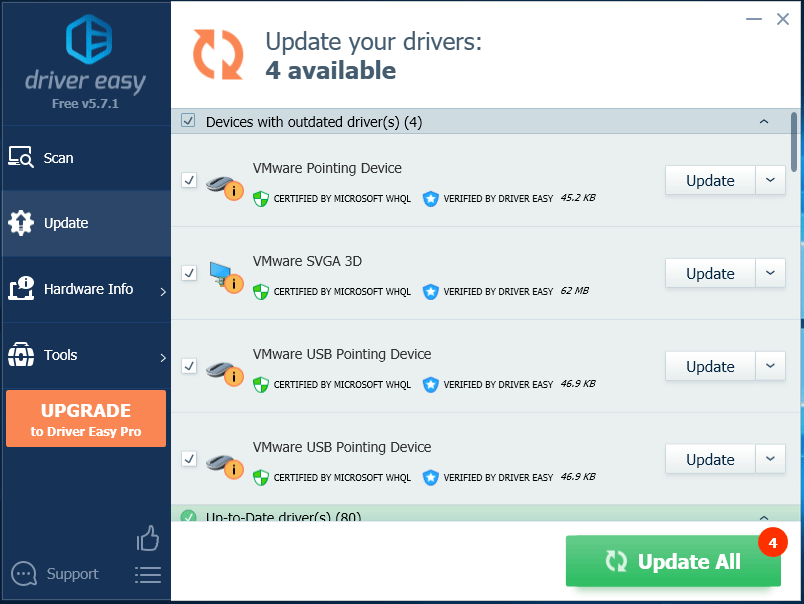
Of course, Driver Easy Pro also has other features, such as driver backup, driver update history, etc. I recommend you have a try!
Solution 6. Use Third-Party Tool
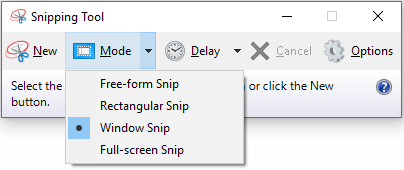
If all the above methods can’t solve the Print Screen button not working Windows 10/11 issue, you can use a third-party app: Snipping Tool. This in-built tool in Windows can take a screenshot of the portion of the currently active window or the whole screen. Please refer to the following steps to use it:
Step 1: Press “Windows + S” keys, type “snipping tool” and click the best-matched app to launch it.
Step 2: Click Mode and choose a proper snipping mode from the pop-up menu.



User Comments :