If you are troubled by Phasmophobia mic not working issue, this post is what you need. It analyses the potential causes and offers you some effective solutions. Explore the details with MiniTool now!
Possible Causes for Phasmophobia Mic Not Working
Multiple elements can trigger the Phasmophobia mic not working issue. Here, we list possible causes for the error as follows.
- The game uses an incorrect microphone.
- The Phasmophobia mic is not configured as the default.
- The exclusive mode or enhancements is enabled.
- The game is not installed on the main drive.
- The Phasmophobia app is not allowed to use the microphone.
- The voice recognition drivers are missing from the PC.
- Steam’s admin breaks the voice recognition tech.
Fix 1: Ensure that Apps Have the Access to Microphone
If Phasmophobia app doesn’t have access to the microphone, you will receive the Phasmophobia voice chat not working error. If so, you need to grant the microphone access for the app with steps below.
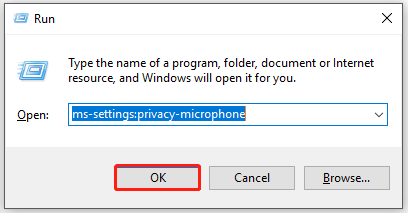
Step 1: Hold the Windows and R keys to open the Run utility, and then input ms-settings:privacy-microphone and click OK to continue.
Step 2: Drop down the content in the right pane to move to the Allow apps to access your microphone section. Then toggle the button under this section.
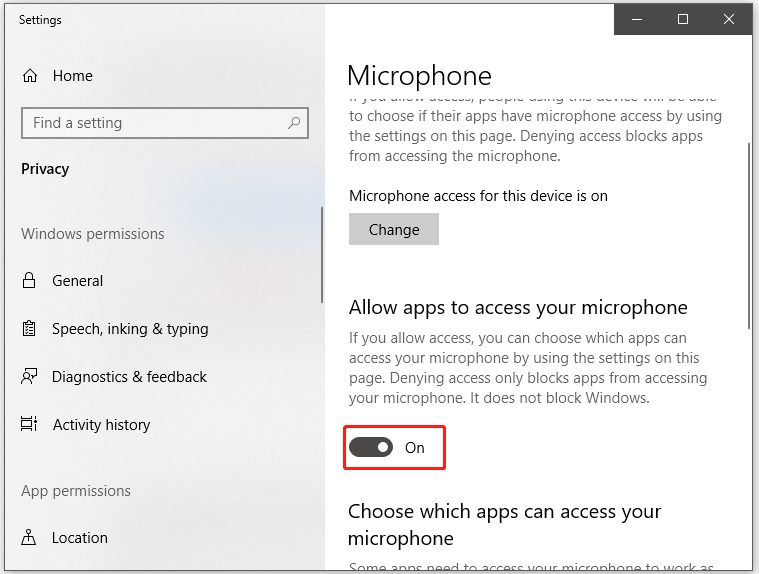
Step 3: Scroll down to the apps list and then find the Phasmophobia program. Change its status to the On position.
Step 4: Now, restart your PC and check if the Phasmophobia mic not working in game issue is solved.
Fix 2: Check and Modify Sound Settings
When your microphone is not detected or chosen incorrectly, the Phasmophobia mic not working issue can occur. In this case, you should check and modify sound settings with steps below.
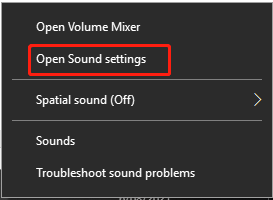
Step 1: Right-click on the Sound icon in the Taskbar area and then click on Open Sound settings.
Step 2: Scroll down the content in the right side of the window to locate to the Input section. Here, you can see your current input device. If it is not selected correctly, select the correct input device from the drop-down list. After that, click on Device properties.
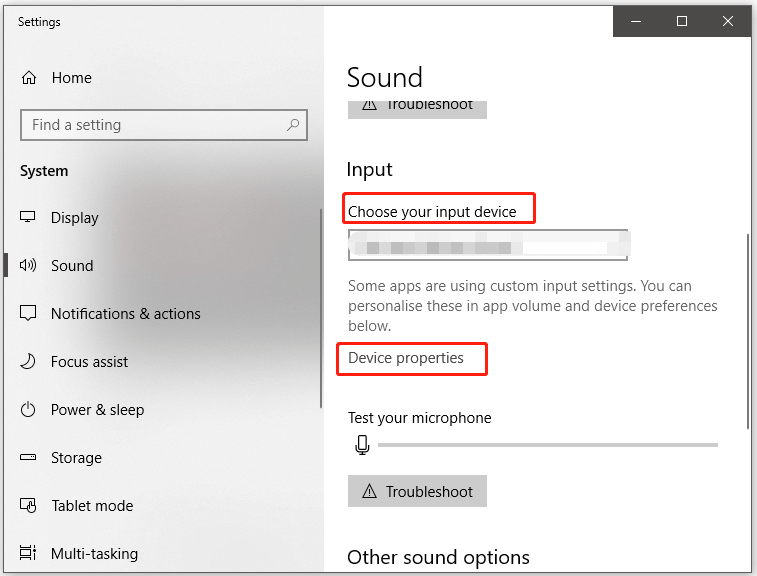
Step 3: Then set the volume to at least 50.
Fix 3: Disable Exclusive Mode
Follow these steps to disable the exclusive mode.
Step 1: After opening the Run window, type mmsys.cpl and hit Enter.
Step 2: Navigate to the Recording tab, and then highlight the active playback device and click on Properties.
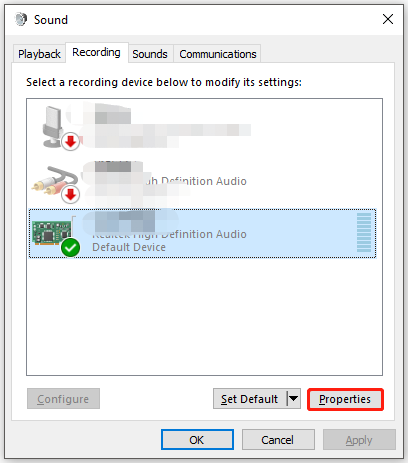
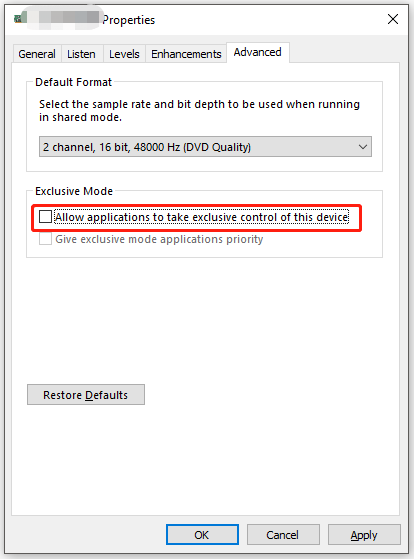
Step 3: Tap the Advanced tab and uncheck the Allow applications to take exclusive control of this device option under the Exclusive Mode section.
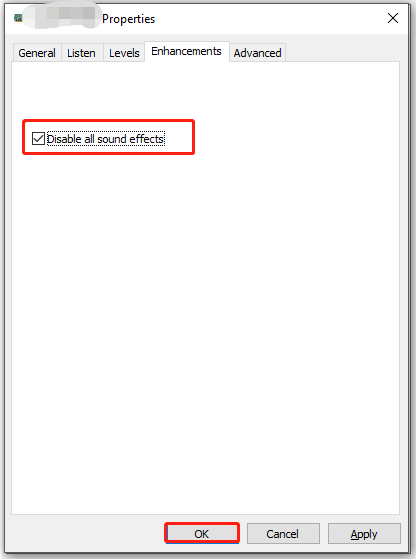
Step 4: Click on the Enhancements tab and check the Disable all sound effects option. Finally, click OK to save the changes.
Fix 4: Update Audio Driver
The Phasmophobia voice chat not working error may appear due to the outdated audio driver. For that, update the driver with the following steps.
Step 1: Right-click on the Windows icon on the desktop and click Device Manager.
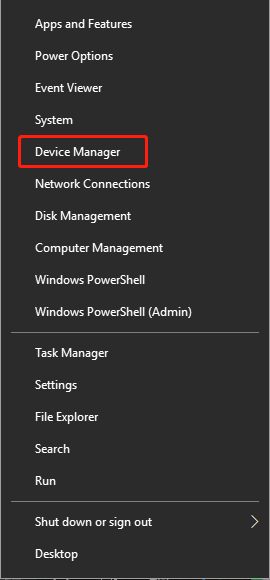
Step 2: Double-click on Audio inputs and outputs to expand it. Then right-click on your audio driver from the expanded list and click Update driver.
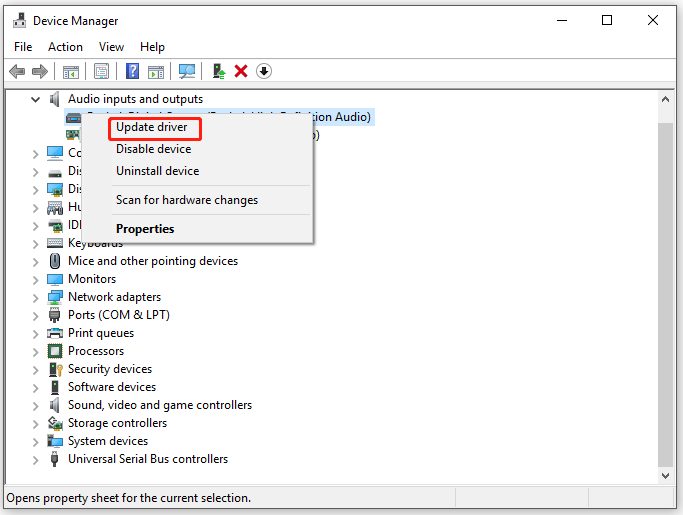
Step 3: In the next window, select a way to update the driver. Then follow the on-screen instruction to finish the operation.
Fix 5: Reset Network
According to user reports, resetting network is also helpful for solving the Phasmophobia voice chat not working issue. Here are detailed steps.
Step 1: Open Settings by pressing Windows + I key.
Step 2: Click on Network & Internet > Status > Network reset.
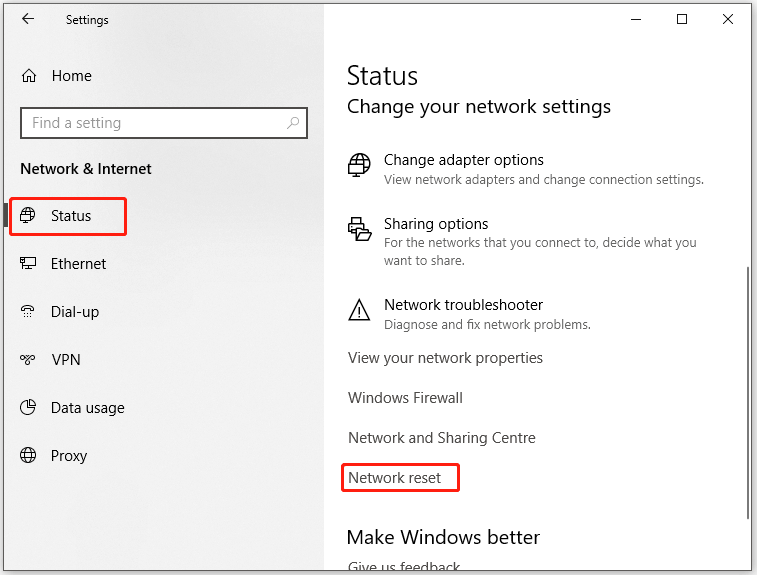
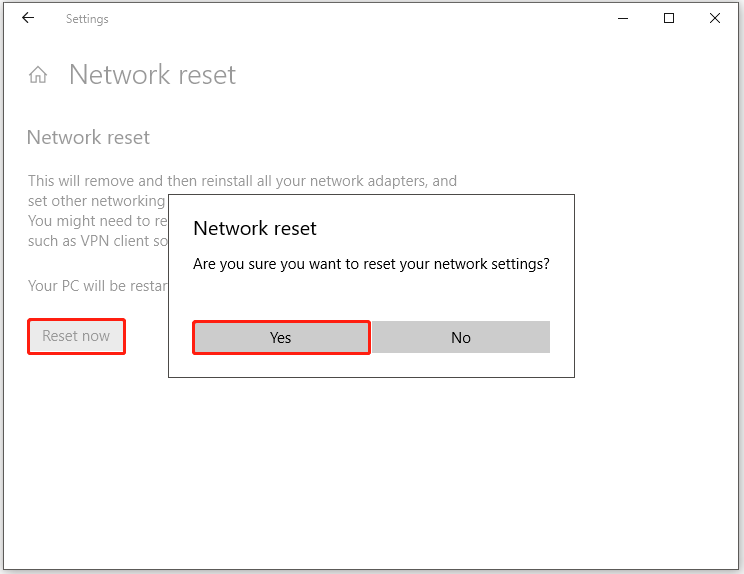
Step 3: Click on Reset now button. If you are prompted with a confirmation window, click Yes to confirm the operation.

![[Detailed Steps] Change the Default Audio Output on Windows 11](https://images.minitool.com/partitionwizard.com/images/uploads/2021/07/change-default-audio-ouput-on-win11-thumbnail.jpg)
![Windows 11 Bluetooth Not Working [Reasons & Fixes]](https://images.minitool.com/partitionwizard.com/images/uploads/2021/07/win11-bluetooth-not-working-thumbnail.jpg)
User Comments :