In general, to create a new partition, you can shrink a volume to get the unallocated space and create a new one. However, there is no Shrink Volume in Disk Management of Windows XP. Thus, how to create partition after Windows XP installed.
Want to Create Partition after Windows XP Installed?
In general, if you find the existing partitions are unreasonable, you need to repartition it to meet your further needs. Or when you need to create a new partition, the general way is to shrink the volume to release some space first and then create new partitions on the new released unallocated space.
However, if you are a Windows XP user, you may find that this way is unavailable. Unlike Windows Vista and the later Windows operating system versions, Windows XP Snap-in Disk Management doesn’t offer the Shrink Volume feature to release some space. Thus, this method is not available if you are using Windows XP.
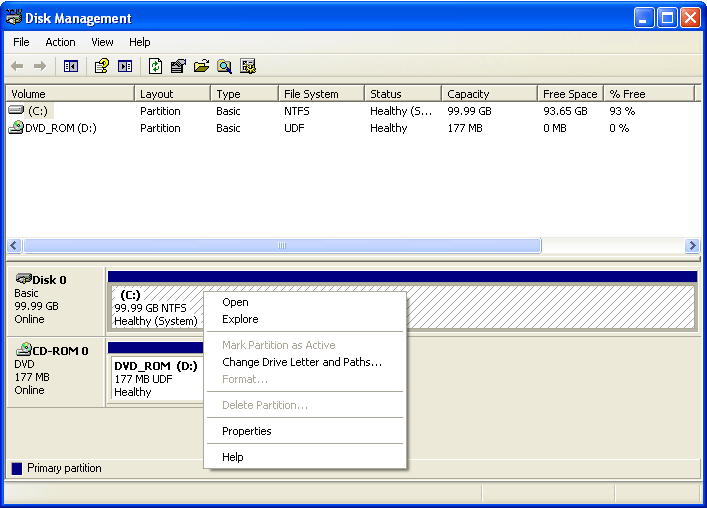
Therefore, do you know how to create partition on Windows XP?
How to Create Partition on Windows XP?
As we have mentioned in the above part, that way is not available for a Windows XP user. Thus, we will show you a reliable and effective way to create partition Windows XP without losing any personal files.
In order to create partition Windows XP, you can take advantage of a Windows XP partition manager – MiniTool Partition Wizard. It is designed to optimize the partition and disk usage.
In addition, MiniTool Partition Wizard has many powerful features. It can aid you to extend partition, migrate OS to SSD, clone disk and so on.
So in order to create partition Windows XP, the Windows XP partition manager – MiniTool Partition Wizard is competent. Just download it from the following button and try to create partition after Windows XP installed.
MiniTool Partition Wizard FreeClick to Download100%Clean & Safe
And then, we will show you how to create partition after Windows XP installed step by step with pictures.
Step 1: Install the Windows partition manager, and launch it to enter its main interface.
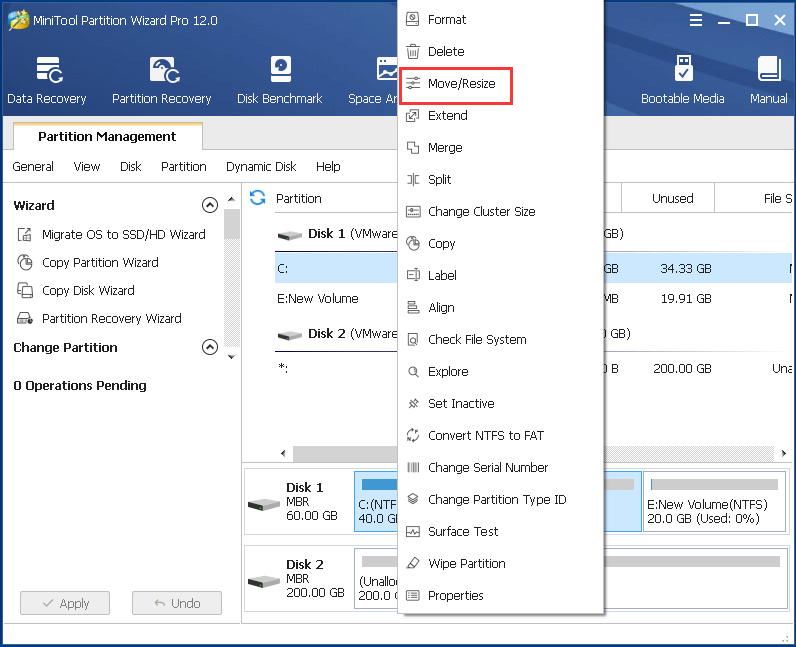
Step 2: Since you need to create a new partition, the first step you need to do is to release the space. Thus, select the system partition and choose Move/Resize feature from the context menu to continue.
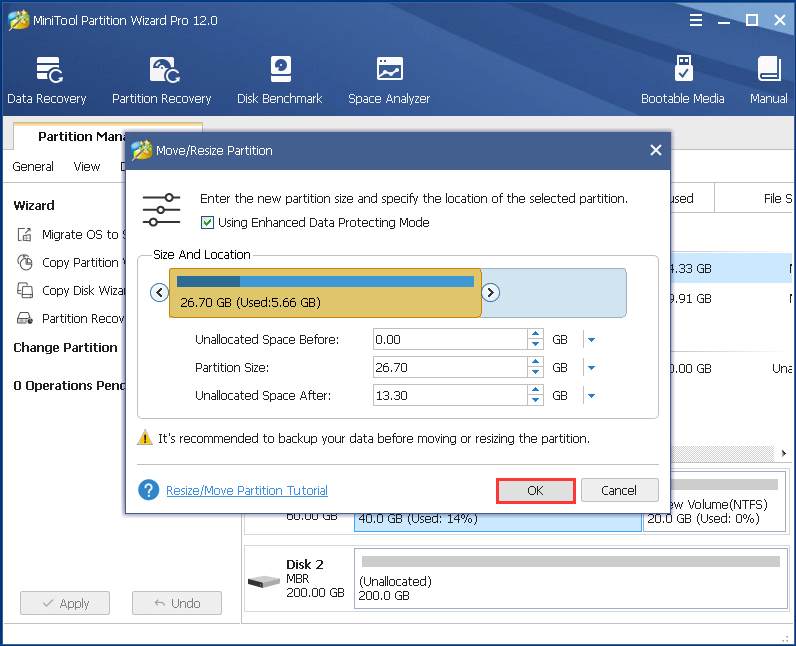
Step 2: In the popup window, you can drag the slide to decide how much space you want to take and click OK to continue.
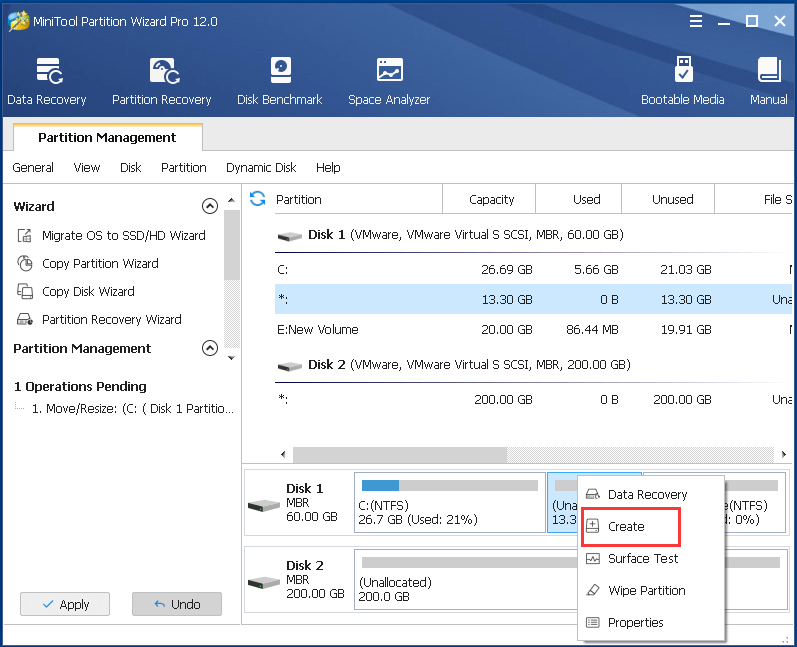
Step 3: Then choose the unallocated space and right-click to choose Create to continue.
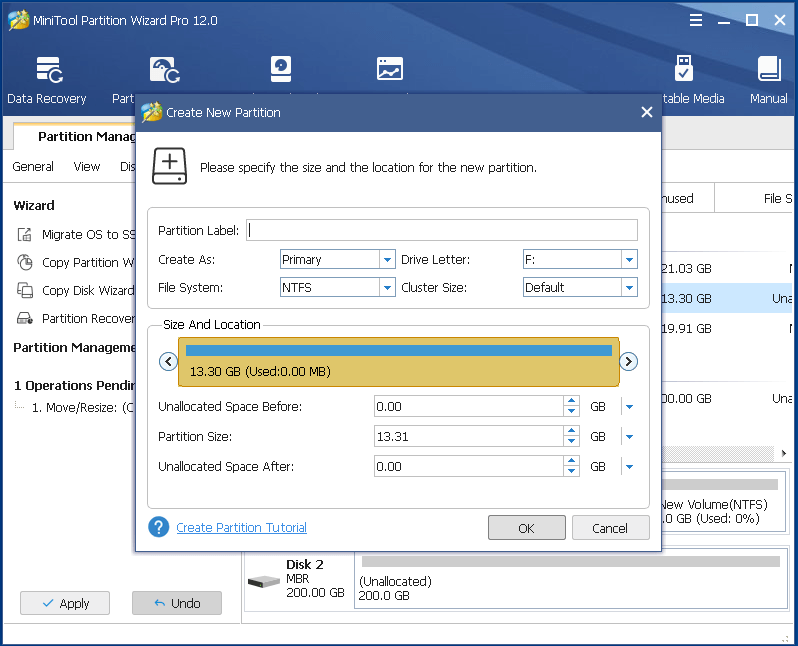
Step 4: In the next popup window, you can set the properties of the new partition, such as the file system, cluster size, drive letter and so on. Then click OK to continue.
Step 5: Returning to the main interface, you can preview the changes and click Apply to confirm these changes. After that, MiniTool Partition Wizard requires you to restart the computer, thus click Restart Now to continue.
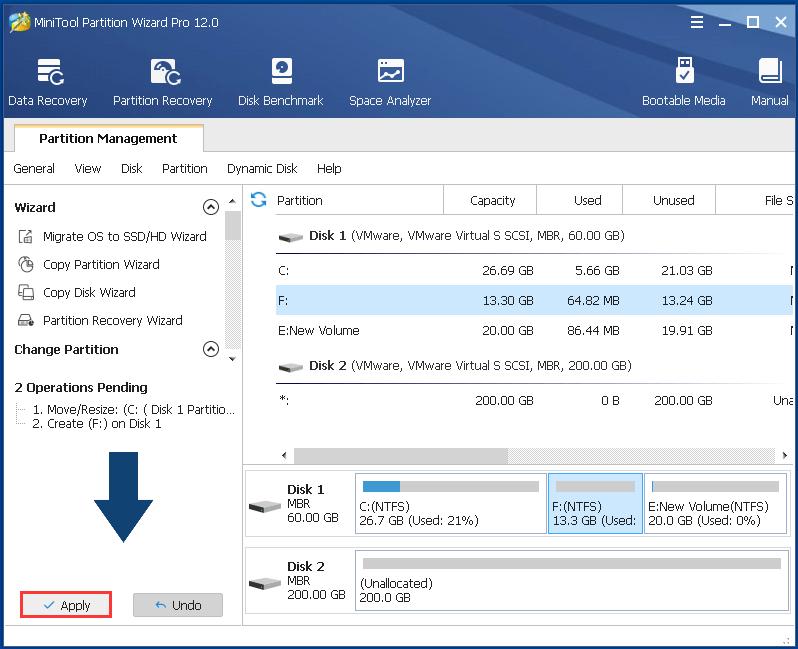
Then you can successfully create partition Windows XP.
As you can see, with this Windows XP partition manager, you can successfully resize the partition and create a new one even though you are using Windows XP. With more partitions, you can separate the system partition and data partition so that you can find out the data when you need.
In addition, MiniTool Partition Wizard can help you to increase partitions in Windows XP.
Bottom Line
After reading this post, you can get one effective way to create partition after installed Windows XP. And you can try to use MiniTool Partition Wizard to create partition Windows XP. In addition, this Windows XP partition manager would not lead to data loss.
However, if you have any better problem of MiniTool Partition Wizard, please don’t hesitate to contact us via the email [email protected].

User Comments :