When launching the GeForce Experience application, many users receive an error message “NVidia Share is not responding”. If you are also trying to resolve it, this post of MiniTool is what you need.
NVidia Share is a practical hardware acceleration screen recording feature in the GeForce Experience application. This utility enables users to record a time behind and provides users a lot of flexibility when playing games. Sometimes, however, NVidia Share is not responding. According to a survey, this issue is often related to an incompatible or outdated graphics card driver. Now, let’s see how to fix NVidia Share not working.
Method 1. Roll Back or Update Your NVidia Graphics Card Driver
If your current graphics card driver is not compatible with GeForce Experience, you may encounter NVidia Share not responding. To fix this issue, you can try rolling back or updating your NVidia graphics card driver. Here’s how to do that:
Step 1. Right-click the Start menu and select Device Manager from the elevated menu.
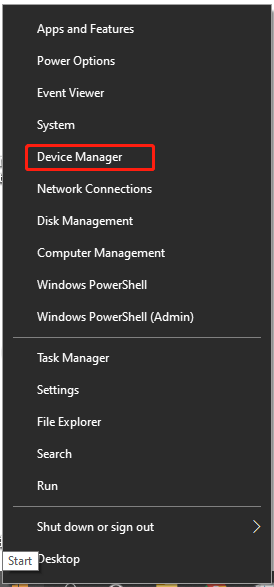
Step 2. Expand the Display adapters category, and then right-click the affected graphics card driver and select Properties.
Step 3. Navigate to the Driver tab and click on Roll Back Driver. Click on Yes to confirm and follow the on-screen prompts to complete this process.
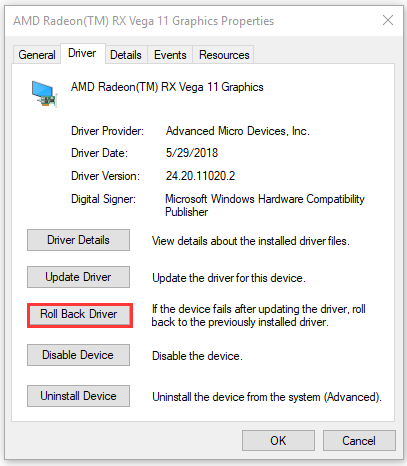
Step 4. If rolling back the driver fails to resolve the issue, you can update the graphics card driver by clicking on Update Driver in the Properties window. Then make sure you follow any prompts to complete the update.
Once done, relaunch GeForce Experience and see if the NVidia Share is not responding error message persists.
Method 2. Disable the NVidia Share in GeForce Experience
Another simple solution is to disable the NVidia Share utility temporarily and then turn it back on. To do so, follow the given steps below.
Step 1. Run your NVidia GeForce Experience application as an administrator, and then click on the Settings icon at the upper right corner.
Step 2. Navigate to the General tab from the left side of the screen, and then toggle the Share switch Off and click on Apply to execute the change.
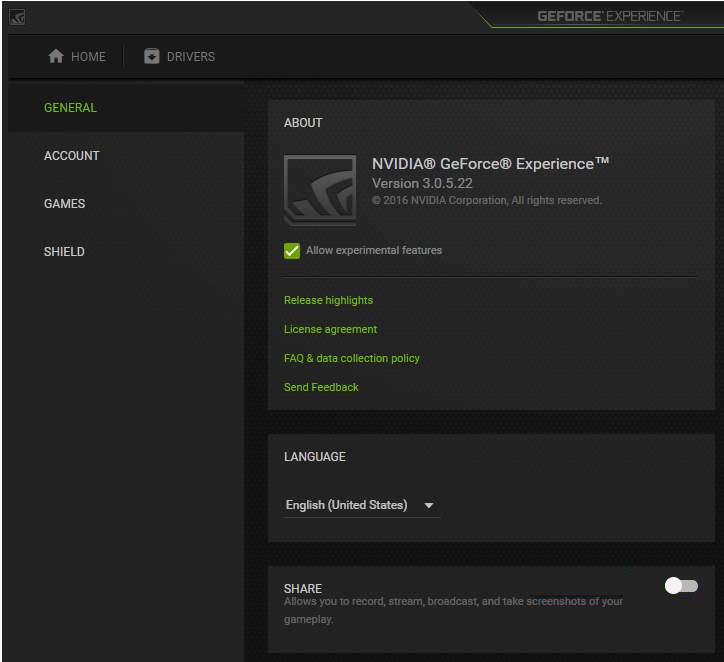
Step 3. Now, restart your computer, and then enable the feature again and see if the “NVidia Share stopped working” issue is fixed.
Method 3. Disable the Instant Replay Feature
There is a feature called Instant Replay in the NVidia Share utility, which can help you record screens at a specifically defined time. Some users reported that the NVidia Share is not responding error can be fixed by disabling Instant Replay.
To do so, you can open GeForce Experience, and then navigate to the NVidia Share Settings section and select the Instant Replay option, and click on Turn off. After that, you can relaunch this program and check if the NVidia Share not responding error is resolved.
Method 4. Downgrade GeForce Experience
If the GeForce Share not working issue persists after trying all the above methods, you may consider downgrading your current GeForce Experience application. Here is a quick guide for you.
Step 1. Press Win + R keys to open the Run dialog box, and then type appwiz.cpl in the box and hit Enter.
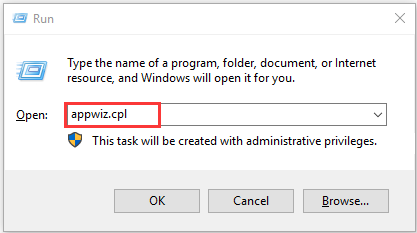
Step 2. Scroll down the list of installed programs to the GeForce Experience application, and then right-click it and select Uninstall.
Step 3. Follow the on-screen prompts to complete this uninstallation. Once uninstalled, download a previous GeForce Experience version from it a trusted resource and install it.

![How to Uninstall Microsoft Teams on Windows 10 [Full Guide]](https://images.minitool.com/partitionwizard.com/images/uploads/2021/05/uninstall-microsoft-teams-thumbnail.jpg)
User Comments :