If you are trying to make changes to the settings in your NVIDIA Control Panel but receiving NVIDIA Control Panel access denied error message, you are at the right place. In this post, MiniTool solution will show you how to fix this NVIDIA access denied error with 5 simple methods.
About Access Denied NVIDIA Control Panel
According to the reports of NVIDIA users, sometimes they open NVIDIA Control Panel but cannot apply changes made for its configuration. And a notification window will pop-up, showing NVIDIA Control Panel access denied, failed to apply selected settings to your system.
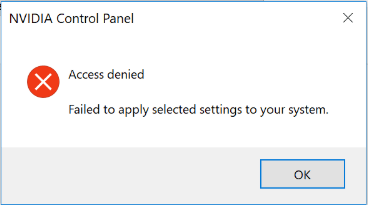
In most cases, this error occurs when users are trying to change settings in the Manage 3D Settings, or set the default graphics processor for a game on their computers. The reasons for the error can be different in different cases, but the common ones should be NVIDIA driver issue and administrative privilege issue.
Well, let’s see how to fix this access denied NVIDIA Control Panel issue effectively and quickly.
Fix 1: Update, Rollback or Clean Install NVIDIA Driver
The outdated or broken NVIDIA driver should be responsible for NVIDIA access denied issue in some cases. Some users have fixed it by updating, rollbacking or clean installing their drivers. So, you can feel free to have a try according to your needs.
At first, you should press Windows + R to open Run window, and input devmgmt.msc and click OK to open Device Manager.
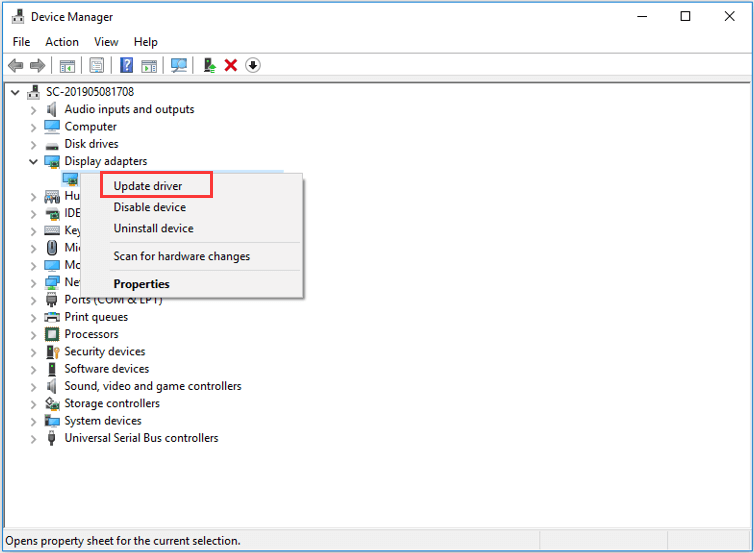
To update NVIDIA driver, just expand Display adapter, right-click your driver and click Update driver. Then, choose Search automatically for updated driver software and follow the onscreen instruction to complete the process.
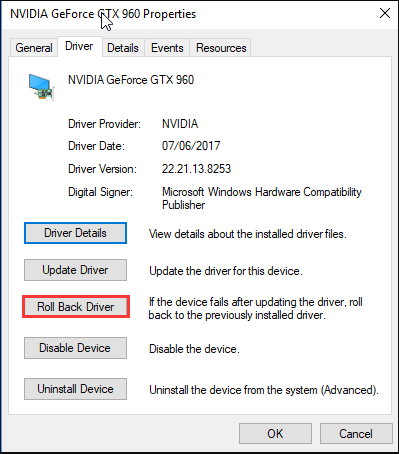
To rollback NVIDIA driver, you should right-click the drive, choose Properties, and click Roll Back Driver under Driver tab of the new window.
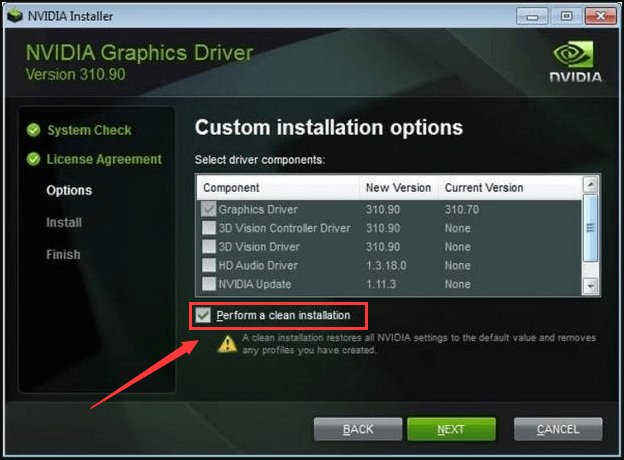
To clean install NVIDIA driver, you should right-click the driver and click Uninstall device to uninstall the driver at first. Then, download your needed driver from the official website and install it according to the given instructions. Just notice that you need to check Perform a clean installation when you get the following window.
Fix 2: Run NVIDIA Control Panel as Administrator
As for the administrator privilege issue, you just need to run your NVIDIA Control Panel.
To do that, just follow the steps below:
Step 1: Open File Explorer.
Step 2: Navigate to the path C:Program FilesNVIDIA Corportation Control Panel Client and locate a file named nvcplui.exe.
Step 3: Right-click the file and select Run as administrator. When you get any confirmation dialog, click Yes to continue.
Now, you can make changes for your NVIDIA Control Panel again to see if these changes can be applied. If this method fails to fix NVIDIA access denied issue, you can try the next method.
Fix 3: Restart NVIDIA Display Driver Service
Your NVIDIA Control Panel failed to apply selected settings to your system might also because the NVIDIA Display Driver service is not working. In this case, you can try restarting the service to fix the error.
Step 1: After invoking Run window, input services.msc and click OK to open Services.
Step 2: Locate NVIDIA Display Driver service. Right-click it and choose Restart.
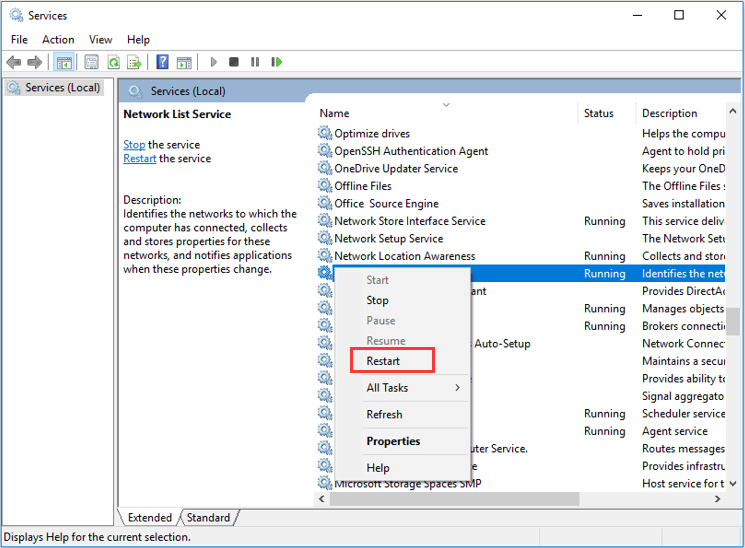
Step 3: Besides, you need to double-click the service to open its Properties window. Then, set its Startup Type as Automatic and click OK to save the change.
Fix 4: Disable Game Bar
The Game Bar is a feature provided in Windows to improve gaming experience and it is enabled automatically. However, it is proven that it can interfere with the NVIDIA Control Panel. Hence, you can try disabling Game Bar to resolve NVIDIA access denied issue.
Step 1: Press Windows + I to open Windows Settings.
Step 2: Choose Gaming in the main interface.
Step 3: Click Game bar in the left pane, and toggle off the switch button of Game bar.
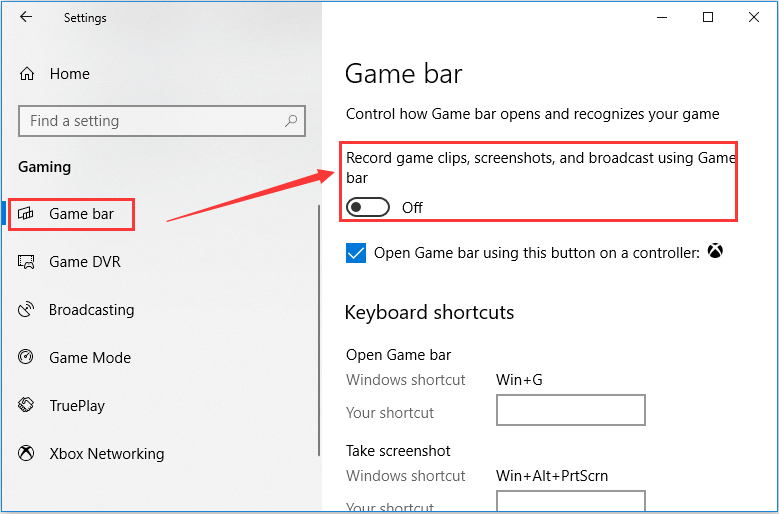
After that, you can run your NVIDIA Control Panel again to check if the access denied issue is fixed.
Fix 5: Restore the Most Recent Working Version of Its Folder
If you are using System Restore or System Protection on your Windows PC, the previous working version of your NVIDIA driver folder might still be saved on your hard drive. Thus, you can try restoring this working version to fix NVIDIA Control Panel access denied issue.
Step 1: Open your File Explorer, switch to View tab and check Hidden items to show all the hidden files and folders.
Step 2: Navigate to the following path: C:ProgramDataNVIDIA CorporationDRS.
Step 3: Right-click the DRS folder and choose Properties.
Step 4: In the pop-up dialog, go to Previous Versions tab and choose a folder version that created before the NVIDIA issue occurs.
Step 5: Click Reset button and follow the on-screen instruction to complete the process.
Once it’s done, you should be able to make changes for your NVIDIA Control Panel without any problems.


User Comments :