Have you encountered not enough physical memory error in VMware? MiniTool offers you five solutions to fix this problem. Just read on to get them.
Not enough physical memory error
There are so many personal virtualization products around, such as Hyper-V, Oracle Virtual Box, etc. Among them, VMware Workstation is one of the best products. It has so many features that make it much more usable compared to other offerings. Many of you may have already installed it.
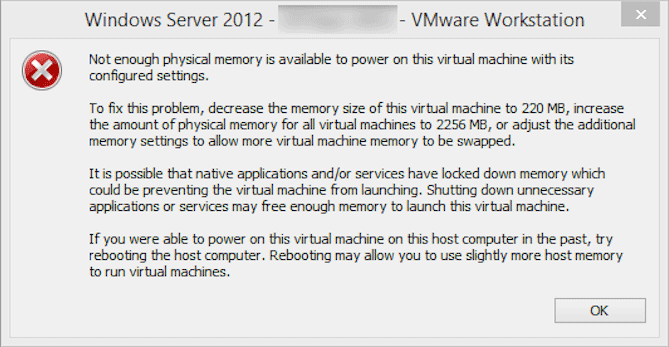
However, some users report that they have encountered not enough physical memory error when they power on VM. The error message is shown as follows: Not enough physical memory is available to power this virtual machine with its configured settings.

This error appears for a random reason and has been around in older versions of VMware Workstation, where it’s been found to go back to VMware Workstation 6. This error may make users lose access to their data, so it is crucial for them to fix this issue as soon as possible.
How to Solve Not Enough Physical Memory Error
The not enough physical memory error might arise due to low RAM memory on your system. If so, please refer to fix 1 and 2. Sometimes, this error may still occur even though there is enough RAM. If so, you should refer to the rest fixes.
Fix 1. Release or Expand RAM
If the RAM memory is low on your system, you can shut down unnecessary applications or services to free enough memory for launching this virtual machine. Of course, you can also solve this problem by expanding the memory. To get a detailed guide, please read the following post:
Fix 2. Adjust VMware Memory Settings
The second method to fix this problem is to power off other virtual machines and then to adjust the additional memory settings to allow more virtual machine memory to be swapped.
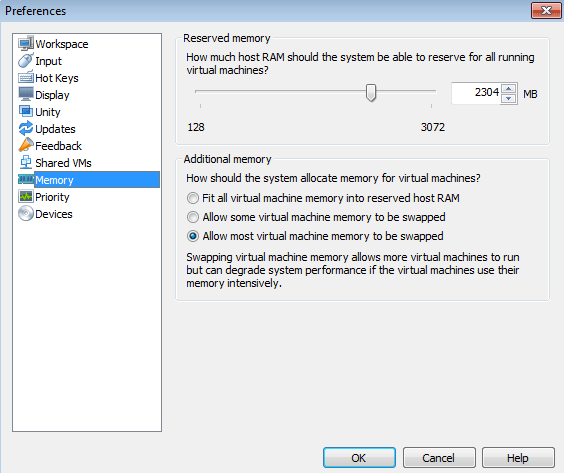
Step 1: Open your VMware Workstation and go to Edit > Preferences.
Step 2: Click the Memory option from the left pane and navigate to the Additional memory section.
- Fit all virtual machine memory into reserved host RAM: you can choose this option if the memory is large enough.
- Allow most virtual machine memory to be swapped: you can choose this option if the memory is slightly larger and you want the virtual machine to run more smoothly.
- Allow some virtual machine memory to be swapped: you can choose this option if you have not much memory.
In this step, you can choose the second or third option according to your condition.

Step 3: Click OK to save the changes.
Fix 3. Run VMware as Administrator
Step 1: Shutdown your VMware Workstation.
Step 2: Run VMware Workstation as administrator through the following two methods:
- Open Start menu and search for “VMware Workstation”. Then, right click on VMware Workstation and select Run as administrator.
- Right-click the icon for VMware Workstation on your desktop and choose Open file location. Then, right-click exe and choose Properties. Go to the Compatibility tab and check Run this program as administrator. Finally, click OK to save changes and try booting your VM again.
Fix 4. Uninstall Windows Update
One of the major reasons that can cause this error is a recent Windows update that restricts users from starting the virtual machine. Therefore, you can solve this problem by uninstalling it.
Step 1: Open the Settings app and click Update & security.
Step 2: Navigate to the left-hand side and click Windows Update > View update history.
Step 3: Click Uninstall Updates to uninstall the latest updates from your system.
Fix 5. Modify the Config.ini File (Host Parameters)
Step 1: Shut down your virtual machines and close the VMware Workstation.
Step 2: Navigate to the following path: C:ProgramDataVMwareVMware Workstation.
Step 3: Scroll down to the end of the file and add the line: vmmon.disableHostParameters = “TRUE”.
Step 4: Save the file and restart your computer to apply the new changes.


![Windows 10 High Memory Usage [Causes and Solutions]](https://images.minitool.com/partitionwizard.com/images/uploads/2019/06/windows-10-high-memory-usage-thumbnail.jpg)

User Comments :