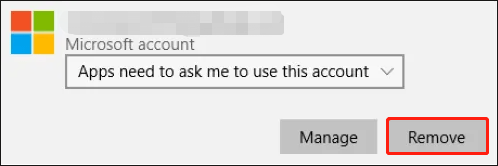
Adding or removing a new Microsoft account from a Windows computer is a very simple process. But what if the Remove button is grayed out or missing altogether? Fortunately, this problem is not permanent and can be easily fixed. This article offers four different ways to help you.
Way 1: Stop the Login Process
Many users have found this method useful, and you can also try it.
Step 1: Press the Win + I key to open Settings.
Step 2: Then navigate to Accounts > Your info > Stop signing in to all Microsoft apps automatically. After that, your information will show the Local Account instead of your email.

Step 3: Click Email & accounts in the left pane and select the account you want to delete. The Remove option should now be available.
Way 2: Disconnect from Access to Work or School
If you’re having this problem deleting your school or work account, try this solution.
Step 1: Open Settings, and then go to Accounts > Access work or school.
Step 2: Select the account on the right-hand side, and then click Disconnect.
Step 3: Then click Yes to confirm the removal.
Way 3: Delete Account Online
If you want to delete a home user account but cannot do so due to the lack of a delete button, you can delete the account online.
Step 1: Open Settings, and then go to Account > Family & other users.
Step 2: Click the Manage family settings online link.
Step 3: Then your default web browser will open. You should be logged into your Microsoft account as an administrator. Under the Home tab, you’ll see all the accounts you’ve added to your computer. To remove the accounts of specific members of your homegroup, click More options and select Remove from homegroup.
If you’re a member of a Family account, you don’t have administrative rights. In this case, you can remove your account by selecting the Leave family group option after logging into your Microsoft Family account.
Please follow the instructions below:
- Go to Settings > Accounts > Family & other users.
- Click the Manage home settings online link in the right pane. This will open a page in your web browser.
- Sign in to your family account.
- Click the Family tab, then click the More option under your account.
- Click Leave family group. You will see a popup where you have to click the Remove button.
This will automatically remove your account from the computer where you added it.
Way 4: Remove an Account via the Control Panel
You can also delete your account through the Control Panel. Before starting, make sure you are currently logged in as an administrator.
Step 1: Launch the Control Panel as administrator, and then go to User accounts > Remove user accounts. A list of all accounts that have been added to the computer can be seen here.
Step 2: Click the account that you want to remove and click the Delete the account option.
Step 3: After that, Windows will display two options, Delete files and Keep files. If you select the Delete files option, all files associated with that particular account will be deleted. You can choose the latter option if you do not want to delete files and data along with your account.


![[Full Guide] Maximized Window Won’t Drag in Windows 10/11](https://images.minitool.com/partitionwizard.com/images/uploads/2022/11/maximized-window-wont-drag-thumbnail.png)
User Comments :