Facing low disk space or thinking about backing up iTunes, Windows 10 users want to move iTunes library to an external hard drive. Is it possible to move iTunes library to external hard drive Windows 10? If possible, how to do that? Read the post and you will get answers.
Since 2018 iTunes can be downloaded from Microsoft Store for Windows 10 computers and Windows 10 users can use this application to manage and play both audio and video files on their computers.
It is convenient to use iTunes to manage audio and video files on Windows 10. However, with the number of these files increasing, less and less disk space has become a headache. So, some users think about moving iTunes library to an external hard drive. Is that possible? If possible, how to do that? Keep reading.
MiniTool Partition Wizard DemoClick to Download100%Clean & Safe
Can You Move iTunes Library to an External Hard Drive?
You can move iTunes library to external hard drive Windows 10. But there are some drawbacks of using iTunes liberty on an external hard drive:
- There is no music, video, or other iTunes files on your computer when the external hard drive is not connected after complete transferring iTunes library to the external hard drive.
- The sync feature of iTunes won’t function if you connect your portable devices first and then the external hard drive.
There are what you should notice when using iTunes library on an external hard drive. Scroll down to see how to move iTunes library to external hard drive Windows 10.
How to Move iTunes Library to an External Hard Drive?
It is easy to move iTunes to an external hard drive on Windows 10. The tutorial is below.
Step 1: Find your iTunes media folder location.
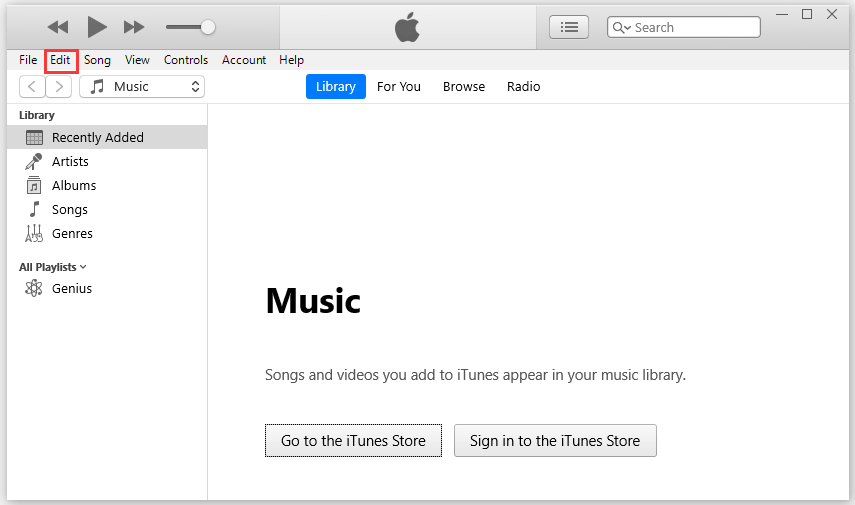
Launch iTunes on your computer. On the main interface of iTunes, please click the Edit option from the menu bar and choose the Preferences option.
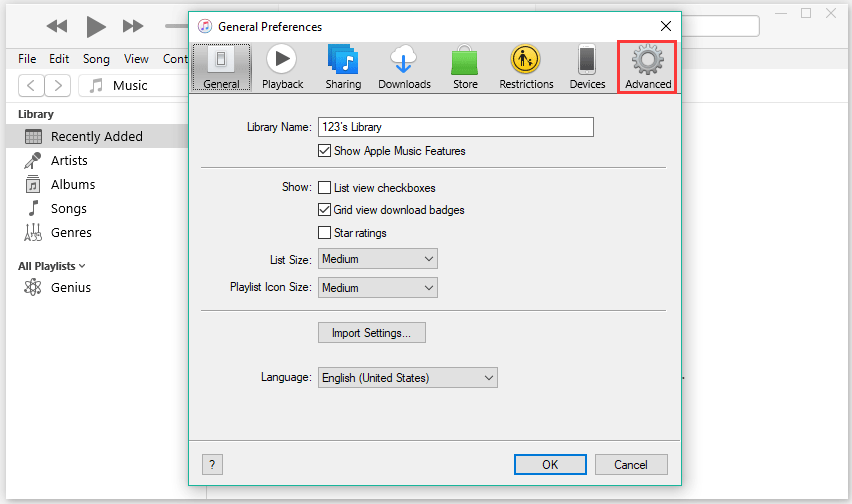
Then, click the Advanced option at the top bar. Note down the information in iTunes Media folder location.
Step 2: Start to move iTunes library to your external hard drive.
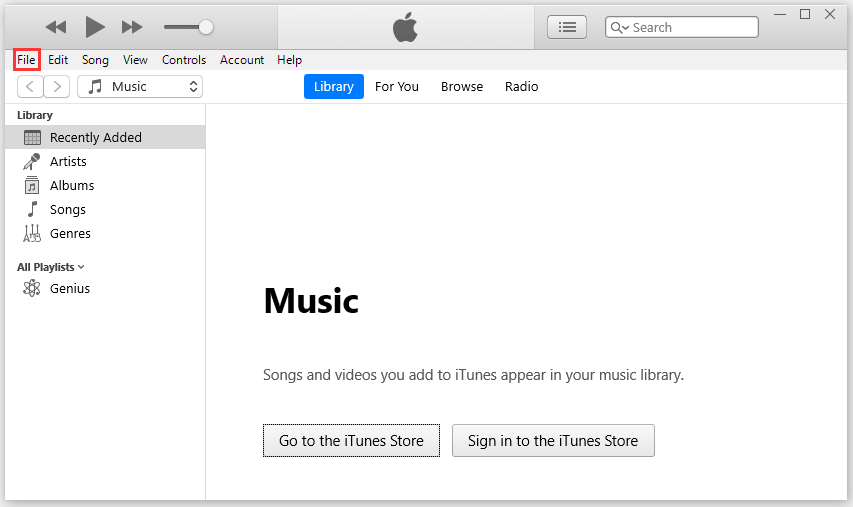
Close the Advanced Preferences window. Click the File option from the menu bar.
Choose the Library option and then choose the Organize Library option.
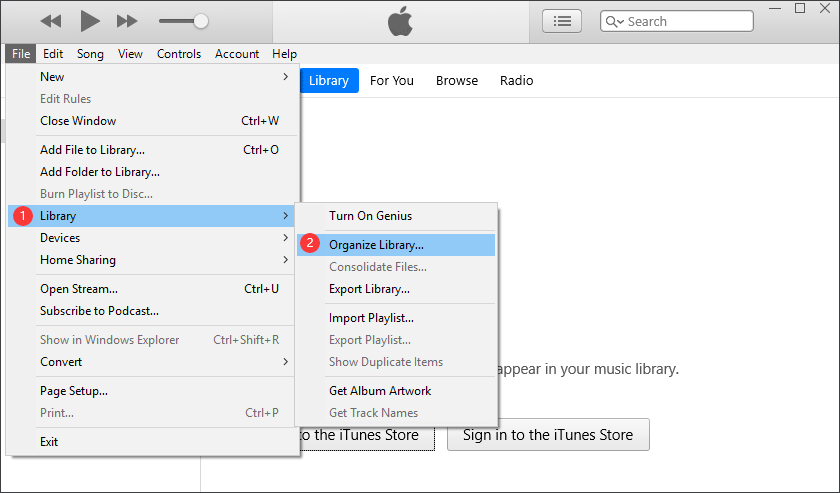
Check the box next to Consolidate files and then click the OK button.
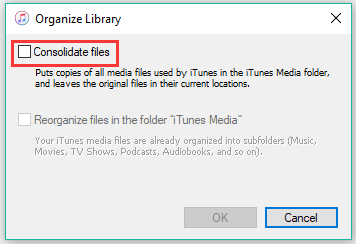
Now, close iTunes. Connect your external hard drive to your Windows 10 computer. Locate the iTunes media folder according to the information you have noted down in Step 1. After locating the folder, drag the folder to the external hard drive.
This is the whole process of moving iTunes library to an external hard drive on Windows 10. Have you completed this transfer successfully? If you encounter some issues during the transferring process, please leave them in the comment zone and we will try to help you out.


![iTunes Is Waiting for Windows Update [Solved]](https://images.minitool.com/partitionwizard.com/images/uploads/2020/10/itunes-is-waiting-for-windows-update-thumbnail.png)
User Comments :