How to mount a drive in Windows 10? You may also look for the answer like many other users. In this guide, MiniTool illustrates the detailed steps for the drive mounting process. Besides, it also tells you how to unmount drive. Mount drive with the given steps now!
Why Do You Need to Mount/Unmount Drives
In most time, Windows 10 can automatically mount and unmount a drive after you connect or disconnect a new drive. By dosing so, Windows can uniquely identify a volume even its drive letter is changed.
However, you need to mount or unmount the drive when Windows 10 fails to do that. This post will show you how to mount and unmount a drive in Windows 10 respectively.
How to Mount a Drive in Windows 10
As for drive mounting, here are 2 available methods for you. You can check them by reading the following content.
Mount Drive via Disk Management
Step 1: Press Windows and R keys to open the Run window, and then input diskmgmt.msc and click OK to open Disk Management.
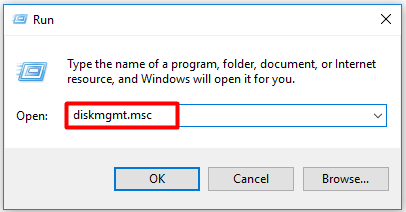
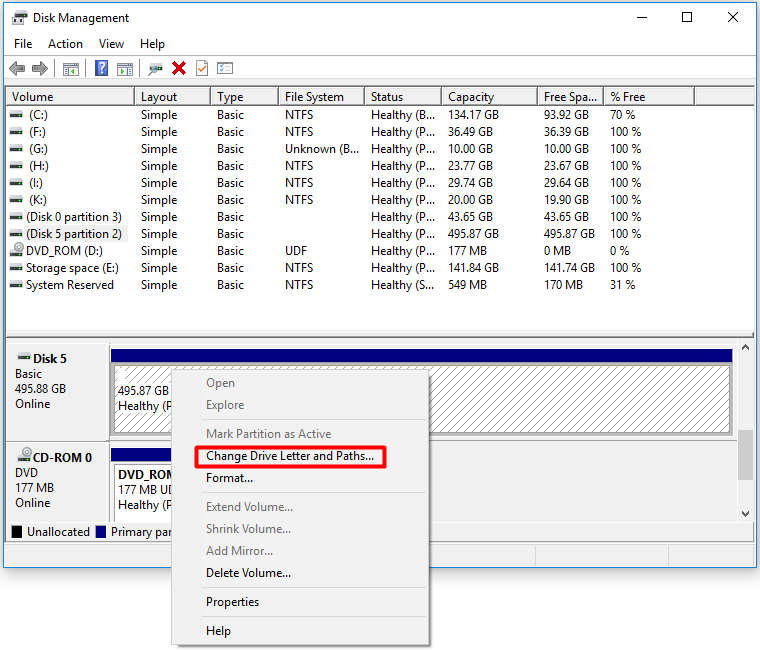
Step 2: Right-click on the newly added drive and choose Change Drive Letter and Paths in the pop-up menu.
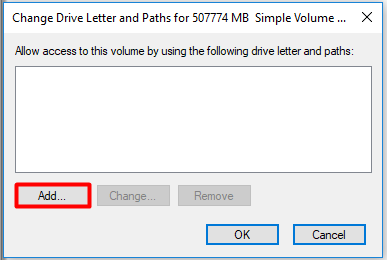
Step 3: Click on the Add button to continue.
Step 4: In the prompted window, check the Assign the following drive letter option and then choose a drive letter from the drop-down menu. Finally, click OK to save the changes.
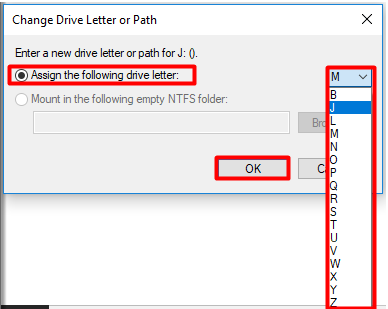
After you finish these steps, the drive will mount and show up in the system. Then you can store data in it.
Also read: How to Mount a USB Drive in Linux Manually [2 Ways]
Mount Drive via Diskpart
You can also mount drive via another Windows built-in program – Diskpart. This program enables you to finish the computer mounting operation within a few command lines.
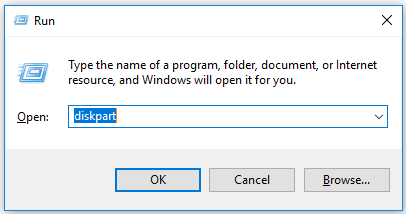
Step 1: Open the Run window by pressing Windows and R keys, and then input diskpart and hit Enter.
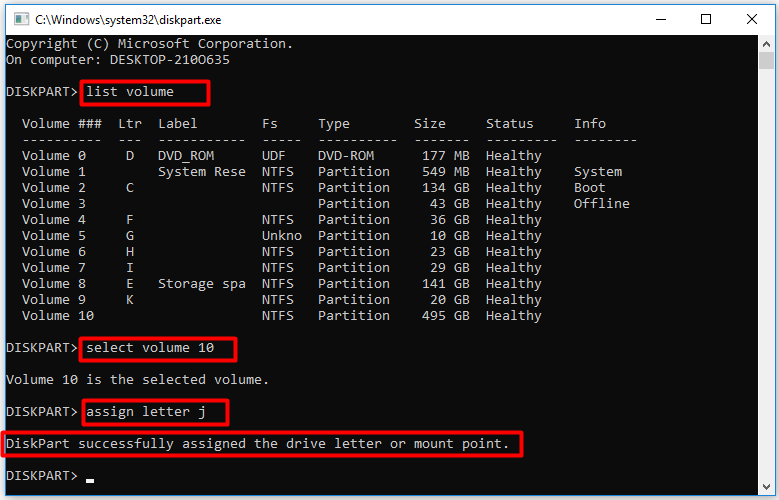
Step 2: In the elevated window, type the following commands and hit Enter after each.
- list volume
- select volume N (N stands for the number of volume that you want to mount.)
- assign letter j (You can replace the letter j with the letter you would like to assign to the volume.)
How to Unmount a Drive in Windows 10
After you unmount the drive, Windows will remove the volume mount point from the specified directory, dismount the volume, and make the volume not mountable. How to unmount drives in Windows 10? Here are 2 tutorials.
Unmount Drive via Disk Management
Step 1: Open Disk Management, and then right-click on the drive to unmount and click Change Drive Letter and Paths.
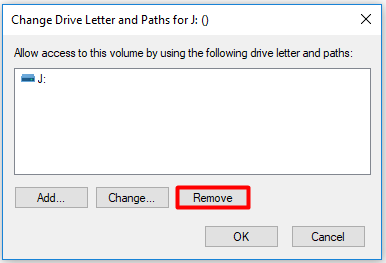
Step 2: In the pop-up window, click on the Remove button.
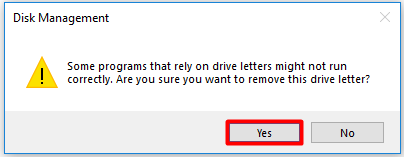
Step 3: Then you will receive a warning window stating that some programs relying on drive letters might not run correctly after removing the drive letter. If you still want to remove it, click Yes to confirm the operation.
Step 4: After the process ends, the drive will not be accessible on Windows 10 anymore.
Also read: Chromebook Recovery Utility: How to Create and Use It
Unmount Drive via Diskaprt
Step 1: Likewise, open Diskpart from the Run window.
Step 2: Type the following commands in the prompted window and press the Enter key after each.
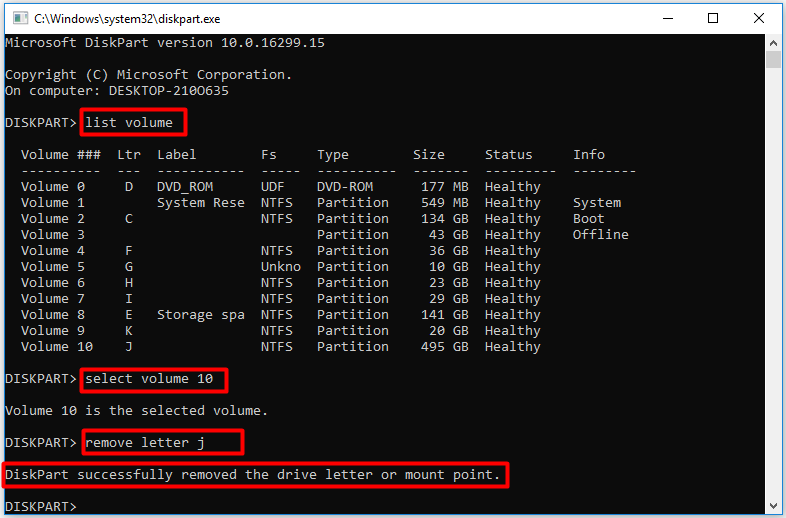
- list volume
- select volume N (N represents the number of the volume to be unmounted.)
- remove letter j (Replace the j with your actual drive letter.)

User Comments :