Do you how to install and manage add-ins in Microsoft Outlook? With help from the right add-ins, you can enhance Microsoft Outlook. MiniTool gives you a step-by-step guide on it. Just keep reading to get it.
Microsoft Outlook Add-ins
Microsoft Office Outlook is one of the components of the Microsoft Office suite, with which you can send and receive email, manage contact information, keep diaries, arrange schedules, and assign tasks.
It is an effective and powerful program, and you can expand its power and flexibility through add-ins. Thus, it can offer you other features and options that you wish. An array of free or paid add-ins is offered by Microsoft, but many of them are designed for business users.
You can access Office add-ins directly from Microsoft through its Office Store, but in order to access add-ins for Outlook, you must run Exchange or Office 365 on the backend, which means that you can’t tap into them for your own personal account with Gmail, Yahoo, or other such services.
How to Install Microsoft Outlook Add-ins
Install add-ins in Outlook:
Step 1: Open Outlook and click the icon for Get Add-ins to display the list of available add-ins. The list starts with the Editor’s Choice selections and you can move on to All add-ins.
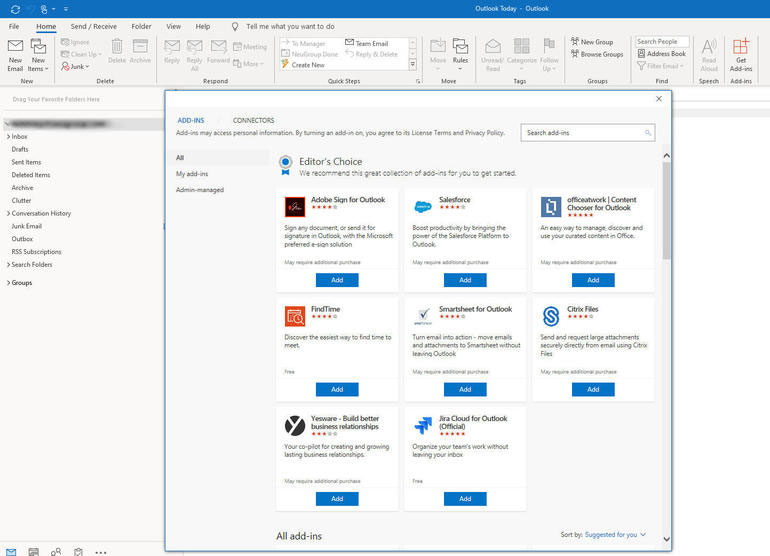
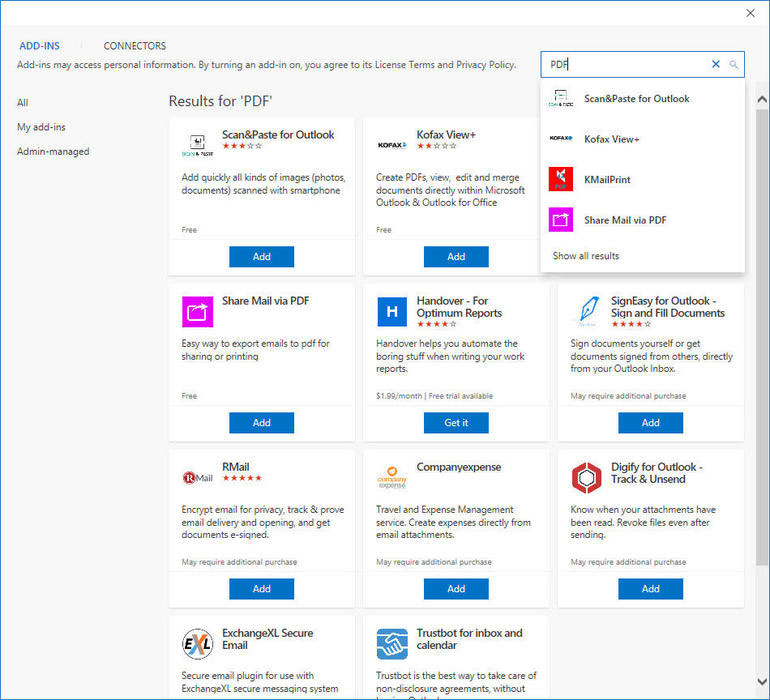
Step 2: In the add-ins list, you can browse through the different items or search for a specific add-in by name or other criteria. Please note that each add-in has a description indicating whether it’s free or requires an additional purchase or subscription.
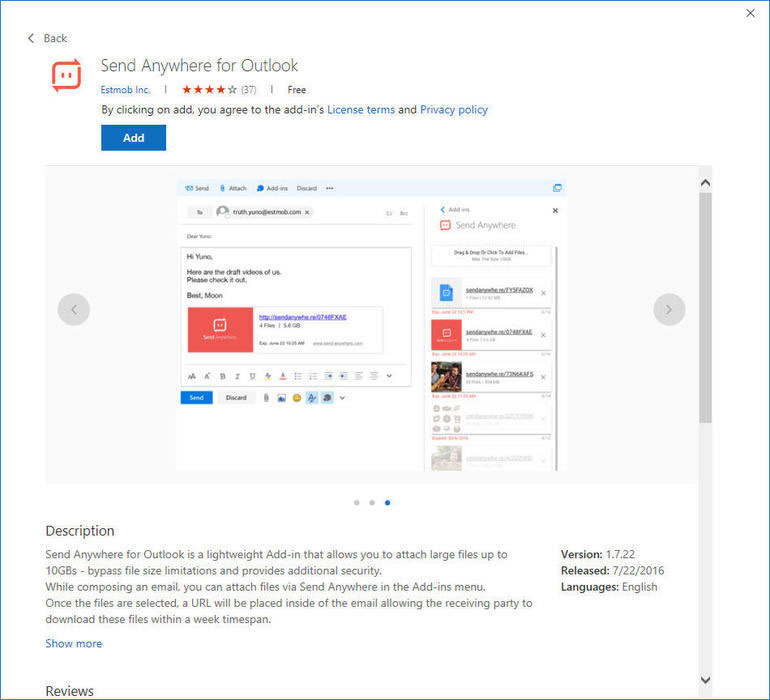
Step 3: Click on a specific add-in to see detailed information and user reviews.
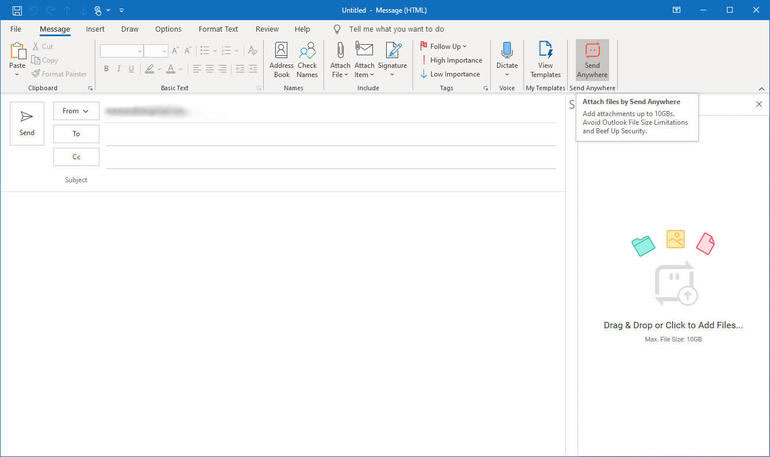
Step 4: Click on the Add button to install an add-in. Then, return to the Outlook and you will find that the add-in has already appeared on the appropriate Ribbon, just depending on how and when it should be used.
Install add-ins at Microsoft’s Office Store:
You can also access and install add-ins for Outlook and other programs at Microsoft’s Office Store. The process is virtually the same as doing it through Outlook. You can choose either method.
Step 1: Click Microsoft’s Office Store and then click Add-ins button to get the list of available add-ins.
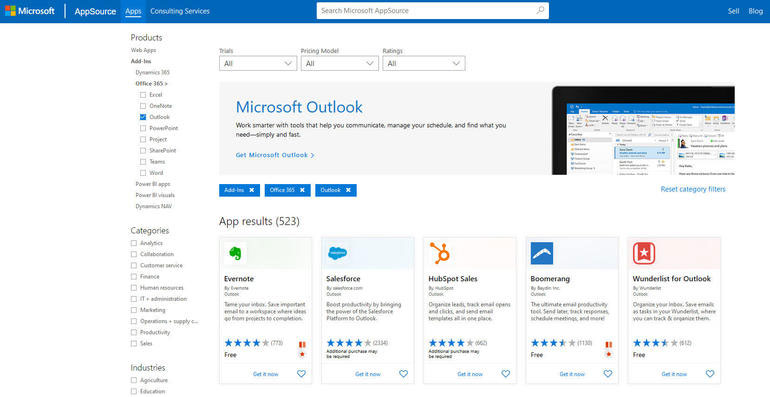
Step 2: Refer to the above steps to install an add-in.
However, when you install add-ins at Microsoft’s Office Store, you may encounter some problems. For example, there is no add-ins icon or you’re unable to access the list of add-ins. If so, you can refer to the following steps to solve this problem.
Step 1: Open Outlook and click on the File menu, and then click Manage Add-ins.
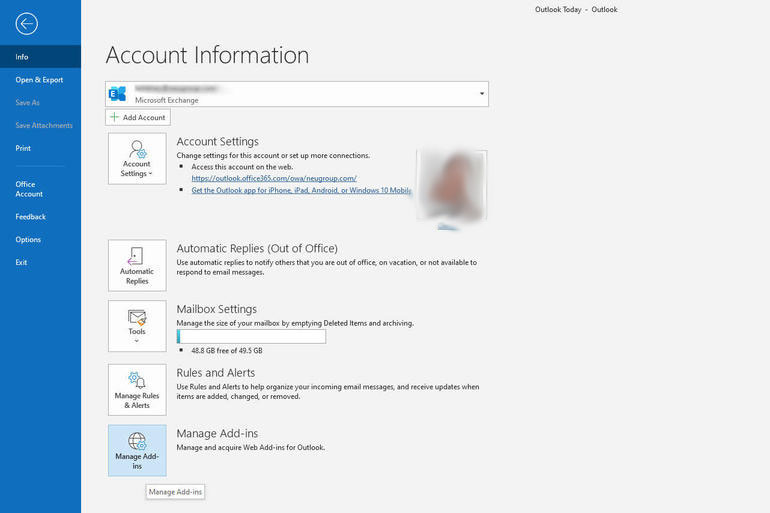
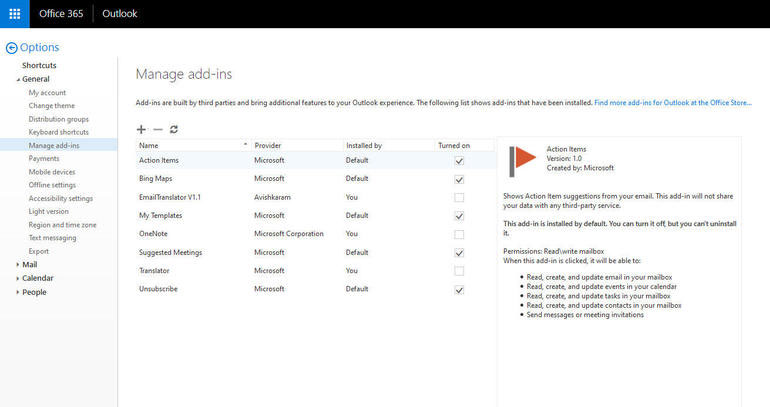
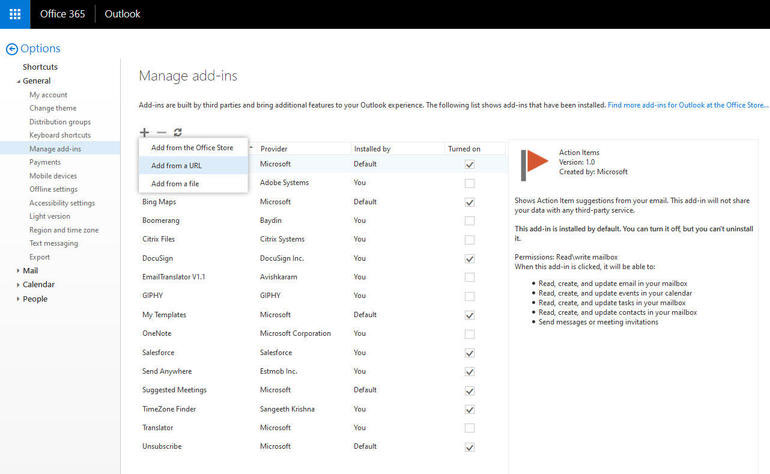
Step 2: Sign into Exchange or Office 365 with your email address and password. Then, the Manage Add-ins setting in the General section will display any current add-ins and their status. Please make sure they are turned on.
How to Manage Microsoft Outlook Add-ins
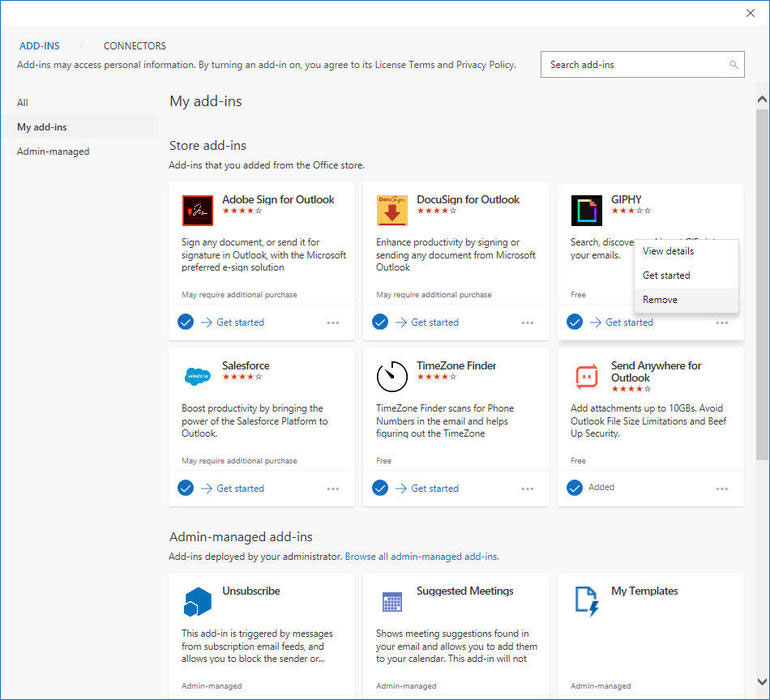
You have two methods to manage your installed add-ins. One way is to click the Add-ins icon on the Home Ribbon and select the section for My Add-ins. In this page, you can remove an add-in by clicking its ellipsis in the lower right and choose the Remove command.
The other way is to manage them from your Office 365 page. You need to open Manage Add-ins section in Outlook again. At this section, you can turn off an add-in without uninstalling it just by unchecking the checkbox next to its name.
Of course, if you want to completely uninstall an add-in, you can do that just by selecting it and then clicking the minus sign at the top of the list.
In addition, you can also add an add-in at this page by clicking the plus sign at the top. Please note that the first option lets you add an add-in from the Office Store and the second and third options let you add an add-in from a URL or manifest file.

![[Solved] Outlook Keeps Asking for Password on Windows 10](https://images.minitool.com/partitionwizard.com/images/uploads/2019/09/outlook-keeps-asking-for-password-thumbnail.jpg)
User Comments :