What is MemTest86? What’s the difference between MemTest86 and MemTest86+? How to use MemTest86 and MemTest86+ to test the computer memory? This post from MiniTool Partition Wizard will show you all.
What Is MemTest86?
MemTest86 is a memory test program designed to test and stress test an x86 architecture computer’s random-access memory (RAM) for errors, by writing test patterns to most memory addresses, reading back the data, and comparing for errors. Once it detects serious errors, you may need to replace the memory bar.
MemTest86 vs MemTest86+
MemTest86+ is also a memory test program. Many people may be confused about the relationship between MemTest86 and MemTest86+. Memtest86+ is a development fork of the original MemTest86. They are developed by two different teams but started with the same code.
Both versions now support current multi-core processors and the corresponding chipsets. Which one should you use? I will prefer MemTest86+ and the reasons are as follows:
- The latest MemTest86 version will not boot on non-UEFI systems. You need to download the older 4.3.7 version separately.
- MemTest86 has a free and a pro version. The free version lacks some features like DDR5/DDR4 DIMM Decoding, New 64-bit/SIMD tests, ECC error injection, SPD data validation, etc.
- MemTest86+ is completely free and the latest version released in October 2022, has been rewritten for UEFI support and DDR4 and DDR5 RAM.
However, MemTest86 supports Windows, Linux, and macOS, while MemTest86+ only supports Windows and Linux.
How to Use MemTest86
MemTest86 is designed to run as a stand-alone, self-contained program from a bootable USB flash drive, CD-ROM, or floppy disk without an operating system present. To run this program, you need to install it onto a USB drive. Here is the guide:
Step 1: Download and install MemTest86 to your USB drive.
- Go to this page to download MemTest86. Because my computer uses MBR boot mode, I download the V4 Windows version. I choose the Image for creating bootable USB Drive.
- Insert a USB drive into the PC.
- Unzip the memtest86-4.3.7-usb.img file.
- In the folder, run the imageUSB.exe file.
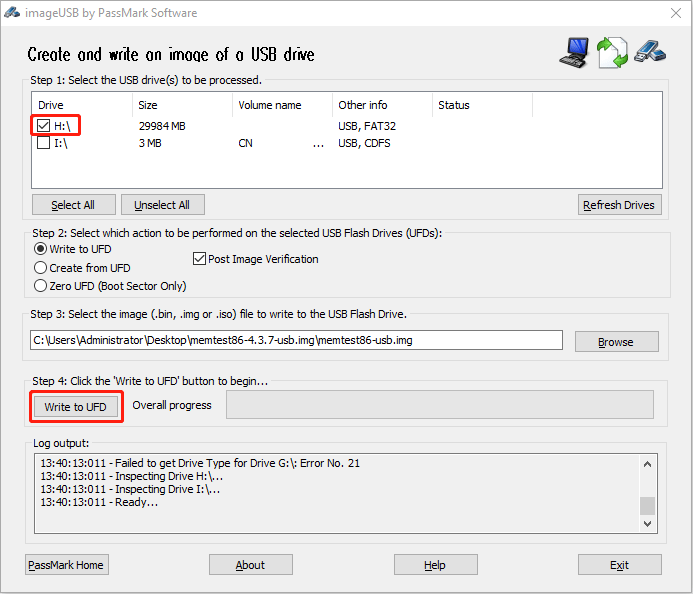
- The imageUSB tool will open. You need to tick the checkbox before the USB drive and then click the Write to UFD button. As for other parameters, you can keep the default value.
- Follow the wizard to complete the image writing process.

Step 2: Run MemTest86 to test the memory.
- Shut down your PC completely.
- Power on your PC and press the BIOS key to enter firmware.
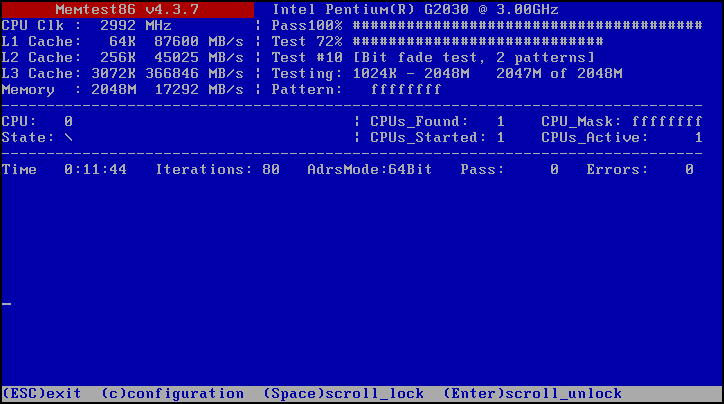
- Make your PC boot from the USB drive. Then, the MemTest86 test will start automatically.

How to Use MemTest86+
Step 1: Similarly, you need to download and install MemTest86+ to your USB drive.
- Go to this page to download MemTest86+ Windows USB Installer (32/64 bits). You will get a mt86plus_6.00_USB_Installer.exe file.
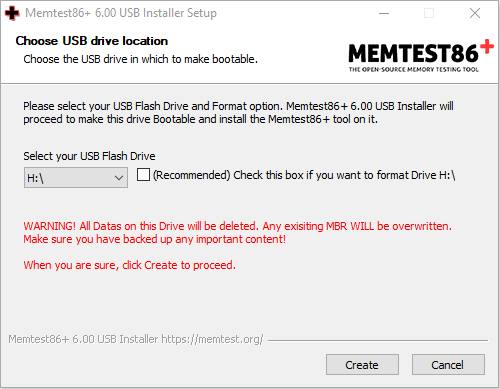
- Insert a USB drive into your PC and double-click the installer file to run it.
- You just need to follow the wizard to install MemTest86+ onto your USB drive. When it asks you to select your USB drive, do as it requires.

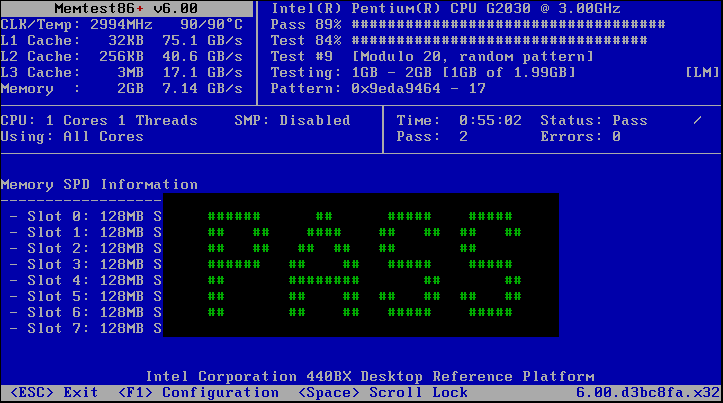
Step 2: Make the PC boot from the USB drive to run the MemTest86+ test.
If your computer has Secure Boot enabled, please disable it temporarily. The Memtest86+ binary is not signed by Microsoft. If the Secure Boot is enabled, you may get the Secure Boot Violation error.

Bottom Line
MiniTool Partition Wizard can help you clone the system, manage disks better, and recover data. If you have this need, you can download it from the official website.


![[Solved] Windows Memory Diagnostic Tool Stuck at 1%, 21%, or 99%](https://images.minitool.com/partitionwizard.com/images/uploads/2021/08/windows-memory-diagnostic-tool-stuck-thumbnail.png)
User Comments :