Many people reported the issue “Lock option missing from power menu” in Windows 10/11. In fact, it is not abnormal, and on the contrary, it is normal because Windows 10/11 has removed the Lock option from the power menu. Well, where to find the Lock option in Windows 10? Follow the guide from MiniTool Partition Wizard to figure that out.
Lock Option Missing from Power Menu
In Windows, the Lock function is used to lock a computer to protect users’ works. Some people use the Windows + L key combination to lock their computers, while some people choose to use the Lock option to complete that. However, few people clicked the power button and found the Lock option unavailable in the power menu in Windows 10/11 and asked help for the issue “Lock option missing from power menu”.
In fact, that is normal because the Lock option is not on the power menu anymore. Windows 10/11 has moved the option to a new place — the Lock option now is available on the user tile menu in Windows 10.
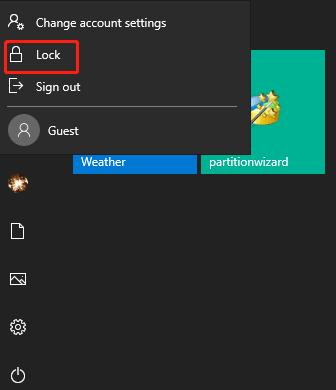
Therefore, to access the Lock option in Windows 10/11, you need to open the Start menu and then click your profile picture. Now the Lock option is displayed in the popping-up menu. If the Lock option is still unavailable, then you need to make a change in Windows 10 in one of the following ways.
Way 1: Tick the Lock Option in Control Panel
Step 1: Type control into the Windows search bar and then hit the Enter key to open Control Panel.
Step 2: When Control Panel opens, switch the view mode in the upper right corner to the Large icons mode or Small icons mode and then find and click the Power Options setting.
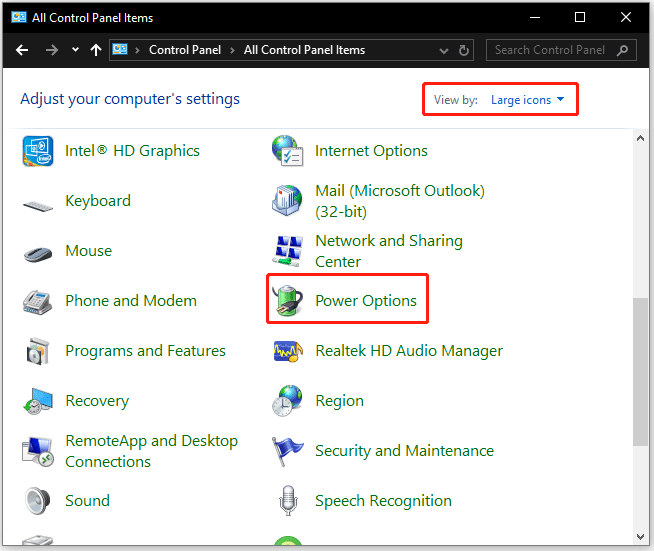
Step 3: Click the Choose what the power buttons do option on the left side.
Step 4: On the new window, click the Change settings that are currently unavailable link. Then tick the checkbox for Lock and click the Save changes button.
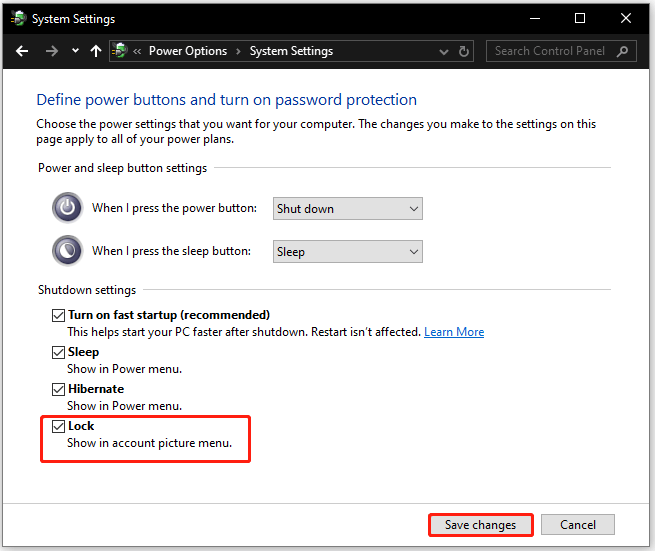
Now the Lock option is enabled in Windows 10. You can open the Start menu again on where click your profile picture to get the Lock option.
Way 2: Enable the Policy via Group Policy Editor
Alternatively, you can enable the Show lock in the user tile menu policy via Group Policy Editor if you are facing the issue “Lock option missing in Windows 10”. To do so, perform the steps below.
Step 1: Type Group Policy Editor into the Windows search bar and then hit the Enter key.
Step 2: Once inside the Group Policy Editor window, go to the following path:
Computer Configuration > Administrative Templates > Windows Components > File Explorer
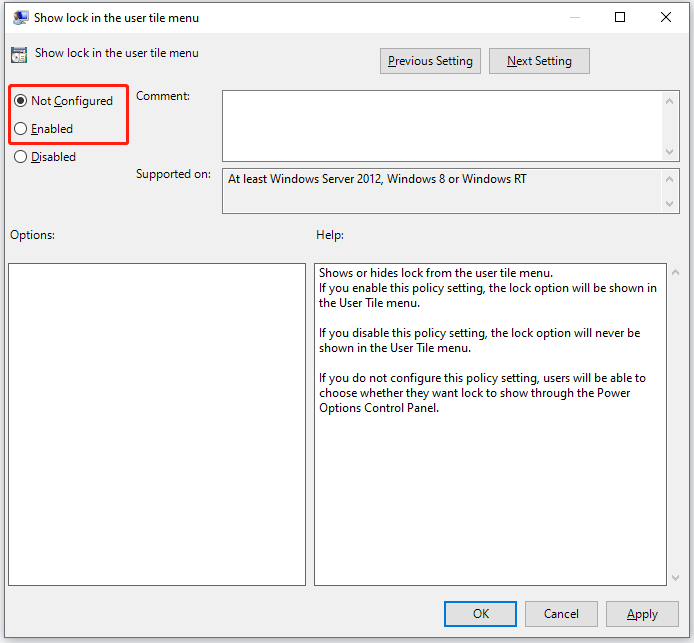
Step 3: Find the Show lock in the user tile menu policy on the right side and double-click it to edit it.
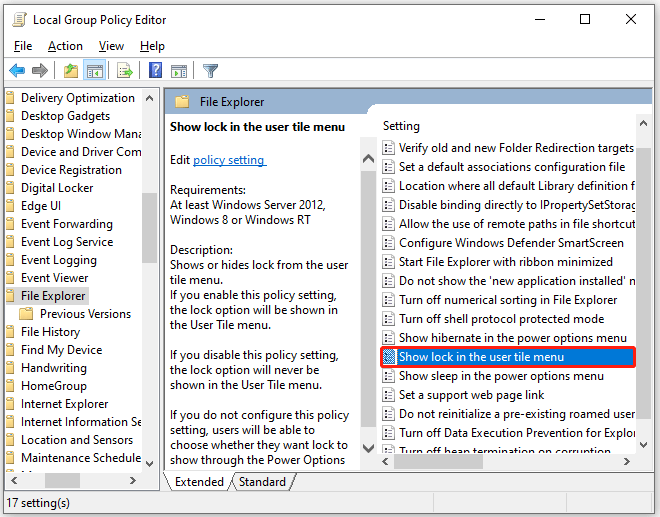
Step 4: On the popping-up window, switch the Disabled mode to the Not-configured mode or the Enabled mode and click the Apply button and the OK button to save this change.
Way 3: Modify the DWORD via Registry Editor
Step 1: Press Windows + R to call out the Run window, then type regedit into the window and hit the Enter key.
Step 2: On the Registry Editor window, go to the following path. To do that quickly, you can copy the path into the upper blank bar and hit the Enter key.
HKEY_LOCAL_MACHINESOFTWAREMicrosoftWindowsCurrentVersionExplorerFlyoutMenuSettings
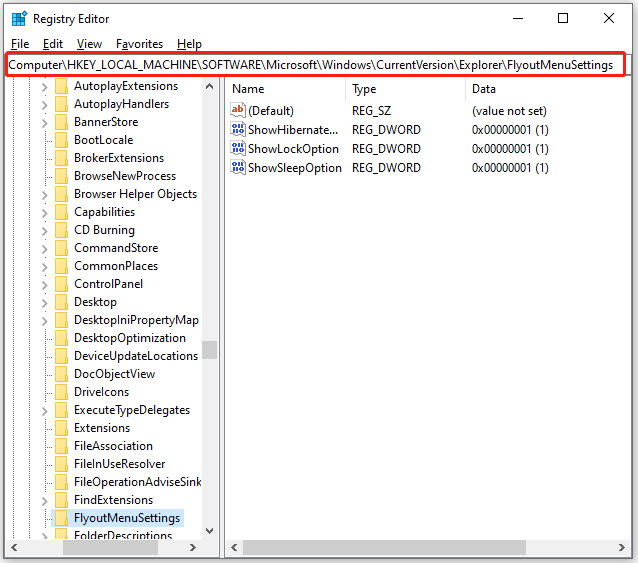
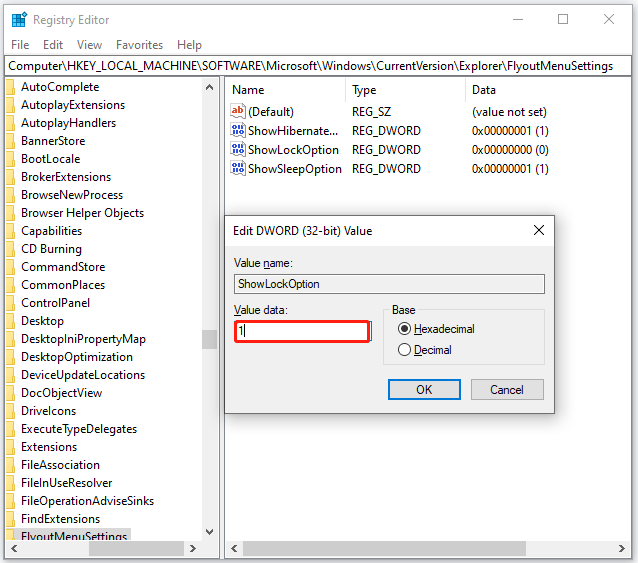
Step 3: Look for the ShowLocOption Registry DWORD on the right side. Then double-click it and set its value to 1 and click the OK button.
Step 4: Restart your computer to apply this change.
Bottom Line
The phenomenon “lock option missing in power menu in Windows 10” is not abnormal as Windows 10 has moved the option to the user tile menu. So, to access the Lock option in Windows 10, you need to click the Windows icon and then click your profile picture. If you still can’t find the Lock option, it might be disabled and you can use one of the above ways to enable it in Windows 10.

User Comments :