Have you ever seen the error message "the program can’t start because libcef.dll is missing from your computer" while trying to run an application? Why does it happen? In this post, MiniTool Partition Wizard will provide you with more information about libcef.dll.
Libcef.dll is Chromium Embedded Framework (CEF) Dynamic Link Library. Some applications need this file to work properly. If libcef.dll is missing, you could receive various errors when you try to run these applications. Here are some common libcef.dll error messages you might encounter:
- The program can’t start because libcef.dll is missing from your computer. Try reinstalling the program to fix this problem.
- Error loading libcef.dll. The specified module could not be found.
- dll is either not designed to run on Windows or it contains an error. Try installing the program again using the original installation media or contact your system administrator or the software vender for support.
- There was a problem starting libcef.dll. The specified module could not be found.
- The code execution cannot proceed because libcef.dll was not found. Reinstalling the program may fix this problem.
These libcef.dll errors are mainly appear because the file is not in the target location or it gets quarantined by your antivirus programs. To solve the problem, you can try the following fixes.
Fix 1: Replace and Register Libcef.dll
In most cases, Windows cannot find libcef.dll because the file is removed or corrupted. To solve the problem, you can replace the file and register it manually. The steps for computers with different system types (32 bit or 64 bit) might be different, and you need to check your system type at first.
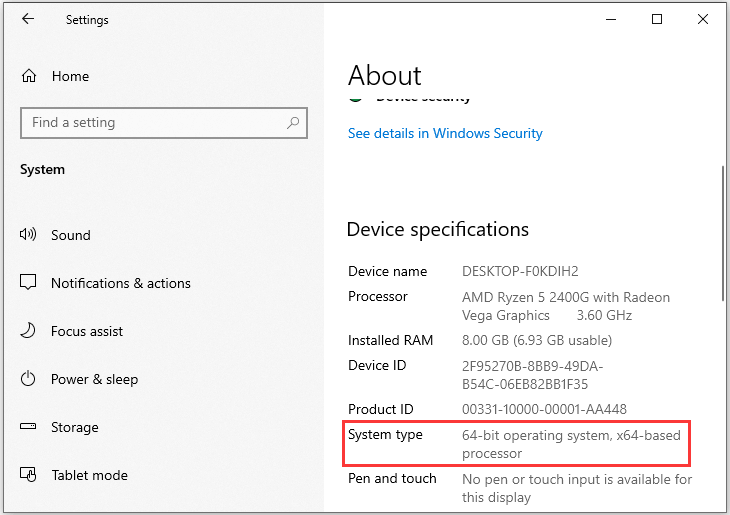
You can press Win + I to open Windows Settings and click System category. In the left pane, select About, and then you can check the System type in the right pane.

Now you can try the fix according to your System type.
For 64-bit System
If you are using 64-bit operating system, you should follow the steps below to replace and register libcef.dll file.
Step 1: Press Win + E to open File Explorer.
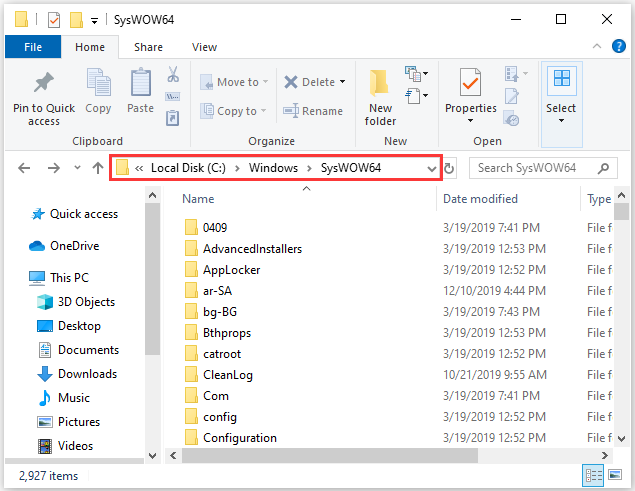
Step 2: Navigate to C:WindowsSysWOW64. If there is not a file named libcef.dll, you should copy one from another computer with the same operating system version and type.

Step 3: Make sure the file is in the correct location, and press Win + R to invoke Run window. Then type cmd and press Shift + Ctrl + Enter to run Command Prompt as administrator.
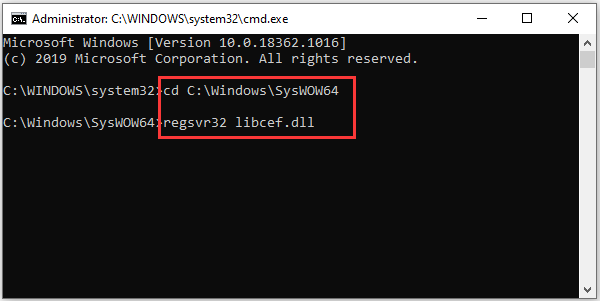
Step 4: In Command Prompt, input the following command and press Enter to change the current directory: cd C:WindowsSysWOW64.
Step 5: Type regsvr32 libcef.dll and press Enter to register libcef.dll file.

After that, you should restart your computer and run the problematic application again to check if libcef.dll error is fixed.
For 32-bit System
The steps to replace and register libcef.dll file for 32-bit system are similar to that for 64-bit system. The differences locate on the path and commands. Now, let’s see how to fix “libcef.dll is missing” for 32-bit system.
Step 1: Open File Explorer and go to C:WindowsSystem32. Then copy or download the libcef.dll to the System32 folder.
Step 2: Run Command Prompt as administrator and execute the following commands one by one:
- cd C:WindowsSystem32
- regsvr32 libcef.dll
Of course, you should also restart your PC and try to launch the target program again.
Fix 2: Exclude the Directory from Your Antivirus Software
Many users are using antivirus programs to protect their PC. In some cases, the antivirus software would prevent the PC from accessing the DLL file. You should check it when you receive the error message like “libcef.dll is missing”.
Please try adding one of the following directory to the exclusion list in the antivirus software according to your situation:
- C:WindowsSysWOW64 (if you are using 64-bit system)
- C:WindowsSystem32 (if you are using 32-bit system)
- C:Program FilesSteambin (if the problematic application is Steam)
If you still encounter the error, you should reinstall the target application.

User Comments :