When disposing of a laptop or a broken drive, you can preserve your privacy by completely wiping the hard drive. This post from Partition Magic will introduce four methods to help you with “Lenovo wipe hard drive”.
Wiping a hard drive involves completely erasing all data on the drive to ensure that it cannot be recovered. This process is often necessary when selling, recycling, or disposing of an old computer, or reinstalling an operating system.
Lenovo computers, like those from any other manufacturers, come with various tools and methods to securely wipe a hard drive on a Lenovo computer. This post will introduce 3 ways to let Lenovo wipe hard drive securely.
Factory Reset PC in Windows Settings
You can erase your hard drive in Windows Settings by using the Reset this PC feature. It can do a factory reset and erase everything on your computer, remove all programs and data and reinstall them. Here’s how to use the Reset this PC feature:
Step 1: Go to Settings > Update & Security > Recovery.
Step 2: Under Reset this PC, click Get started.

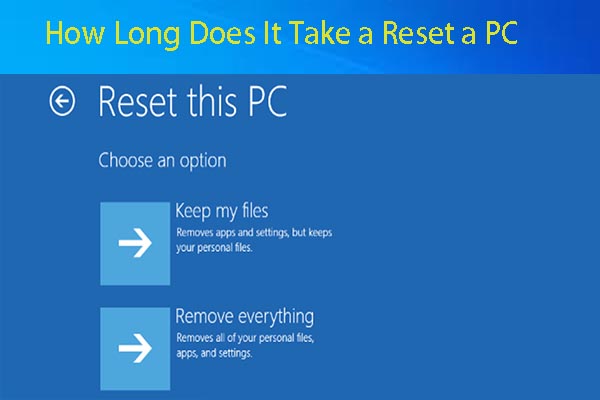
Step 3: Choose an option. There are two deletion options. If you want to erase the disk, then it is recommended that you choose the second option.

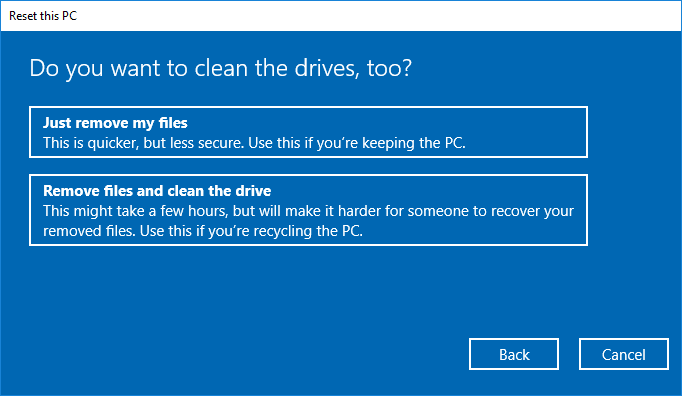
Step 4: On this page, it will offer you two deletion options again. If you choose option one, it will just remove your files, and the second option will erase the hard drive. In order to perform Lenovo wipe hard drive, I recommend you choose the second option.
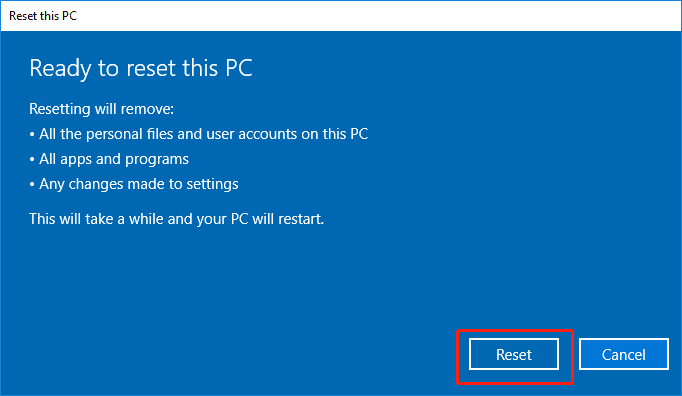
Step 5: After reading the note, you can click Reset to apply this operation. This will wipe the drive and reinstall Windows.
Factory Reset PC in WinRE
Windows Recovery Environment (WinRE) includes a series of troubleshooting tools such as Automatic Repair, Reset to Factory Default Settings, System Image Recovery, etc. so that you can repair your computer when it won’t boot. If you want to erase Lenovo hard drive, you can boot into the Windows recovery environment and then perform the factory reset.
To factory reset the Lenovo computer in WinRE easily, you can use OneKey Recovery. This is a built-in utility for many Lenovo laptops and desktops that allows the user to restore the system to factory settings. It can quickly access the WinRE and erase the hard drive. Follow the steps below to quickly access Lenovo’s OneKey Recovery system:
Step 1: Before starting, please back up your important personal files to an external drive or cloud storage. If you have done fingerprint, portrait, system EFS, BitLocker, and other file encryption, it is strongly recommended to decrypt these encrypted data before backup.
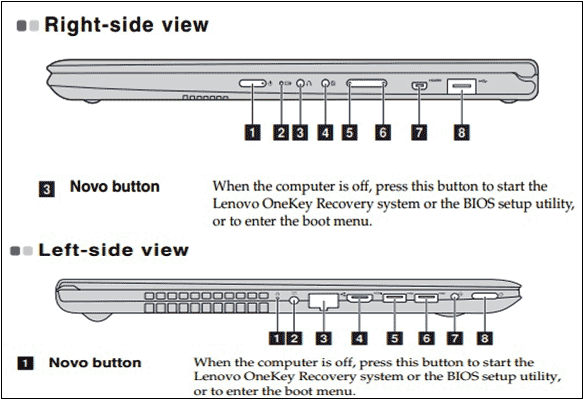
Step 2: Turn off your computer. Press the Novo button to access the OneKey Recovery system.
The Novo button is usually located on the side or near the power button of the machine. To press the button, use the tip of an unfolded paper clip (or similar object with a sharp tip) and gently press the Novo button.
Step 3: In the Novo Button Menu, select System Recovery.
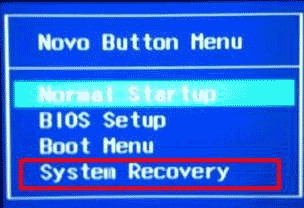
Step 4: After clicking System Recovery, your PC will go to the Lenovo OneKey Recovery interface.
Step 5: Click Troubleshoot, and then click Reset this PC. Choose Remove everything. It will remove your personal files, accounts, and apps/programs that did not come with this PC, and any changes made to the settings.
Use BIOS
Generally speaking, you can erase data by formatting or wiping a hard drive while running the computer. However, if you are trying to wipe a system drive, you need to wipe it from BIOS because it can’t be done while the drive is in use. Here is the detailed guide on how to perform a Lenovo wiping hard drive using Lenovo UEFI BIOS:
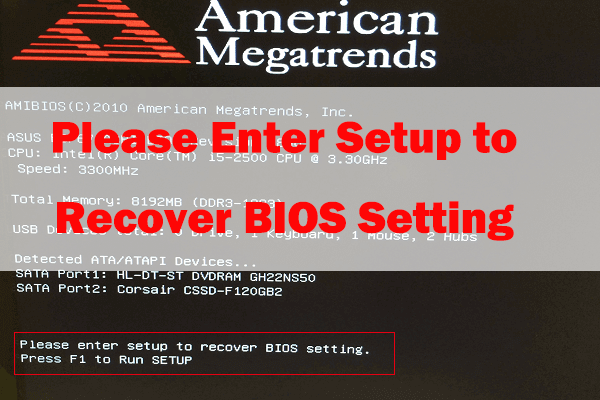
Step 1: Boot your Lenovo computer and press either F1 or F2 to open the Lenovo BIOS Setup Utility.
Step 2: Enter the Security part and choose Security Erase HDD Data under Hard Disk Password.
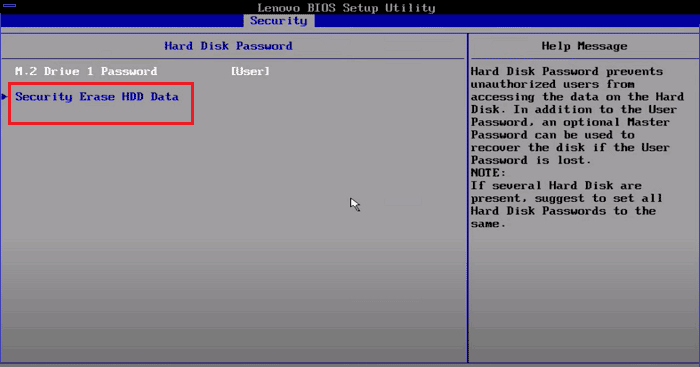
Step 3: Input the user password and click Yes to confirm the setup warning. Choose Confirm and hit Enter to wipe your hard drive.
Use MiniTool Partition Wizard
MiniTool Partition Wizard is a professional partition manage software, which can create, move and resize partitions, as well as, convert MBR to GPT, format SD card FAT32, clone HDD to SSD. With MiniTool Partition Wizard, you can let Lenovo wipe hard drive easily.
Now, you can read the following to learn how to wipe disk by using the professional partition manager:
MiniTool Partition Wizard DemoClick to Download100%Clean & Safe
Step 1: Download and install MiniTool Partition Wizard on another properly running computer.
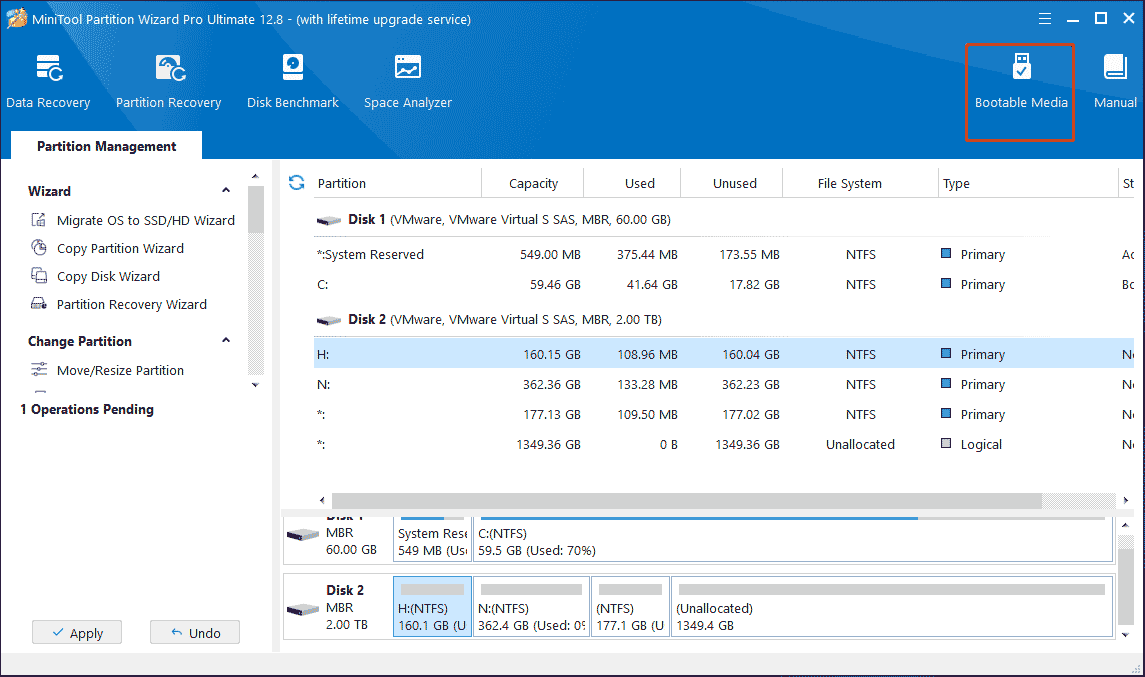
Step 2: Launch the software to enter its main interface. Then click Boot Media at the upper right corner of the program.
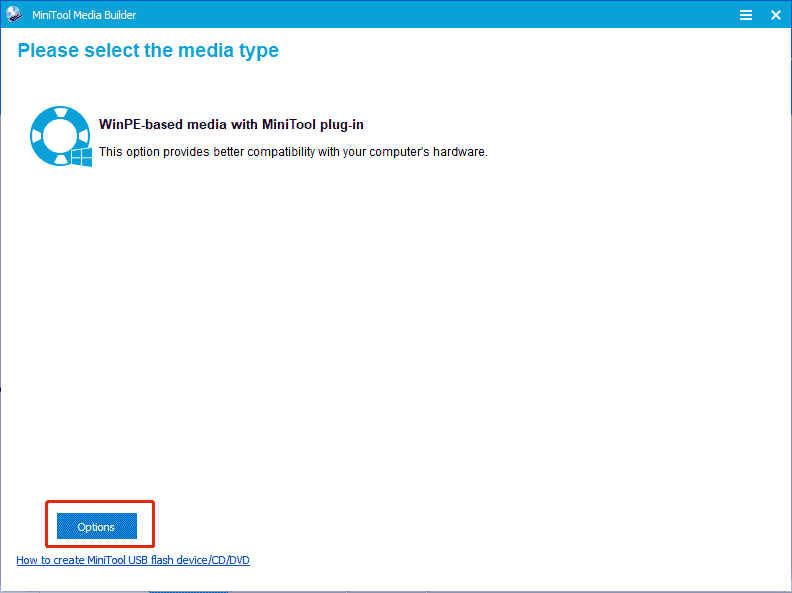
Step 3: In the prompted window, click Options to continue.
Step 4: Follow the on-screen instructions to download the ISO file to a USB drive. This will make your USB drive bootable.
Step 5: Once the process ends, click Finish to exit the operation. Then plug the bootable USB drive into your faulty computer.
Step 6: Boot the computer and then immediately press the BIOS button to enter the BIOS page. Choose the plugged USB as the boot option and save the changes.
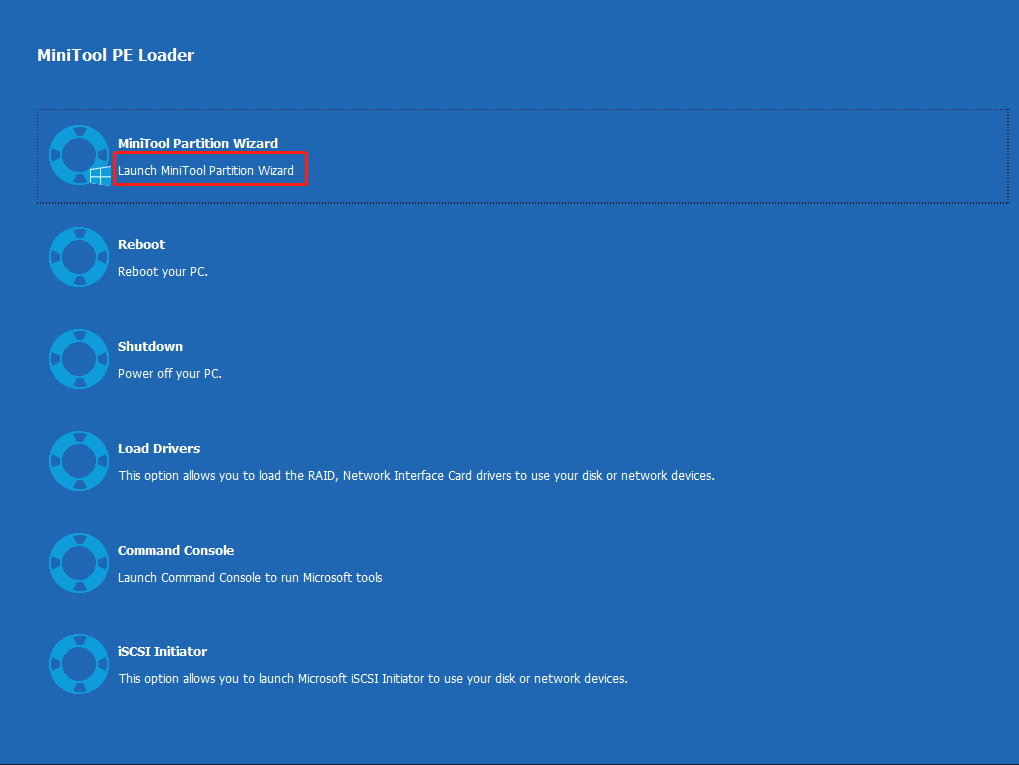
Step 7: After booting the computer from USB, click OK twice and wait for a while. Then, MiniTool Partition Wizard will launch automatically.
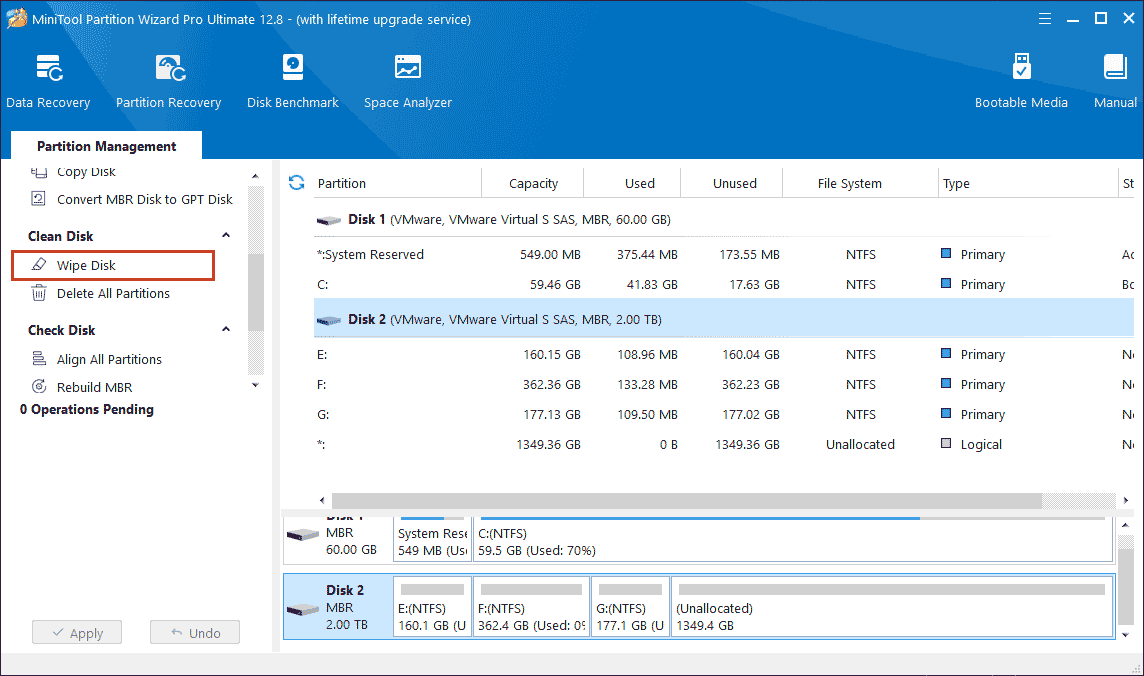
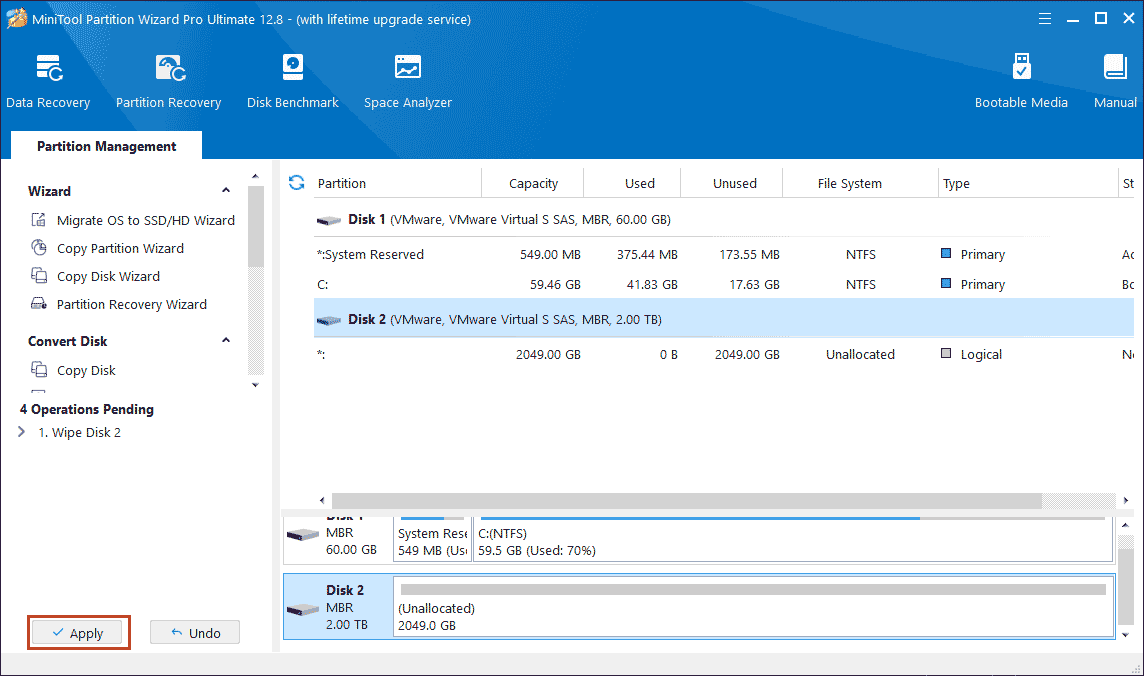
Step 8: After entering the home menu of the program, click on the disk you want to wipe and click Wipe Disk in the left panel.
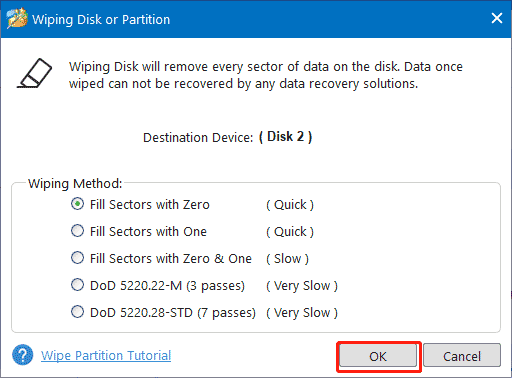
Step 9: In the prompted window, choose a wiping method from the given options and then click OK to save the changes.
Step 10: Click Apply to execute the pending operation.
Bottom Line
Wiping a hard drive on a Lenovo computer is a critical task for ensuring data security and privacy. Following the proper steps can help you achieve a thorough, secure erase when you are ready to sell your computer, recycle it, or install a new operating system.
In addition, if you have any problems when using MiniTool Partition Wizard, you can always contact us via the email [email protected]. Thanks in advance.
User Comments :