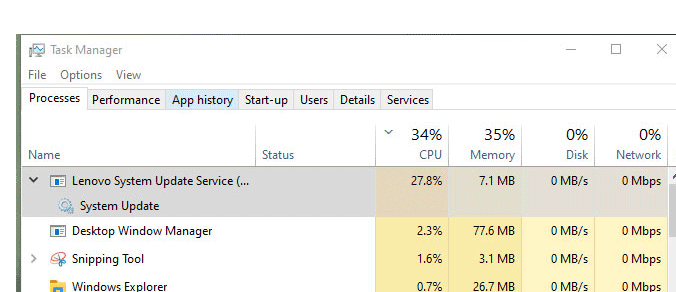
Does the Lenovo System Update Service eat a lot of CPU resources? If you find this issue in Task Manager, you can try the following 4 ways offered by MiniTool Partition Wizard to solve the Lenovo System Update Service high CPU issue.
Lenovo System Update Service High CPU Issue
Lenovo System Update is a preinstalled software on ThinkPad, ThinkCentre, and ThinkStation PCs with Windows systems. This software is used to update/install Lenovo drivers, BIOS, and applications.
However, some people report that they have encountered the Lenovo System Update Service high CPU issue in Task Manager. This software runs in the background and uses 20~30% CPU for no reason. In addition, some people also hear fan noise caused by this issue.

How to Solve the Lenovo System Update Service High CPU Issue
To solve the problem, you can try the following methods.
Fix 1. End the Task in Task Manager
Most of the time, the Lenovo System Update Service will use only a small fraction of the CPU power, but the CPU usage might spike when this software gets stuck in an infinite loop or encounters unexpected errors.
In this case, you can try clearing the CPU usage by opening the Task Manager to end this task. Here is the guide:
- Right-click on the blank area of the Taskbar and choose Task Manager from the menu.
- In the Processes tab, locate the Lenovo System Update Service process, right-click it, and choose End task.
Fix 2. Install the Correct Lenovo System Update Version
If you installed the problematic 5.07.0117.0 version of the Lenovo System Update, you may get the Lenovo System Update Service high CPU.
Fortunately, Lenovo has released a new version to solve this problem. You just need to uninstall this software, and then go to this page to download the new version of Lenovo System Update. Then, install this software and all will be OK.
Fix 3. Uninstall the Lenovo System Update
Lenovo PCs allow you to uninstall the Lenovo System Update software. To get rid of issues caused by this software, you can uninstall it after closing this software. Here is the guide:
- Type “control panel” into the Windows search box and open it.
- Click Uninstall a program under the Programs section.
- Right-click the Lenovo System Update software and choose Uninstall.
Fix 4. Disable Lenovo System Update Automatic Updating
Some people report that the Lenovo System Update Service high CPU issue may be caused by the Lenovo System Update Automatic Update. If you want to keep this software or you fail to uninstall this software, you can try to solve the problem by disabling the Lenovo System Update Automatic Update. You can use the following two ways:
Way 1. Use Lenovo System Update
- Open System Update and then click Schedule updates under the “Advanced” section.
- Uncheck the box “Enable monthly check for updates”.
Way 2. Use Registry Editor
- Press Windows key + R and enter “regedit” to open Registry Editor.
- For 64-bit Windows, please go to HKEY_LOCAL_MACHINESOFTWAREWow6432NodeLenovoSystem UpdatePreferencesUserSettingsScheduler.
- For 32-bit Windows, please go to HKEY_LOCAL_MACHINESOFTWARELenovoSystem UpdatePreferencesUserSettingsScheduler.
- Change value “SchedulerAbility” to NO.


User Comments :