If you don’t know how to perform the ISO mount operation, you come to the right place. MiniTool tells you how to mount ISO files in detail. Besides, it collects some best ISO mounter software.
Way 1: Mount ISO from File Explorer
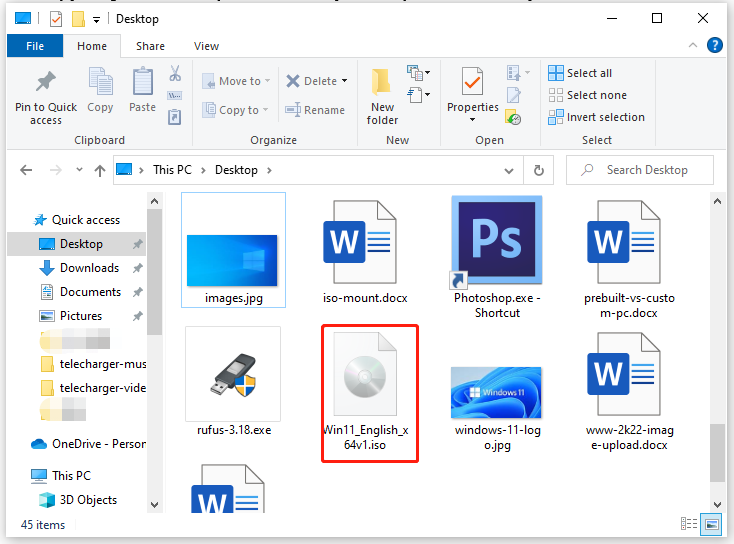
A simple way to mount ISO files is to use File Explorer that is available on Windows, Linux, and macOS. It offers you 3 options to mount and unmount ISO files. Before starting the process, you need to open File Explorer by pressing Windows + E keys. Then choose an option to carry out the ISO mount operation.
Option 1: Double-click the ISO
Step 1: Navigate to the target ISO file by choosing the stored location in the left panel and scrolling content in the display window.
Step 2: Double-click on the .iso file to mount it. Then the ISO file will open like other folders allowing you to access and extract the contents.
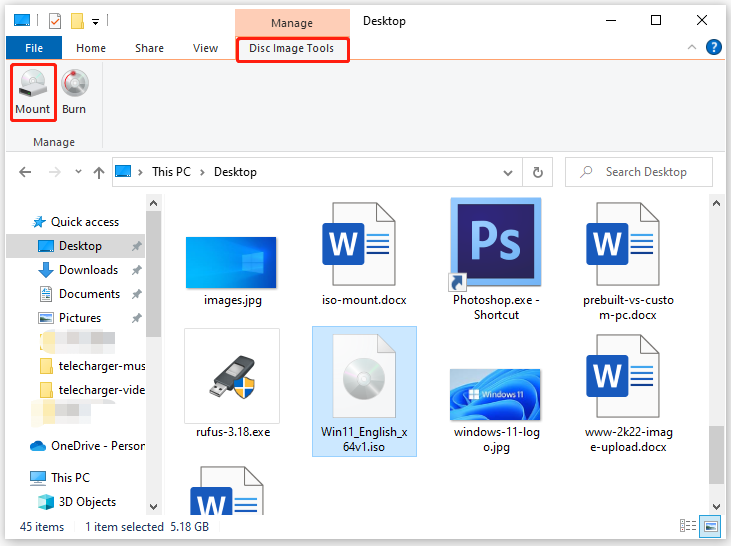
Option 2: Use the Ribbon Menu
Step 1: Move to the target ISO.
Step 2: Click on the ISO you want to mount.
Step 3: Tap on the Disc Image Tools tab at the top of the window and click on the Mount option.
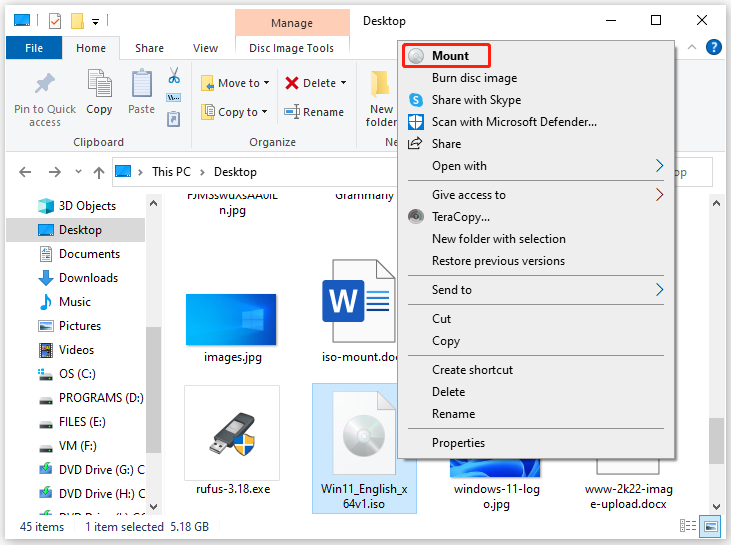
Option 3: Use the Context Menu
Step 1: Find the ISO file in the File Explorer.
Step 2: Right-click on the ISO file and tap the Mount option in the context menu.
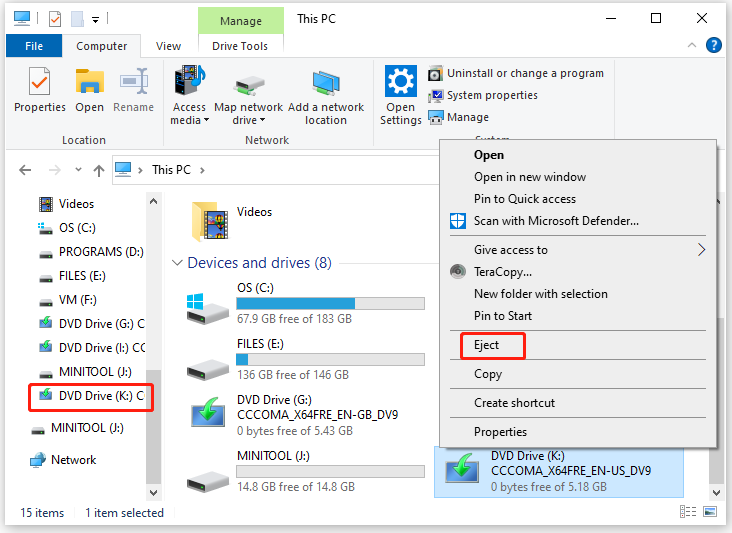
If you don’t use the ISO file, you can unmount it with these steps.
Step 1: Open File Explorer and click This PC to expand its content.
Step 2: Right-click on the virtual drive in the right side of the window and choose the Eject option. Alternatively, you can also right-click it in the left panel and select Eject to unmount the image.
Windows ISO Downloader: How to Get It to Download Windows 11
Way 2: Mount ISO via PowerShell
PowerShell also allows you to unmount and mount ISO. You can perform the ISO mount/unmount operation by following steps below.
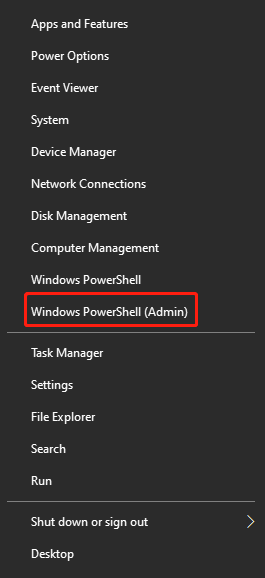
Step 1: Right-click on the Windows icon on the desktop and click Windows PowerShell (Admin).
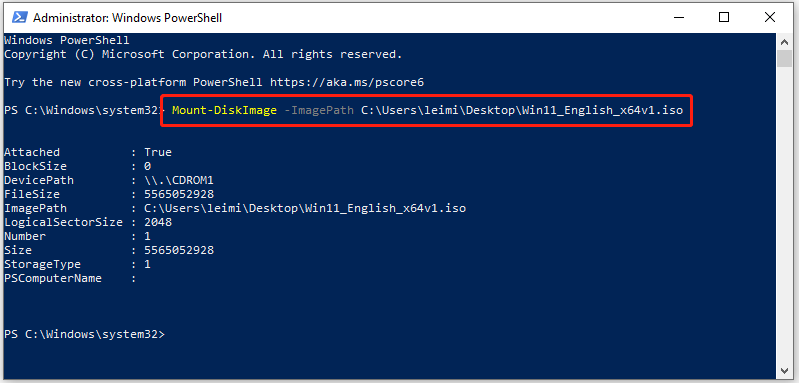
Step 2: Type Mount-DiskImage -ImagePath PATHTOISOFILE and hit Enter to execute the command. After that, you can access the contents to install the application or extract the image from the mounted ISO.
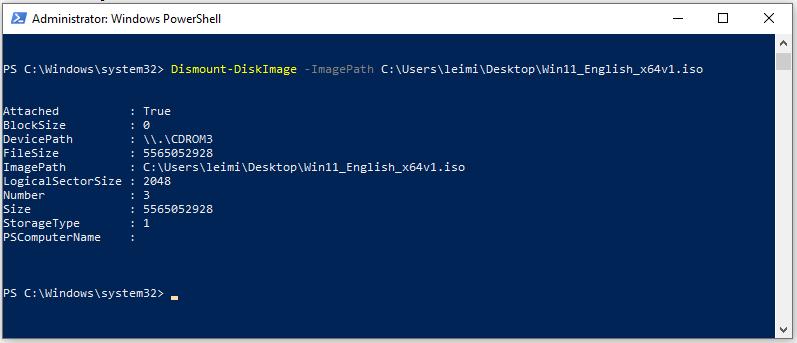
How to unmount ISO via PowerShell? Well, run PowerShell as administrator first and then type and execute the command below to unmount it.
Dismount-DiskImage -ImagePath “PATHTOISOFILE”
Way 3: Mount ISO with Third-Party Disk Image Mounters
You can also mount ISO by using disk image mounters especially if you run a Windows 7 system. What’s the best ISO mounter software? Here are some recommendations for you.
WinCDEmu Free ISO Mounter
It is a free and open-source CD/DVD/BD emulator, allowing you to mount optical disc images by clicking them in the File Explorer. It enables you to mount images including ISO, CUE, MDS/MDF, NRG, and IMG with a single click. Besides, it supports an unlimited amount of virtual drives.
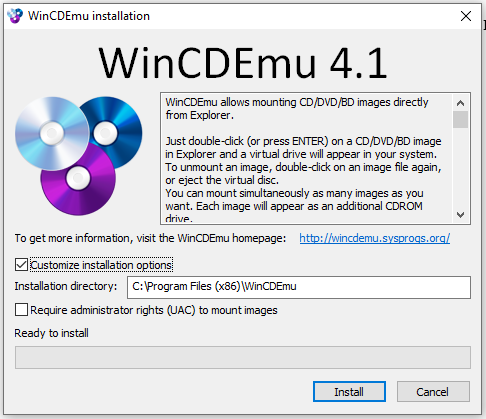
WinCDEmu can run on 32-bit and 64-bit Windows versions ranging from XP to Windows 7. It doesn’t require a restart after installation. You can automatically mount an ISO file to a drive letter by double-clicking on it after the installation. If you don’t want to be asked which drive letter to use, check the Manage drive letters automatically option.
By right-clicking the target drive in File Explorer and choosing Create an ISO Image, you can create an ISO from a CD/DVD or Blu-Ray disc easily. To unmount ISO files, you just need to right-click on the drive in Explorer and tap Eject.
Virtual CloneDrive
As its name implies, Virtual CloneDrive only exists virtually. It supports image formats like ISO, BIN, IMG, DVD, UDF, and CCD. It can mount up to 15 virtual drives at the same time. You can mount an ISO file by double-clicking on it or right-clicking on the tray icon and clicking Mount.
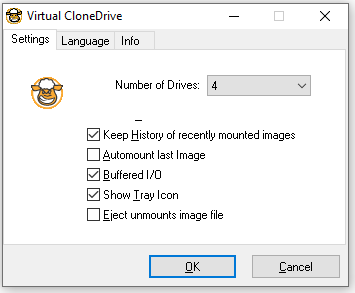
Images files created with CloneDVD or CloneCD can be mounted onto a virtual drive and used in the same manner as plugging them into a normal CD/DVD drive. Though Virtual CloneDrive hasn’t been updated in the last few years, it is still completely compatible with Windows 10.
DVDFab Virtual Drive
DVDFab Virtual Drive supports a maximum of 18 virtual drives simultaneously from 8 different types of disc images. The Miniso DVD/Blu-Ray format is one of these image types, which allows you to mount a DVD or Blu-ray ISO image or folder so that it can be played in a media player.
You can access most functions of this disk image mounter via the tray icon menu. Options like changing the drive icons, Windows integration, and hotkeys can be modified in the Settings window.
ISODisk
ISODisk, a free and powerful ISO mounter program, allows you to create up to 20 virtual CD/DVD drivers. With this best ISO mounter software, you can mount an ISO file and access the files as if the ISO is burned to CD or DVD.
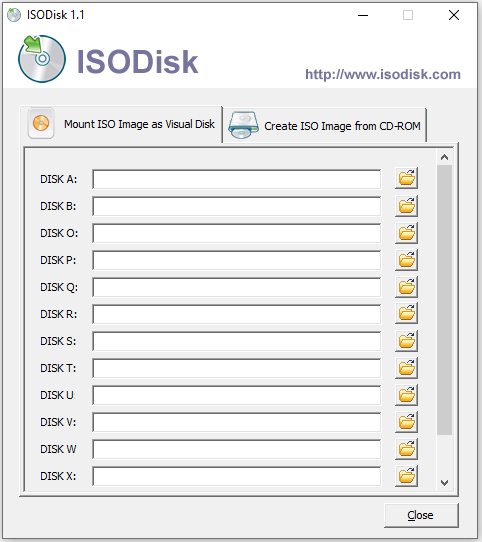
You don’t need to install any other virtual drive software after installing ISODisk. If you have mapped the archive to a virtual drive, you are able to view the contents in Windows Explorer.
PowerISO
PowerISO supports all the world-known standard image file formats like ISO, BIN, CDI, NRG, and DAA. It is a multifunctional disk image mounter. For instance, it can help you burn ISO files to CD, DVD, or Blu-Ray disc. It can be used to rip audio CD to MP3, WMA, APE, FLAC, or BIN files.
Furthermore, PowerISO can convert all the other supported image file formats to a standard ISO image file. Hence, it is also regarded as an ISO creator. Importantly, it is capable of creating bootable USB flash drives. PowerISO is available on Windows, Linux, and macOS.
If you want to know more tools to make bootable USB drives, you can read this post: 8 Best USB Bootable Software to Make Windows Installation Media
MiniTool Partition Wizard DemoClick to Download100%Clean & Safe
The Bootable Media Builder of MiniTool Partition Wizard also allows you to create a bootable USB drive. Different from the above bootable drives, this is made to enter the MiniTool PE loader where you can fix issues on Windows with this software.
How to mount ISO? This post provides you with 3 ways. If you want to find the best ISO mounter software, you can also obtain information from the post.

User Comments :