Do you know how to make your monitor have a better image display effect by installing a color profile? If not, you should read this post, in which MiniTool shows you how to install a color profile.
What Is a Color Profile?
When it comes to displaying an accurate color on a monitor, we should touch upon two factors:
Display Driver and Monitor. A combination of both defines how many colors it displays. In this post, I will only explain color profile, which is related to monitor.
Why an image looks different on every monitor? Why some of the pictures taken from a phone look surprisingly better on another phone’s display? The answer lies in the color profile. Then, what is a color profile?
A color profile is like a manual which defines how a monitor can create colors, and how to use the colors. They are written per the hardware of the monitor. You can also call them Blue Prints. When OS wants to print color on display, it needs to use this blueprint to draw accordingly.
With the color profile, the monitor can pick up the right color from the images and display it. If you don’t see the same color as you see in the real world, then the display or the monitor doesn’t have the correct color profile.
How to Find and Download Color Profiles for Your Monitor?
A color profile, whose file extension is ICM (Image Color Management) or ICC (International Color Consortium), should be installed along with the display driver. However, if the color profile is not available, then Windows will use a general ICM file that works with most of the displays. That’s the reason why the installation of the ICM file is essential.
Please refer to the following steps to find and download the correct color profile:
Step 1: Find out the exact monitor model. You can find it in your bill or at the back of the monitor. If you still cannot find it, open Device Manager > Monitors, and it will list all the monitors with the exact model name.
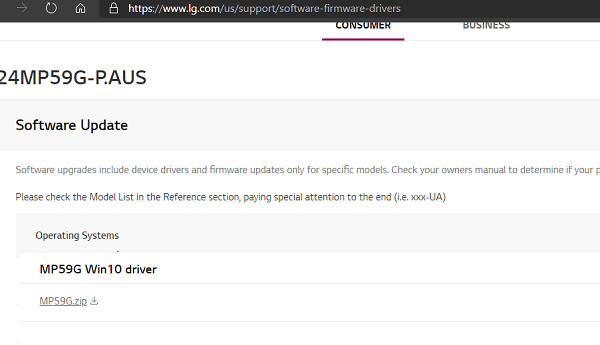
Step 2: Go to the OEM website, which is the only place you can get the right profile for your monitor. Then, locate the Driver download section. Choose the right driver to download.
Step 3: Extract the downloaded folder. It has the driver and the ICC file inside it.

How to install a color profile in Windows 10
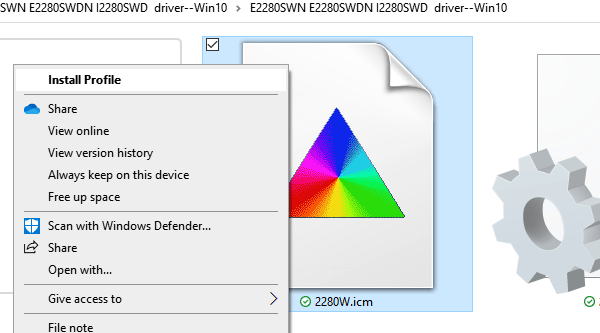
Installing a color profile is very close to how we install fonts in Windows 10. You just need to locate the ICC or ICM file in the folder you extracted above and then right-click on the file to choose the Install Profile from the context menu. Then, the color profile is installed instantly without any additional steps.

If for some reasons, it doesn’t work, then we can use the Color Management feature in Windows 10 to install the color profile. Please follow the steps below:
Step 1: Type “color management” in the Start menu search box. And then click the best-matched result to open it. Here you can manage color profiles for all the devices related to the display.
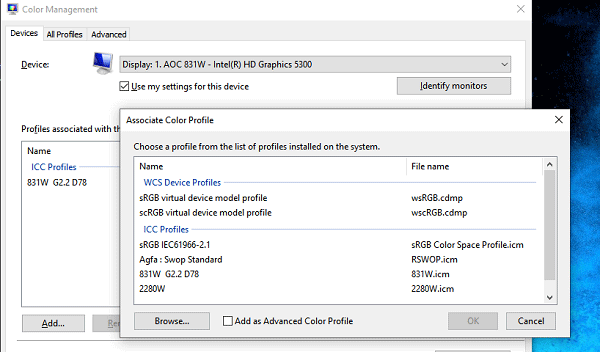
Step 2: Select the monitor for which you need to install the color profile. Then, all the color profiles will be listed under Profiles associated with the selected display.
Step 3: Check the box next to Use my settings for this device, which will enable the Add button. Click the Add button and select the downloaded color profile. After that, set it as the default profile in Windows 10.


User Comments :