Are you facing HyperX Cloud 2 mic not working on Windows 10? How to fix HyperX Cloud 2 mic not working? Actually, you can solve the problem easily by yourself. Just follow the solutions provided by MiniTool Software.
HyperX Cloud 2 is a wonderful gaming headphone which bring unforgettable experience for players. It is quite popular for its memory foam cushion comfort, passive noise cancellation and virtual 7.1 surround sound.
However, many users complain that their HyperX Cloud 2 mic was not working on Windows 10.
Fortunately, you may be able to fix the problem easily. In the following contents, there are some solutions to HyperX Cloud 2 mic not working. Let’s try them one by one until the mic works.
Solution 1: Check Your Sound Settings
If your HyperX Cloud 2 mic is disabled or not set as the default device on your computer, you may encounter HyperX Cloud 2 mic not working.
To enable it and set it as the default device, you can follow the steps below.
Step 1: Open Control Panel.
Step 2: Select Large icons from the View by drop-down menu. Then click Sound.
Step 3: Switch to Recording tab. Right-click any empty place in the window and check Show Disabled Devices.
Step 4: Right-click the Headset Microphone and choose Enable. Then right-click it again and click Set as Default Device.
Step 5: Then you need to click Apply and OK to save the changes you have made.
Now you can check if HyperX Cloud 2 mic not working has been fixed.
Solution 2: Try Audio Troubleshooting
You can also use the built-in troubleshooter in your Windows 10 to fix HyperX Cloud 2 mic not working issue.
You just need to right-click the Speaker icon from the bottom-right corner and select Troubleshoot Sound Problems from the pop-up menu. Then follow the onscreen guide to start the troubleshooting and apply the suggested fixes.
After the troubleshooting, you can restart your computer and check if HyperX Cloud 2 mic not working still exists.
Solution 3: Update the Audio Driver
When you encounter HyperX Cloud 2 mic not working on Windows 10, you can try updating audio driver to solve the problem, because corrupted or outdated audio driver could be another reason for this issue.
Here is how to fix HyperX Cloud 2 mic not working by updating audio driver.
Step 1: Open Run window by pressing Win + R. Then type the command “devmgmt.msc”to open Device Manager.
Step 2: Double-click Audio inputs and outputs to extend the list. Then right-click the driver associated with your HyperX Cloud 2 mic, and choose Update driver.
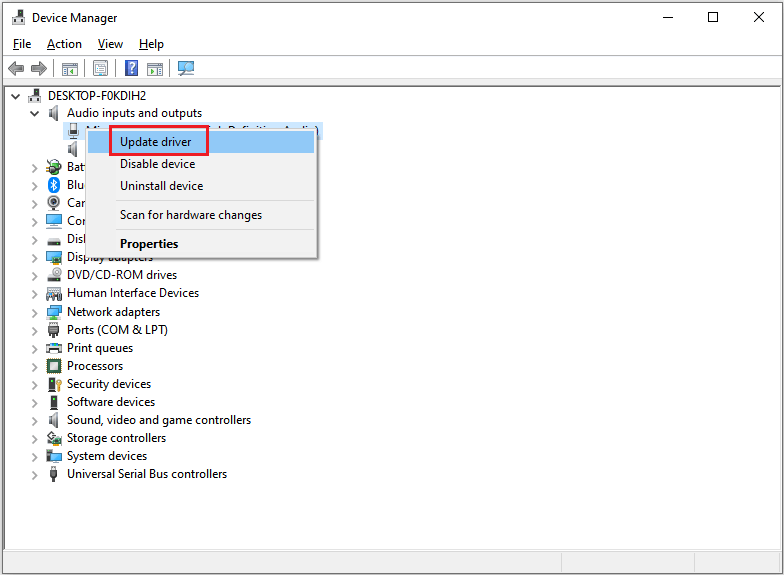
Step 3: In the pop-up window, choose Search automatically for updated driver software. Then Windows will search, download and install the latest driver for your device automatically. Just wait patiently and follow the onscreen instructions to finish the process.
Once it’s completed, you can restart your computer and check if your HyperX Cloud 2 mic can work without any problems.
If the above method failed, you can use a professional third-party program to update drivers. Driver Easy Pro can detect all outdated drivers and update them with just one click. Here is the guide:
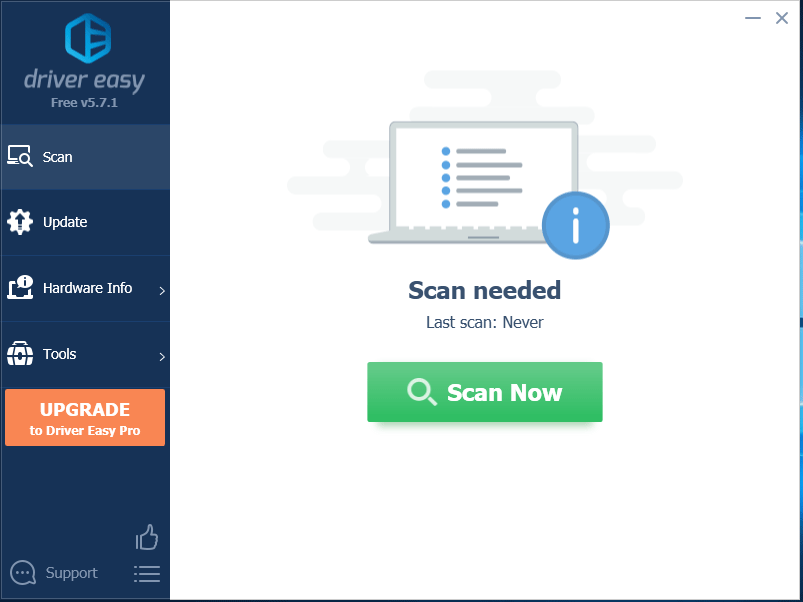
Step 1: Install Driver Easy and launch it. Click the Scan Now button.
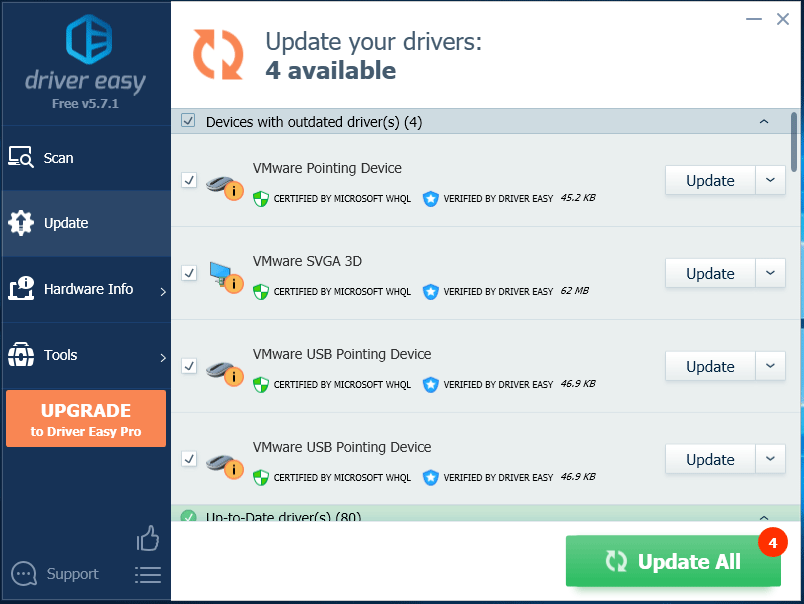
Step 2: After the scanning process is completed, click the Update All button to download and install the latest drivers for all devices with outdated drivers.


User Comments :