Do you how to configure a Hyper-V pass-through disk as well as how to convert the pass-through disk to a virtual disk and remove it? MiniTool offers you a step-by-step guide.
Pass-through Disk Pros and Cons
Whether you are a software developer, an IT professional, or a technology enthusiast, many of you need to run multiple operating systems. Hyper-V lets you run multiple operating systems as virtual machines on Windows.
In general, the Hyper-V virtual machines can be configured to use one or more virtual hard disks, or a dedicated physical hard disk, which is referred to as a pass-through disk. Some people may like to bind a virtual machine to a pass-through disk because of the following reasons:
- It performs better than virtual hard disks because there is less overhead.
- It uses a simpler storage path because it does not involve the file system on the host.
- It is better aligned with the SAN.
- It can reduce CPU usage.
- It supports large disks.
However, using pass-through disks has some significant disadvantages, which makes you migrate and remove the pass-through disk. The disadvantages include:
- The pass-through disk can only be used by one virtual machine.
- Hyper-V cannot take a snapshot of the pass-through disk. The pass-through disk cannot be backed up by the Hyper-V VSS Writer and the backup program using Hyper-V VSS Writer. This point may limit the use of the Live Migration feature.
This post tells you how to configure a pass-through disk and how to migrate and remove it. You can try them.
How to Configure a Pass-through Disk in Hyper-V
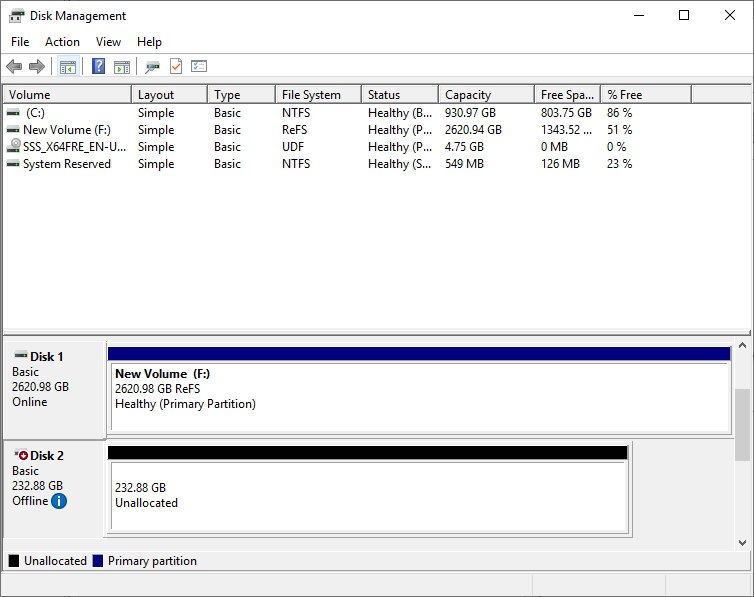
Step 1: In the host computer, take a disk offline.
- Press “Win + R” keys simultaneously to open the Run
- Enter “msc” in the Run prompt and click OK button to open the Disk Management console.
- Locate the disk that you want to dedicate to the virtual machine. Please make sure that the disk does not contain any volumes.
- Right-click on the disk and choose the Offline command from the shortcut menu.
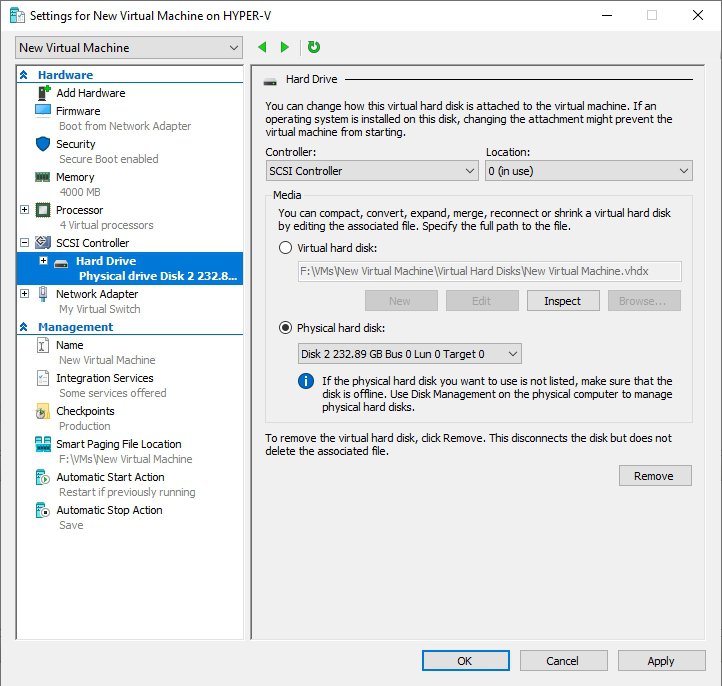
Step 2: Configuring pass-through disk in Hyper-V Manager.
- Open Hyper-V Manager and go into the Settings for the virtual machine that you plan on linking to the disk.
- Go to the Hard Drive
- Select the Physical Hard Disk
- Select the hard disk that you want to use from the drop-down list.
How to Convert the Pass-through Disk to a Virtual Disk and Remove It
Tip: It’s a good idea to back up the VM before you start in case anything goes wrong. In addition, you should make sure that you have enough free space to create a virtual hard disk that is at least as large as the physical disk that you are replacing.
Step 1: Create a virtual hard disk
- Shut down the virtual machine.
- Open Disk Management on the host machine and note the disk number.
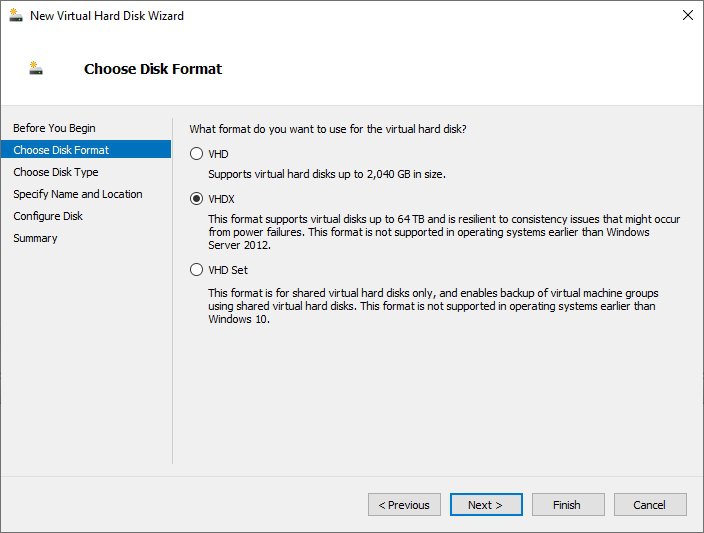
- Open Hyper-V Manager, and select New >Hard Disk under Actions. This will open the New Virtual Hard Disk Wizard.
- Choose the disk format. You should choose the VHDX option unless you have a compelling reason to create a VHD-based disk instead.
- Choose disk types. You will be asked to create a fixed-size, dynamically expanding, or differencing disk. Choose the Dynamically Expanding option and click Next, because it can be difficult to correctly size a fixed-length disk, although Fixed Size option does deliver better overall performance.
- Specify a name and a location for the virtual hard disk that you are creating. Please save the virtual hard disk in a location that has plenty of free space.
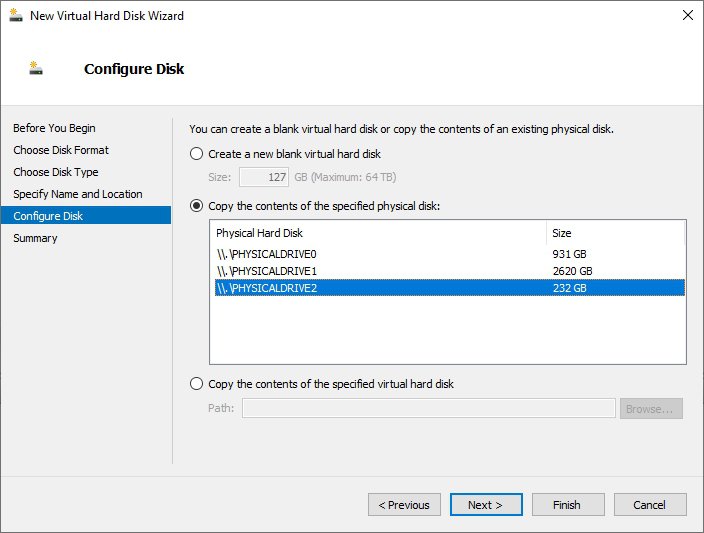
Step 2: Replace the pass-through disk with the new virtual disk in the Configure Disk screen.
- When you complete step 1 and click Next, you will be taken to the all-important Configure Disk
- Choose Copy the contents of the specified physical disk, and select the pass-through disk that you plan to replace. The disk number that you noted in Disk Management can help you identify the pass-through disk.
- Click Next again and you will be taken to a summary screen. Take a moment to make sure that the information displayed on the summary screen is correct, and then click Finish to begin the conversion process.
Step 3: Remove the physical disk and bind the virtual hard disk to your VM.
- Go to the virtual machine’s settings.
- Select the physical disk and click the Remove button, followed by the Apply
- Click on the SCSI Controller and select the Hard Disk
- Click the Add button and then choose the Virtual Hard Disk option when prompted.
- Click the Browse button and select the new virtual hard disk that you have created and click OK.
About The Author

Position: Columnist
Linda has been an editor at MiniTool for seven years. She continuously learns about computers and puts her knowledge into practice. Moreover, she is particularly knowledgeable in disk management, data recovery, system installation, and PDF editing. Her articles typically reference multiple examples or are based on her own experience, providing users with the most suitable solutions.
User Comments :