It is necessary to perform a HP warranty check when you encounter any issues with HP devices. In this post, MiniTool offers you a guide on how to perform a HP laptop warranty check and HP serial number lookup.
All HP devices have a one-year warranty. If a device is within warranty time, you can send it to its store to get it repaired. Hence, the first thing you should do is to check if your device is under warranty after a defect or damage occurs.
How to perform a HP warranty lookup? This post would tell you two ways to check the HP warranty status.
In addition to the HP laptop warranty check discussed in this post, the HP warranty check includes devices like printers, notebook PCs, tablets, desktop/tower PCs, All-in-one PCs, monitors, etc.
Way 1: Via the HP Support Assistant App
A simple way to perform a HP warranty check is to use the HP Support Assistant app. For that, you just need to run the app on your smartphone and then click on the Warranty and Service Contracts tap to check the current status of your warranty.
Way 2: Via the HP Warranty Support Website
To perform a HP laptop warranty check on the official Support page, you need to know the serial number of your device. That is to say, you’re required to conduct a HP serial number lookup before performing a HP warranty check.
HP Laptop Serial Number Lookup
Option 1: Check the Information under the Laptop/Battery Component
On most HP laptops, the serial number and model number are displayed on the sticker that is attached under the laptop. Turn your HP laptop upside-down and read the sticker. The number following the prefix “S/N”, “Serial”, or “Serial Number” is the serial number.
If you laptop has a removable battery, it is likely that the serial number is located under the compartment of the batteries. The keypoint is that you need to remove the battery to find the serial number.
Option 2: Use Command Prompt
Step 1: Open the Run window by pressing Windows and R keys.
Step 2: Input cmd and hit OK.
Step 3: Type wmic bios get serialnumber in the Command Prompt window and press Enter. Then it will display your serial number in seconds. The screenshot below is just for illustration. The shown serial number doesn’t belong to a HP laptop.

HP Laptop Warranty Check
After you get the HP serial number lookup specs from above content, you can perform a HP warranty lookup now.
Step 1: Head to the HP official support page by clicking here.
Step 2: Click on the Check warranty status tap to continue.

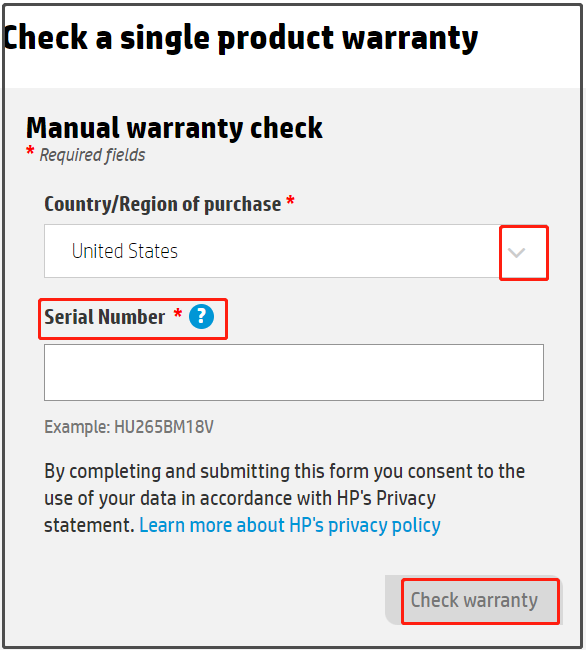
Step 3: In the prompted window, choose the Country/Region of purchase of your HP device from the drop-down menu and copy & paste the serial number found in the HP laptop serial number lookup section.
Step 4: After that, click on the Check warranty button. Then it will tell you the warranty status of your HP device.

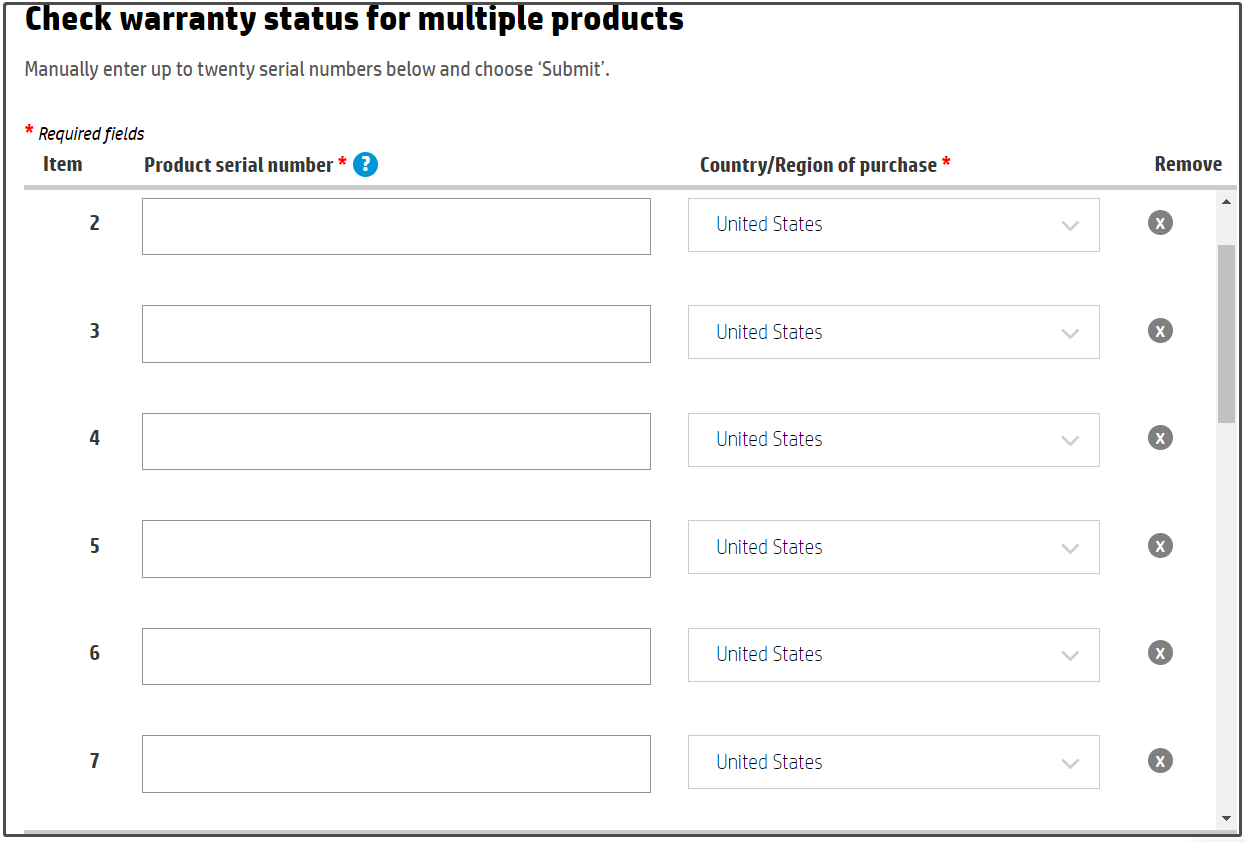
Step 5: To check multiple warranties, move to the bottom of the HP warranty lookup page and click Continue.

Step 6: Likewise, you need to input the serial number of target HP devices and choose their Country/Region of purchase from the drop-down menu. Finally, click on the Submit button at the bottom right of the page.
You are allowed to perform a HP warranty check for up to 20 devices on this page.

Bottom Line
How to conduct a HP warranty check operation? This post provides you with two easy methods. If you check HP laptop warranty via the support page, you need to perform a HP laptop serial number lookup first. All the details can be found in this post.


User Comments :