Do you know how to install PowerToys on Windows 10 and how to use each of its features? If you are not familiar with it, you should read this post, in which MiniTool offers you a step-by-step guide on how to install PowerToys and how to use each of its features.
What Is PowerToys?
PowerToys was originally a set of productivity tools on Windows 95. It contained 15 tools including:
Tweak UI: Customize the Windows user interface;
Quick Res: Quickly change the screen resolution;
Send To X: Send files and folders to the command line, clipboard or desktop;
Xmouse 1.2: Make the window focus follow the mouse, activating the window without having to click.
Unfortunately, the PowerToys was stopped and not updated since Windows XP due to unstable functions and poor testing. However, after nearly 20 years, Microsoft brought the new PowerToys suite to the Windows 10 system in May this year.
The new version of PowerToys is open-source and contains three features: FancyZones, Power Renamer, and Shortcut Guide. Then, please read the following content to know how to install PowerToys and use its three features.
How to Install PowerToys
Step 1: Click here to download the latest PowerToys. In this step, you should download the PowerToysSetup.msi file and a Source code file.
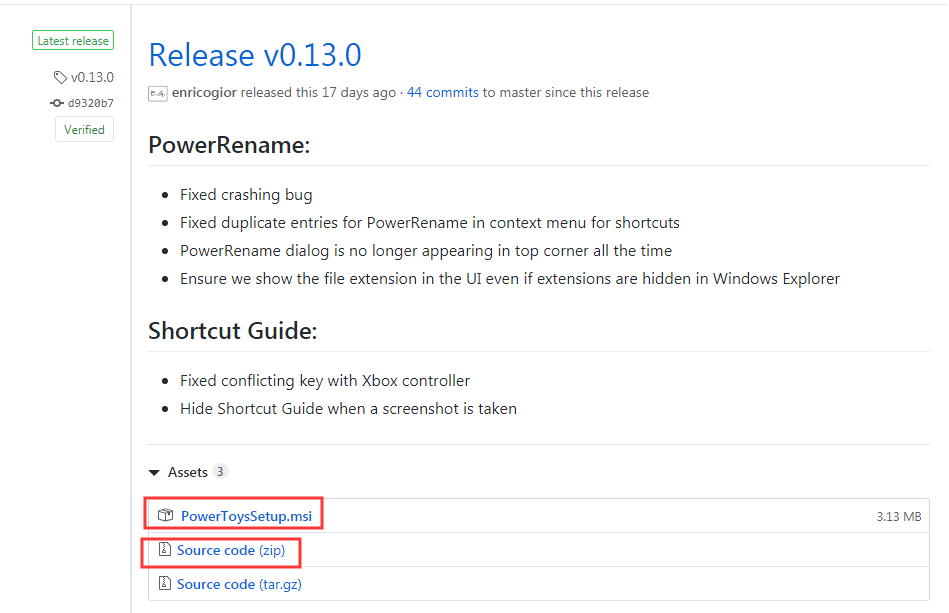
Step 2: Extract the Source code file and then double-click the setup file to install PowerToys.
Step 3: After the installation process is completed, click the PowerToys logo in the notification area on the taskbar and then double-click to launch it. You will then get the following screen.
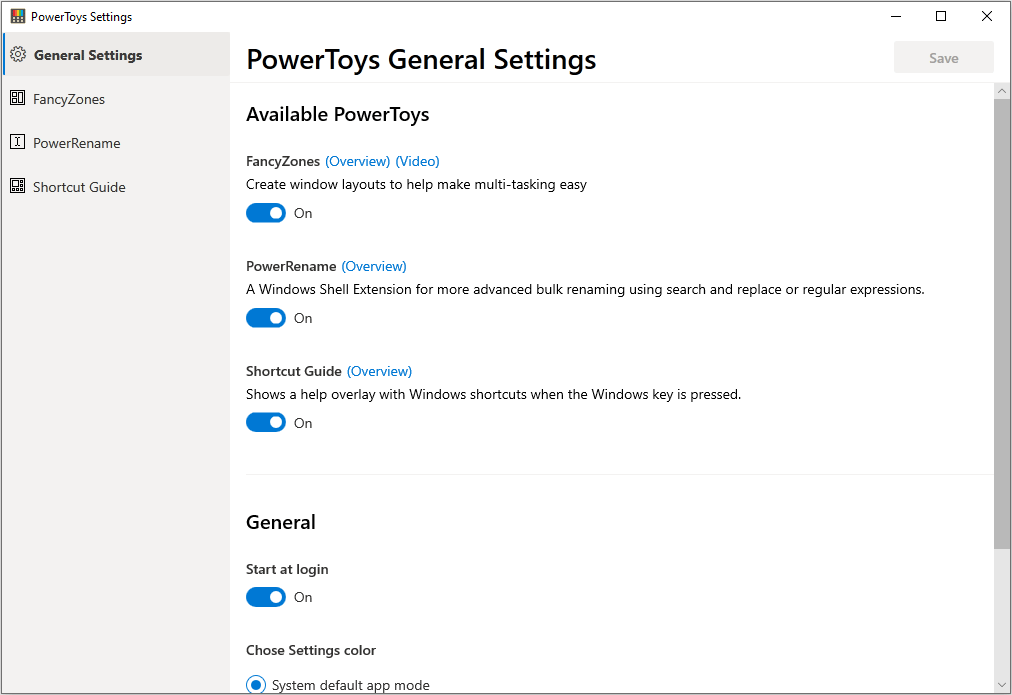
There are four modules in the PowerToys Settings. The first module is General Settings, which allows you to toggle off some features, and other modules are available features. As new modules become available, they will be added to the list.
How to Create a Custom Window Layout with FancyZones
Step 1: Highlight the FancyZones module and then click Edit zones button.
Step 2: Choose a layout. You can use Templates or Custom layouts.
- If you use templates, you can choose from columns, rows, grids, etc. Then, you can increase or decrease columns, decide whether to show space around zones, and configure space around zones.
- If you want to customize your own layout, you can choose Custom and click Create new custom. In this step, I customized my own layout.
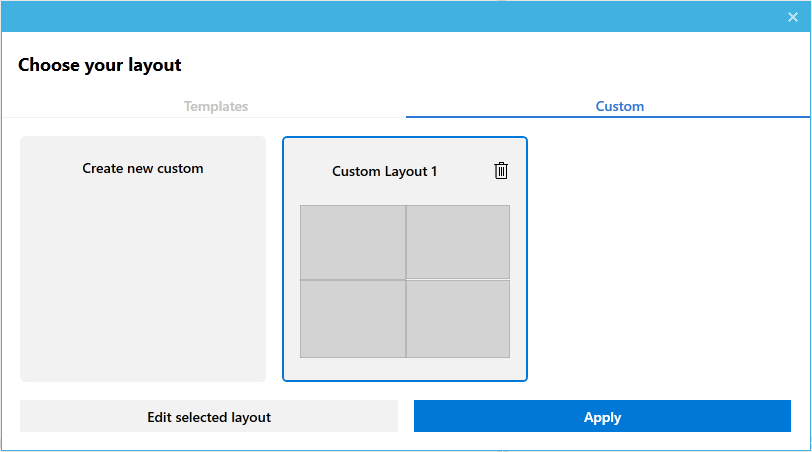
Step 3: After choosing a layout, click the Apply button. Then, hold down the Shift key while dragging and dropping the window into a proper zone.
In this way, you can lay multiple program windows on the screen in the most sensible way so as to improve your productivity and efficiency.
In addition, FancyZones also includes settings like overriding snap key shortcut, flash when active layout changes, keep layout intact when the resolution is changed, and more. All of them are very useful for those who need to work on multiple windows all the time.
How to Rename Multiple Files at Once with Power Renamer
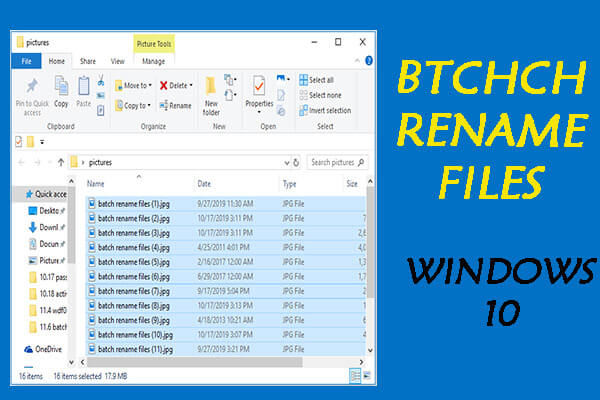
Step 1: Open File Explorer and select a few files you’d like to rename (you can select multiple file by holding down the Ctrl key while selecting files with the cursor).
Step 2: Right-click on these selected files and choose the PowerRename button.
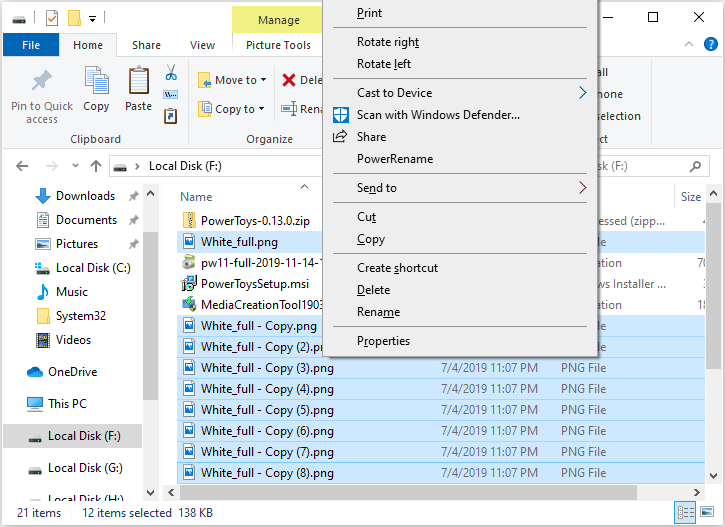
Step 3: Type the text you want to change in the Search for field, and put the text you want to use in the Replace with field. Then, preview your changes in the Preview window. If there is no problem, click the Rename button.
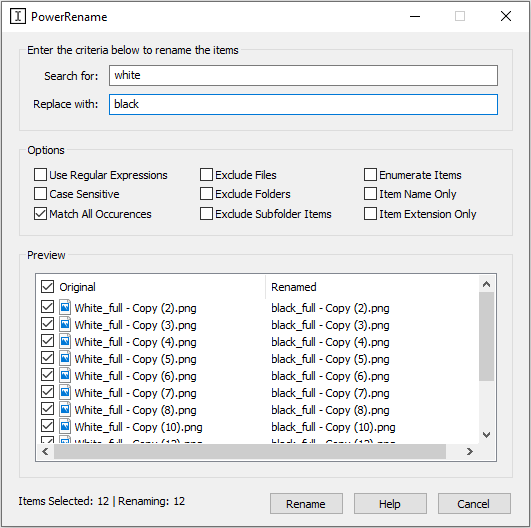
In addition, the Power Renamer offers necessary options like Regex, Exclusion, case sensitive, etc., which will help you filter files more accurately.
How to Use Shortcut Guide
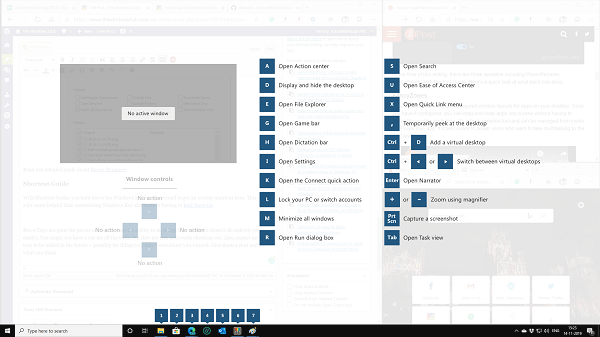
If you aren’t aware of shortcuts available in Windows, Shortcut Guide is very useful. You just need to press the Windows key for a little longer than usual, and an overlay with all the essential keyboard shortcuts will appear on your screen.

User Comments :