How to show hidden disk partitions if they are not found in File Explorer? Such situation is usually brought by hidden disk partitions which can be made by Windows, by users themselves or by manufacturer. This article shows how to show hidden disk partitions with reliable ways and simple steps.
If you can find a disk partition in Disk Management, but cannot view it in File Explorer, the first thing you should consider is that whether the disk partition is hidden or not. Usually, 3 causes may lead to a hidden partition, and we will talk about them one by one, with detailed information on how it is hidden and how to show hidden disk partition in that situation.
Situation 1. Partitions Hidden via Removing Drive Letter
This can be further divided into 2 cases:
Case 1. Windows will hide the System Reserved partition (Legacy BIOS) or EFI system partition (UEFI) by not assigning it a letter.
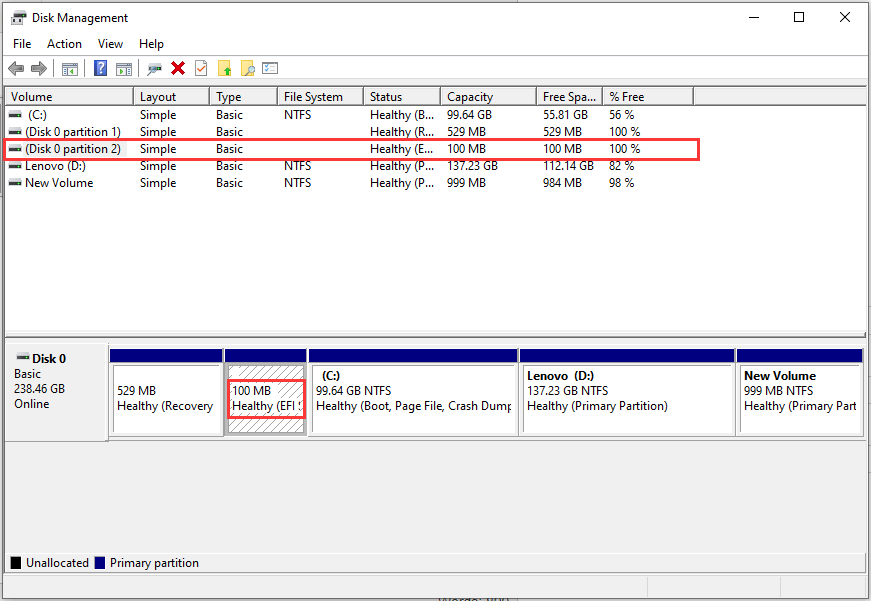
For those partitions, it is better to keep them remain their hidden states.
Case 2. In addition, users can intentionally hide a partition by removing its letter in Disk Management or third party program.
In Disk Management: Right click the partition you want to hide, choose Change Drive Letter and Paths, and tap Remove and then OK.
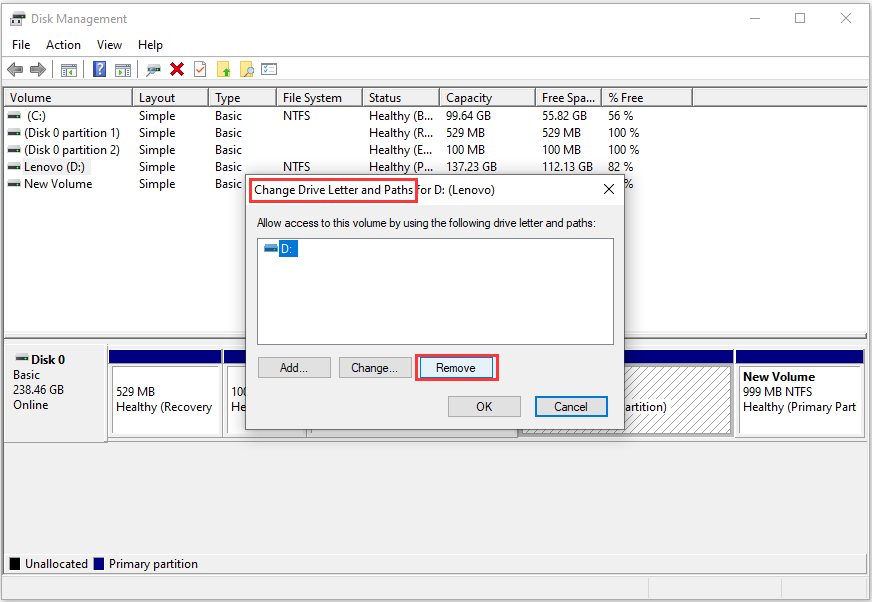
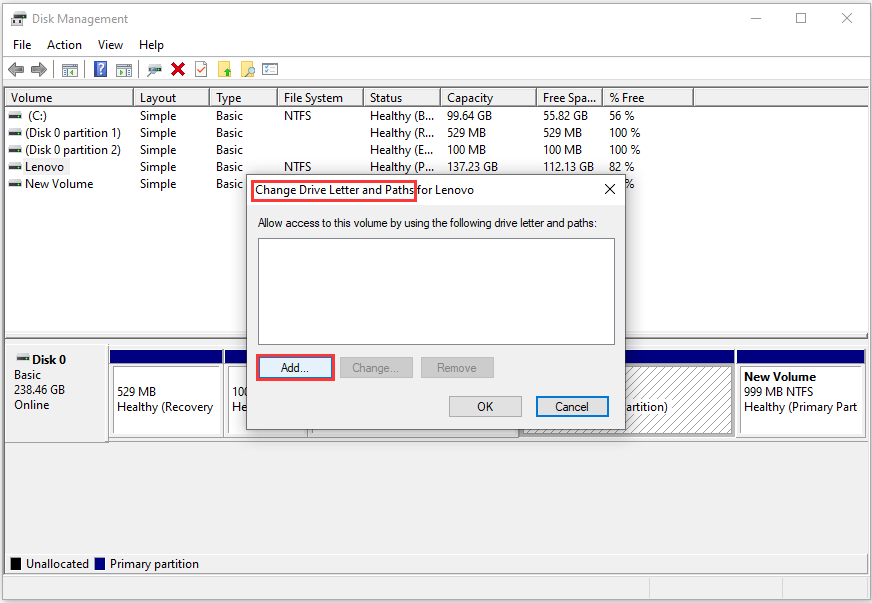
And to unhide disk partition, just Add a drive letter instead.
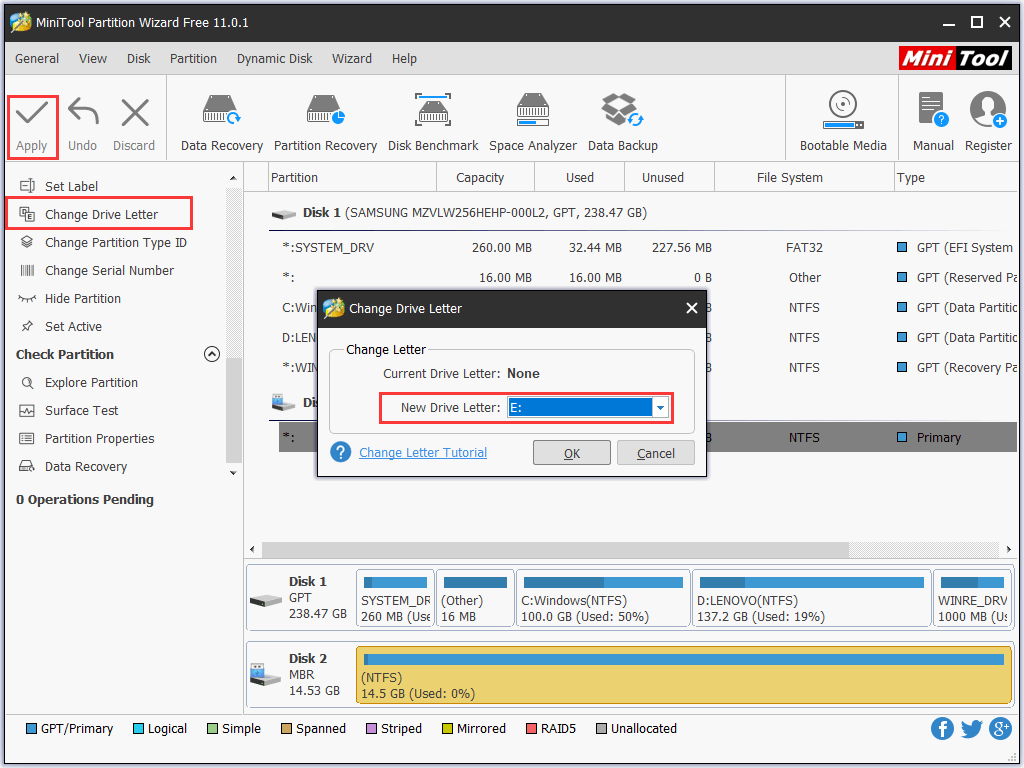
In third party program (take MiniTool Partition Wizard Free Edition for example): Select the partition you want to hide, choose Change Drive Letter feature from the left side, then select None from the drop-down list of New Drive Letter, tap on “OK”, and click “Apply” to perform the change.
MiniTool Partition Wizard FreeClick to Download100%Clean & Safe
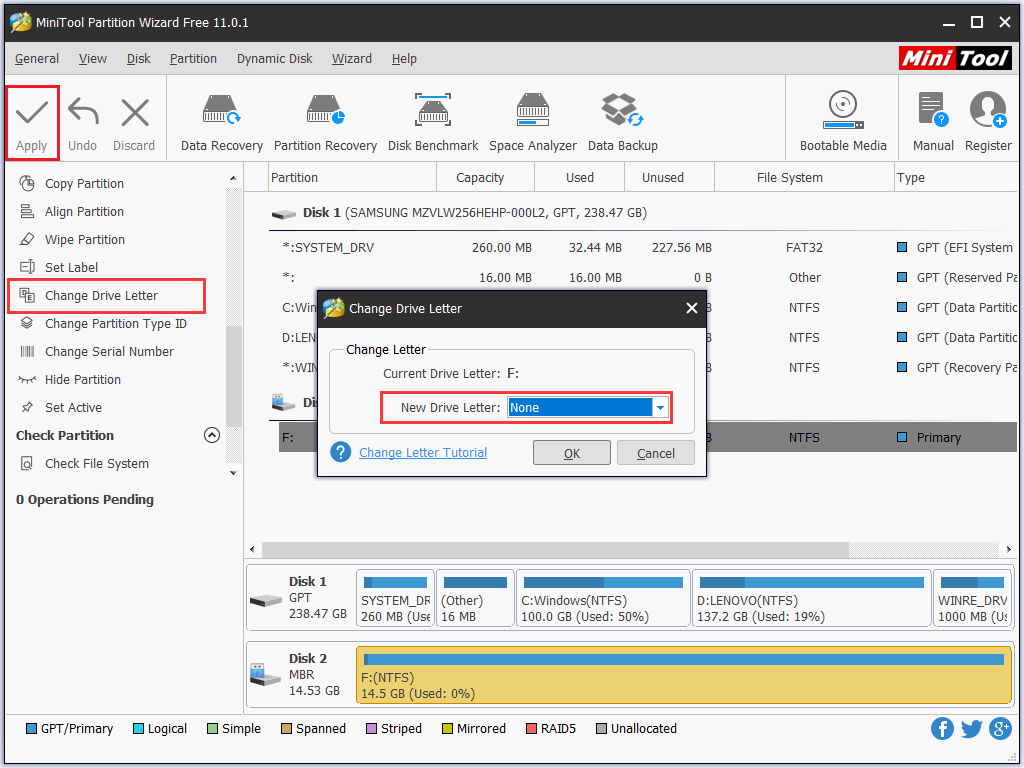
To show hidden hard disk partition, choose a drive letter from the drop-down box and execute this operation.
Situation 2. Partitions Hidden by Third Party Program
Using third party program you can hide a partition easily, and this kind of hidden partitions are quite different from those simply without drive letter, because it hides partition via modifying partition type ID. You can use MiniTool Partition Wizard to hide a partition.
MiniTool Partition Wizard FreeClick to Download100%Clean & Safe
- After you have installed Partition Wizard, launch it to get its main interface.
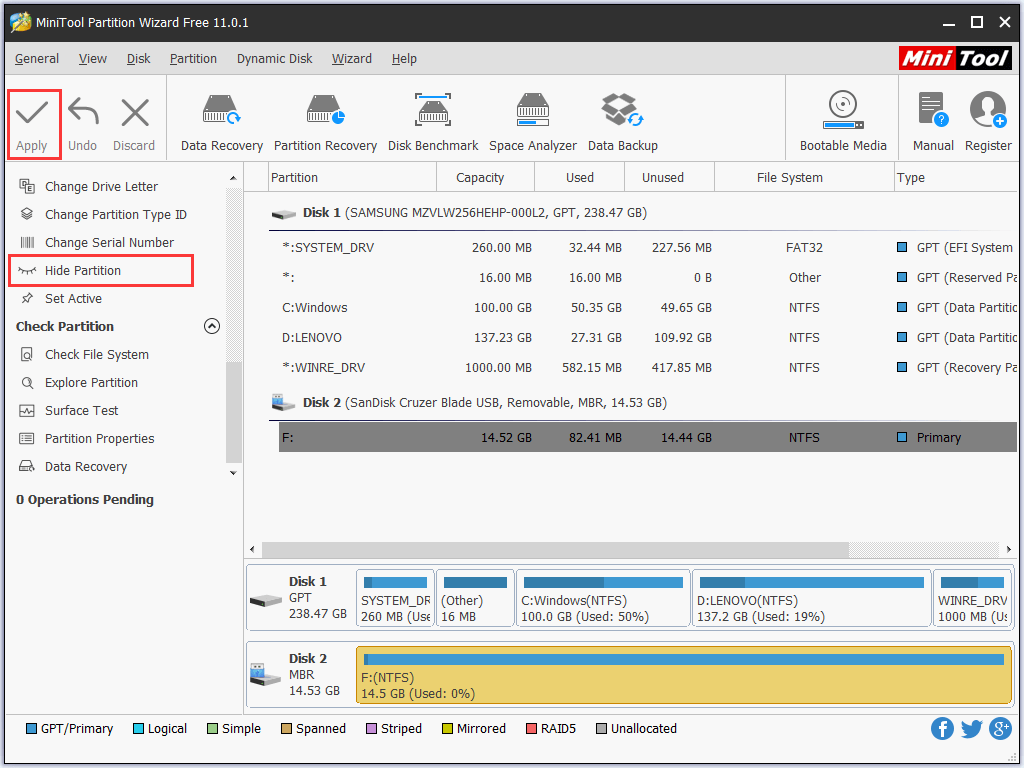
- Then, select the partition you want to hide and choose “Hide Partition” feature from the left side.
- Now we can see status of the selected partition becomes Hidden. At this time, as long as you click “Apply” button, this change will be applied to your computer.
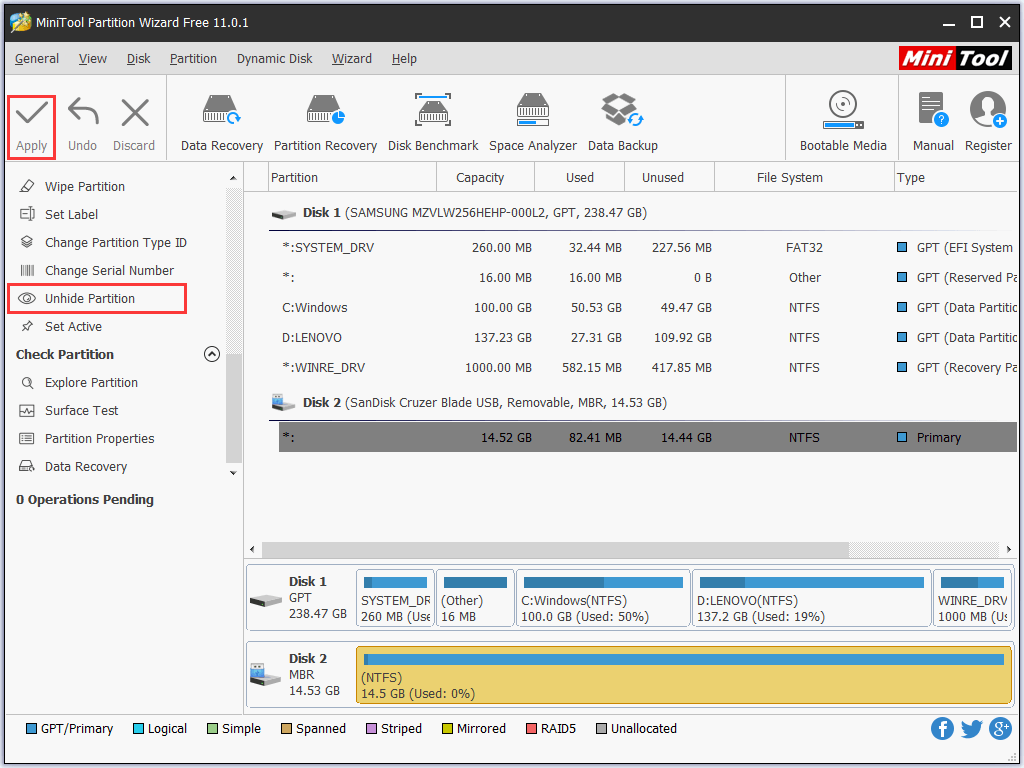
How to show hidden disk partition in such case? Similarly, apply the Unhide Partition feature instead.

Situation 3. Partitions Hidden by Manufacturer
In Disk Management or third party partitioning programs, you may see some wizard partitions, such as Recovery Partition and OEM Partition:
These partitions are hidden by manufacturers and related to system restore and factory reset. Generally, we are unable to access them since they are not allocated with letter, and Disk Management also does not give an option to give them letters. Well, is it possible to unhide such kind of hidden partitions? Of course, it’s possible.
We are going to introduce 2 ways to unhide this kind of partitions.
1. Show Manufacturer Hidden Partitions in Partition Wizard
MiniTool Partition Wizard FreeClick to Download100%Clean & Safe
Step 1. Download and install the program to your computer. Of course, if you have installed it, just ignore this step.
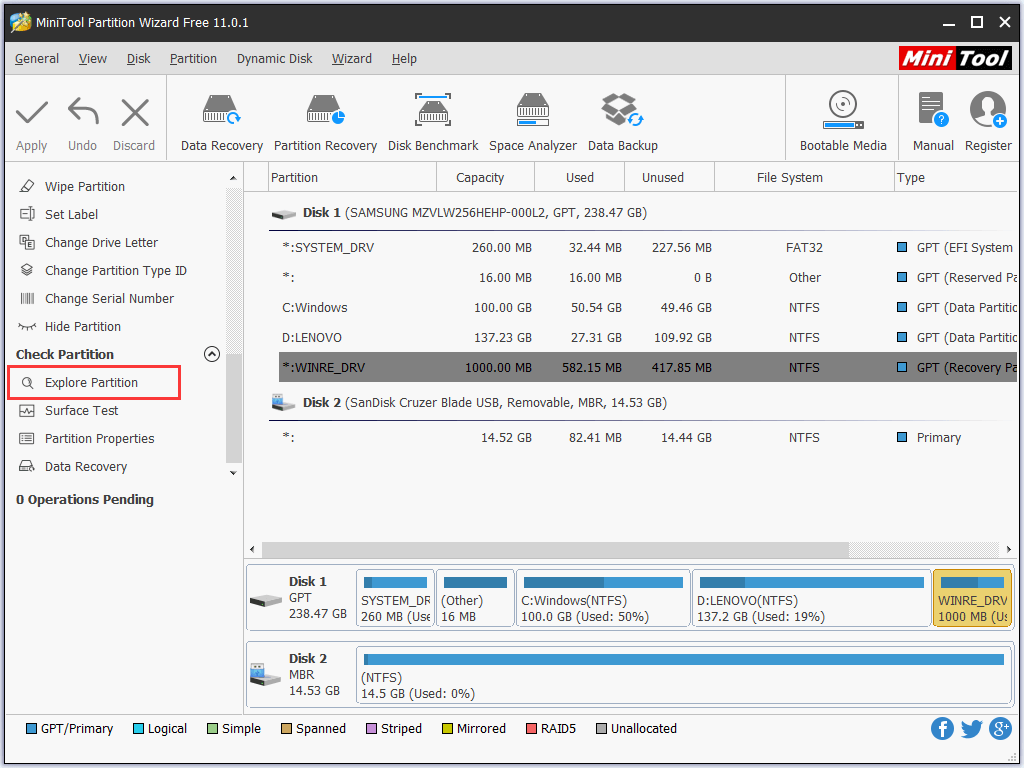
Step 2. Then, launch the program to get its main interface. Then, please select the partition you want to view and choose “Explore Partition” feature from the left side. After that, all contents in the selected partition will be shown clearly.
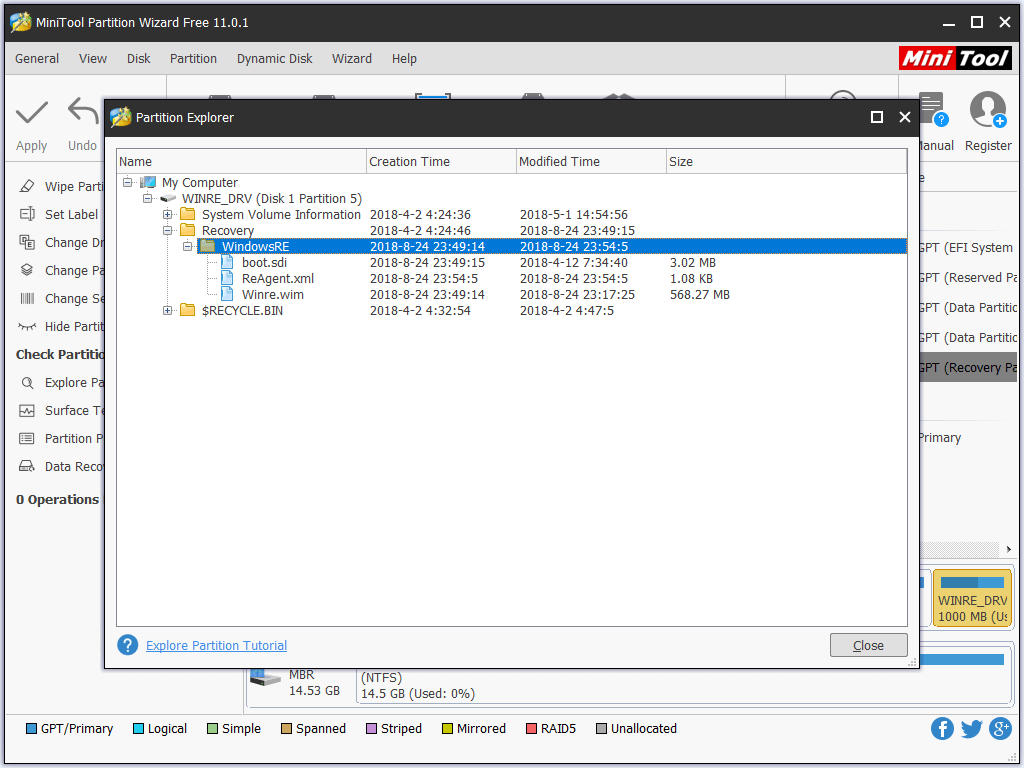
No commands are required, and no information is modified. That’s an easy and safe way to show hidden partitions. Then, let’s see the second way if you are unwilling to use third party program.
2. Unhide Manufacturer Hidden Partitions in Diskpart
For ordinary users, it might be difficult to unhide this kind of partitions, since it should be done in Diskpart and requires complex commands.
Show Recovery Partition
Step 1. Please type diskmgmt.msc in Search box to open Disk Management, and then focus on disk number (the disk holding recovery partition) and its partitions. Step 2. Type diskpart in Search box and run it as administrator. After diskpart is launched, please type the following commands, and each type ends with pressing on Enter key:
- List disk Select disk N (N is the number of the disk holding recovery partition)
- List partition Select partition N (now N is the number of the recovery partition)
- Detail partition (remember the type value of the partition, which is good if something goes wrong)
- Set id = 07 override
- Exit
Then, you can check whether your recovery partition is accessible in either Windows Explorer or Disk Management.
Show OEM Partition in Diskpart
Actually, we can unhide OEM partition like unhiding recovery partition in Diskpart, but there are many cases reporting that doing this makes Windows unbootable. So, we do not recommend this method. Just show these partitions in MiniTool Partition Wizard.
Actually, if you have created a backup for your system, there is no need to keep manufacturer hidden partitions. And you can delete them to release free space. View the post Solutions to Deleting Drive C, EFI System Volume, Recovery/OEM Volume to get steps to delete such a kind of partition, and then refer to the post Extend Partition to add the released space to other partitions.
Should you have any problem in hidden partitions, just feel free to leave us message in Comments part.

User Comments :