What is Steam Deck Recovery Image? How to reinstall SteamOS on the Steam Deck? How to factory reset Steam Deck? If you are confused about the questions, this article from MiniTool Partition Wizard will tell you everything about them.
What do you do if you can’t boot, installed another OS and want to go back to standard Deck SteamOS, or have other major issues? Fortunately, Valve provides a recovery image that will allow you to easily get your device back up and running.
What Is Steam Deck Recovery Image
A recovery image is a copy of the operating system that you can use to wipe and replace the current version on your device. This will restore your device’s software to the state it was in when you first took it out of the box.
You can also use a recovery image to restore a system without completely wiping the entire operating system, for example by wiping user data.
How to Restore SteamOS on the Steam Deck
Here are the steps to reinstall SteamOS on the Steam Deck. Before starting the recovery process, you’ll need a few things: a USB flash drive of at least 8 GB and a USB-C adapter. Also, the image is close to 3GB in size, so make sure you have a solid internet connection and a good computer.
1. Prepare a Bootable USB
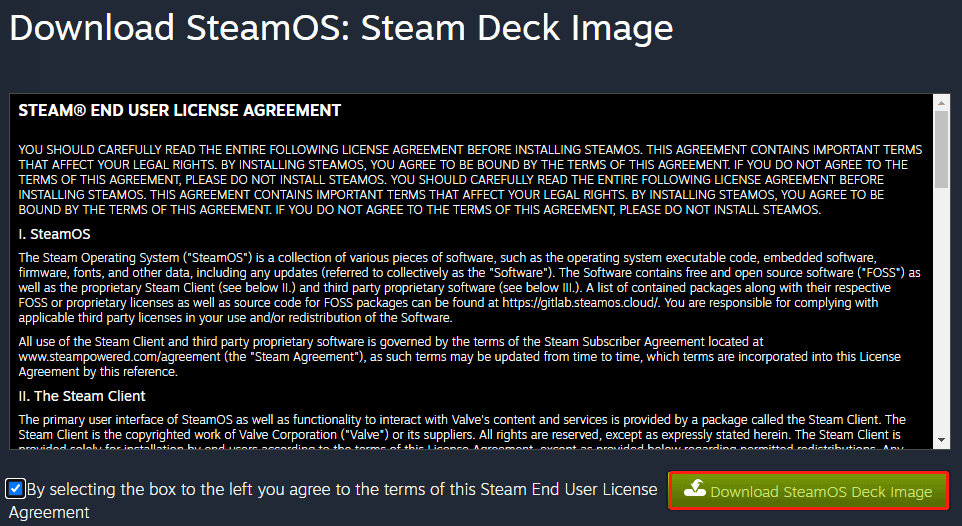
Step 1: Go to the Steam store to download the Recovery Image.

Step 2: Prepare a USB key. Depending on your operating system, follow one of the following guidelines:
- Windows: Download and run Rufus. Select the recovery file and write it to your drive. This will format the contents of your USB drive.
- macOS: Download and run Balena Etcher. Select the recovery file and write it to your drive. This will format the contents of your USB drive.
- Linux: On Linux, you can also use Balena Etcher. Select the recovery file and write it to your drive. This will format the contents of your USB drive.
For Linux, Valve also provides a one-line command that does the job without installing anything extra. Just open a terminal and type: bzcat steamdeck-recovery-4.img.bz2 | sudo dd if=/dev/stdin of=/dev/sdX oflag=sync status=progress bs=128M. Please note that set /dev/sdX to the USB device you plugged in.
Step 3: Once done, select Close and eject the USB drive.
2. Boot from the USB Drive on Steam Deck
Step 1: Use the USB-C adapter or hub to plug the boot disk in.
Step 2: Close your Steam Deck if it is not already closed. Hold Volume Down and click the Power button until you hear the chime, release the Volume Down button and you’ll be directed to the Boot Manager.
Step 3: In Boot Manager, boot from EFI USB Device (your USB key).
Step 4: The screen will go dark on startup, and wait a moment.
Step 5: Once launched, you’ll be taken to a desktop environment that you can navigate using the trackpad and triggers.
3. Choose the Recovery Option
In the recovery environment, there are four different options to choose from.
- Re-image Steam Deck: This will perform a full factory reset. All user information, installed games, applications or operating system will be wiped and replaced with stock SteamOS.
- Clear local user data: This will reformat the main partition on your Steam Deck, which will delete downloaded games and all personal content stored on the Deck, including system configuration.
- Reinstall Steam OS: This will reinstall SteamOS on the Steam Deck while attempting to preserve your games and personal content.
- Recovery tools: This will open a prompt to change the Steam Deck boot partition.
Choose the appropriate option according to your needs.
Further reading: Do you seek a professional partition manager that can recover the lost data and migrate OS for Windows PC? If yes, MiniTool Partition Wizard is highly recommended. Its Data Recovery and Migrate OS feature can help you do that. Besides, it has multiple functions, such as Surface Test, Convert MBR to GPT, and so on. Do you want to try it now?
MiniTool Partition Wizard FreeClick to Download100%Clean & Safe

![[Tutorial] How to Install Epic and GoG Games on Steam Deck](https://images.minitool.com/partitionwizard.com/images/uploads/2023/02/install-epic-and-gog-games-on-steam-deck-thumbnail.png)
![How to Install Xbox Cloud Gaming on Steam Deck [A Few Steps]](https://images.minitool.com/partitionwizard.com/images/uploads/2023/02/install-xbox-cloud-gaming-on-steam-deck-thumbnail.png)

User Comments :