Many people assume that dynamic disk is complicated to manage for ordinary PC users and many of them want to convert dynamic disk to basic. This article describes how to remove dynamic hard disk with two dynamic disk converter – Disk Management and a professional dynamic disk manager MiniTool Partition Wizard.
Dynamic disk is widely used by professionals and technicians since this kind of disk configuration can help enhance disk performance and increase data security. However, if users just have one dynamic disk, there is no need to employ dynamic disk since they can only create simple volumeswhich function much like partitions on basic disk.
More importantly, some OS cannot be installed to dynamic disk, like Ubuntu and Windows 7 Home Basic, and after conversion users will be unable to start installed operating systems from any volume except the current boot one. Well then, how to remove dynamic hard disk after users have converted basic disk to dynamic by mistake or configured the disk to dynamic? Here, we provide 2 solutions.
How to Remove Dynamic Disk in Windows Disk Management?
You may convert dynamic disk to basic with Windows built-in partition tool Disk Management, but you have to delete all volumes on the disk. Nevertheless, deleting volumes will result in data loss unless users make a backup in advance. (SEE: How Do I Make Dynamic Volume Copy with MiniTool Partition Wizard?)
Step 1. Right-click the Windows Start menu and choose Disk Management.
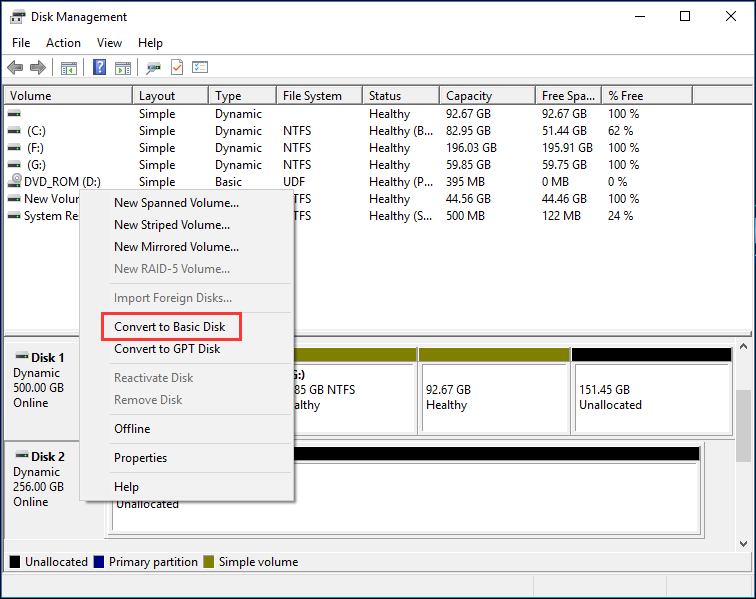
Step 2. Delete all volumes on the disk. Then select the disk which needs to be converted to basic and right-click to choose Convert Dynamic disk to Basic.

As you can see, Disk Management can help you convert dynamic disk to basic, but the sacrifice is losing all volumes on the disk. If there is not much data stored on the dynamic disk or you have backed up data before, you may try this method. But many users reflect that this method is a little troublesome and very inconvenient. In this case, you may try a third-party software MiniTool Partition Wizard. With this dynamic disk manager, you can convert dynamic disk to basic disk without losing any volume on the disk, which is very simple and effortless.
How to Remove Dynamic Hard Disk with Third-party Partitioning Tool?
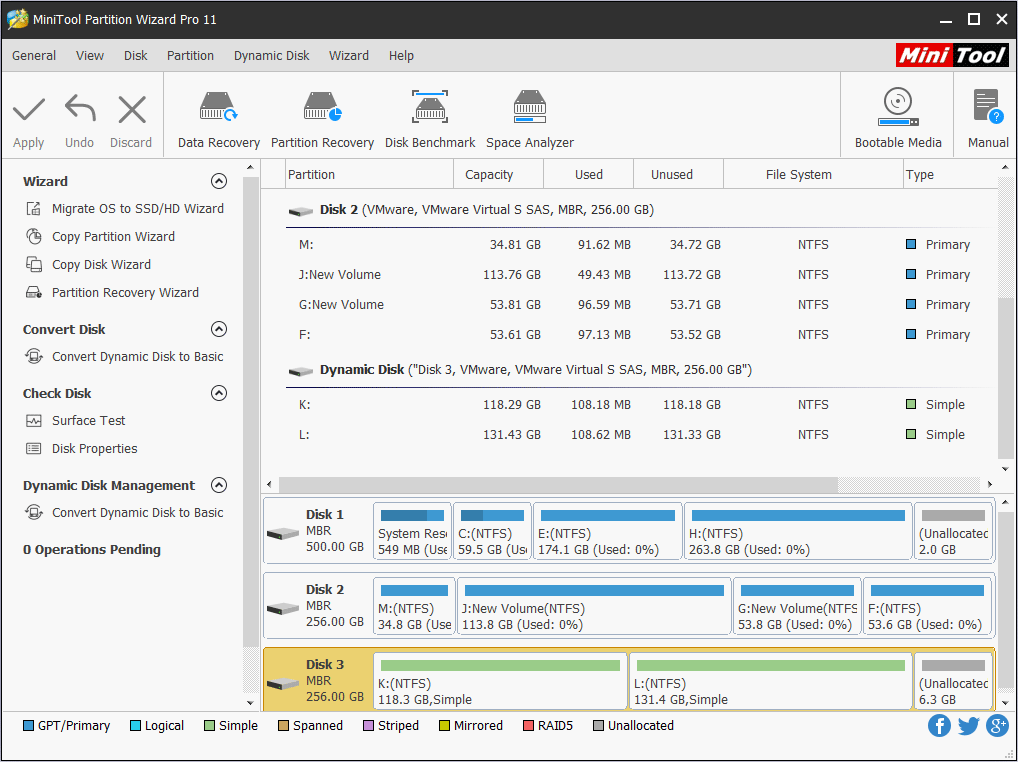
Firstly, download a piece of partitioning software from the internet, which should support dynamic disk perfectly. Here, dynamic disk converter MiniTool Partition Wizard is recommended since it will not bring any data loss. Then, launch the program to get its main interface:
2. If the dynamic disk employs MBR partition style and more than 4 volumes are created on the disk, you may need to shrink each volume before you can convert dynamic to basic.
Step 1. Download MiniTool Partition Wizard Pro Edition, install it on your computer and get it registered.
Step 2. Next, select the dynamic disk from disk map and choose Convert Dynamic Disk to Basicfrom the left action panel.

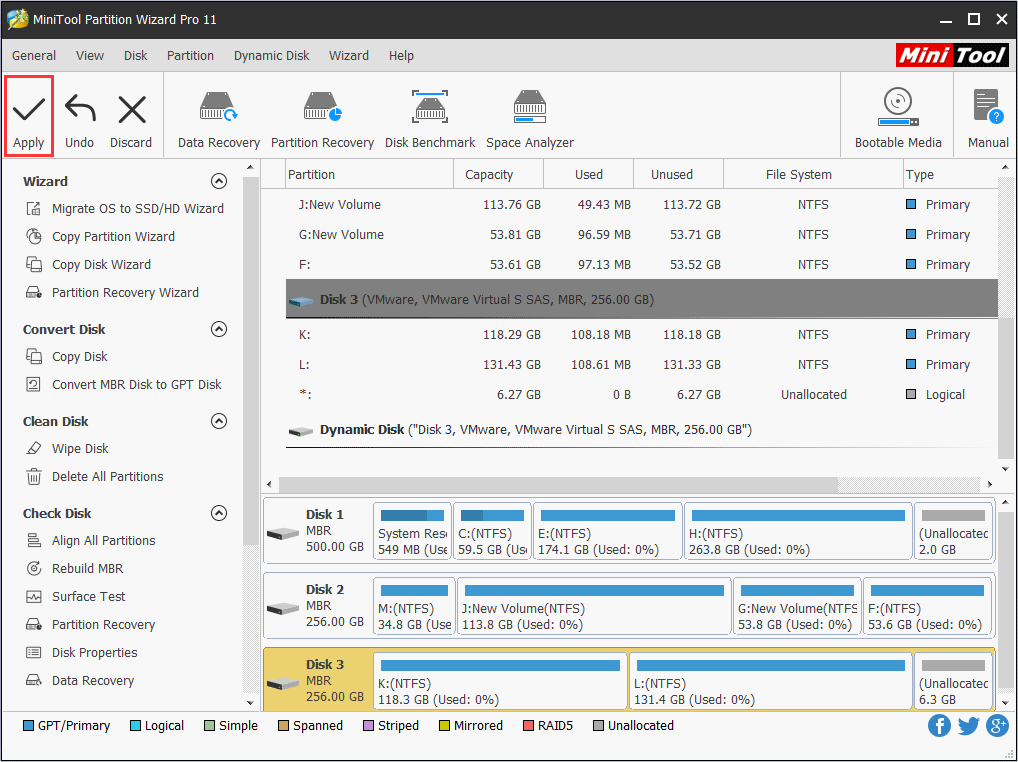
Step 3. Click Apply button on the top left corner to start converting dynamic disk to basic.

After all operations are completed, the conversion is finished. If the dynamic disk is being used, users will be asked to reboot computer. And users should do as told.
Now users would know how to remove dynamic hard disk. If you also convert a basic disk to dynamic by mistake and want to restore it, employ the best solution according to actual situations.
Verdict
With MiniTool Partition Wizard’s assistance, you don’t need to delete any volume. Now it’s your turn to try the safest and easiest way to change dynamic disk to basic disk by following the steps in this post.
If you have encountered any issue when you convert dynamic disk to basic, you can leave a message on the following comment zone. We will reply as soon as possible. If you need any help when using MiniTool software, you can contact us via [email protected].

User Comments :