MBR (Master Boot Record) and GPT (GUID Partition Table) are two different ways of storing the partitioning information on a drive. When you add a new hard disk, Windows will select MBR by default, possibly because any version of Windows operating system (OS) can be installed on an MBR disk.
However, for a MBR disk, only 4 primary partitions or 3 primary partitions plus one extended partitions at most are allowed to be created. That is to say, you are unable to create more than 4 partitions on MBR disk. GPT disk does not have such restrictions, but it only supports 64-bit version of Windows 7 and the latter Windows OS. Then, you may ask: how can I create more than 4 partitions on an MBR disk?
In this case, if you want to create more than 4 partitions on MBR disk, you need to delete one existing primary partition and create a smaller partition in Disk Management or convert at least one primary partition to a logical partition by using a partition management tool. However, obviously using Disk Management is not the best choice for you as deleting partitions will cause data loss, unless you backup all the files and data in that partition in advance.
So today I will introduce you a third party software MiniTool Partition Wizard to help you create more than 4 partitions on MBR disk without deleting any partition.
Create More Than 4 Partitions in Windows 10 with Partition Wizard
MiniTool Partition Wizard is a reputable and reliable partition management tool. It is very convenient for you to convert a primary partition to logical partitions by using this software. In addition, it could help you create, format or resize partition in an effortless way. Now I will show you how to create more than 4 partitions in Windows 10 with this powerful software.
Step 1. Download MiniTool Partition Wizard Free Edition and launch it to get its man interface.
MiniTool Partition Wizard FreeClick to Download100%Clean & Safe
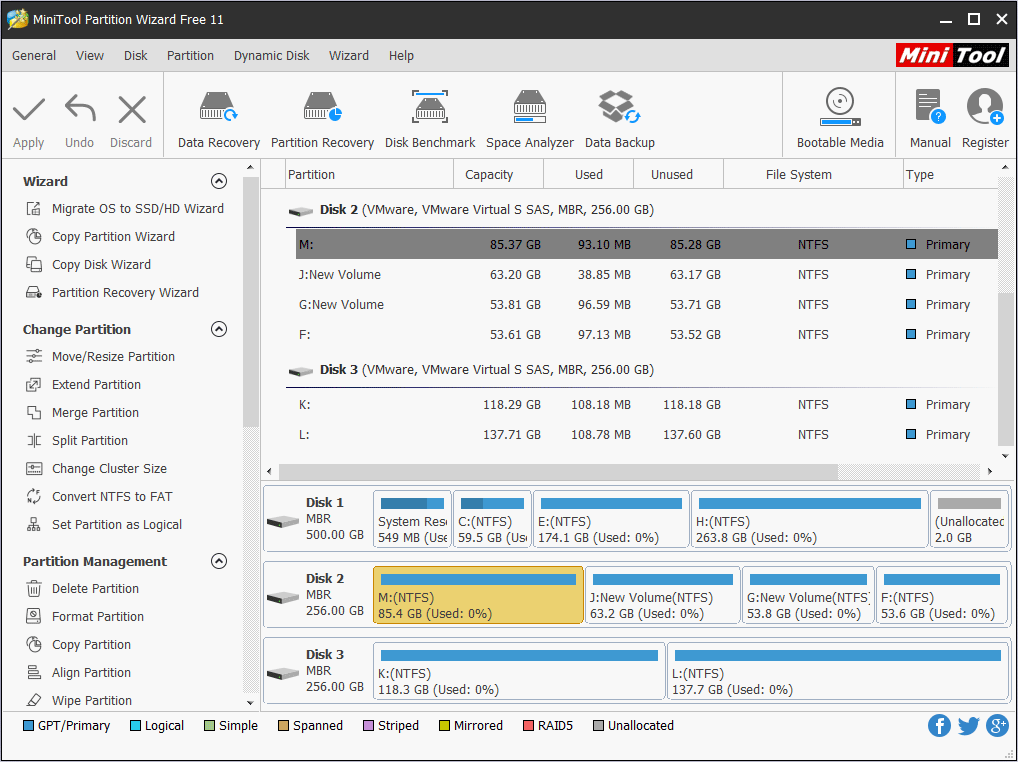
Step 2. Select the partition that has enough free space to create a new partition later. Then choose Set Partition as Logical.
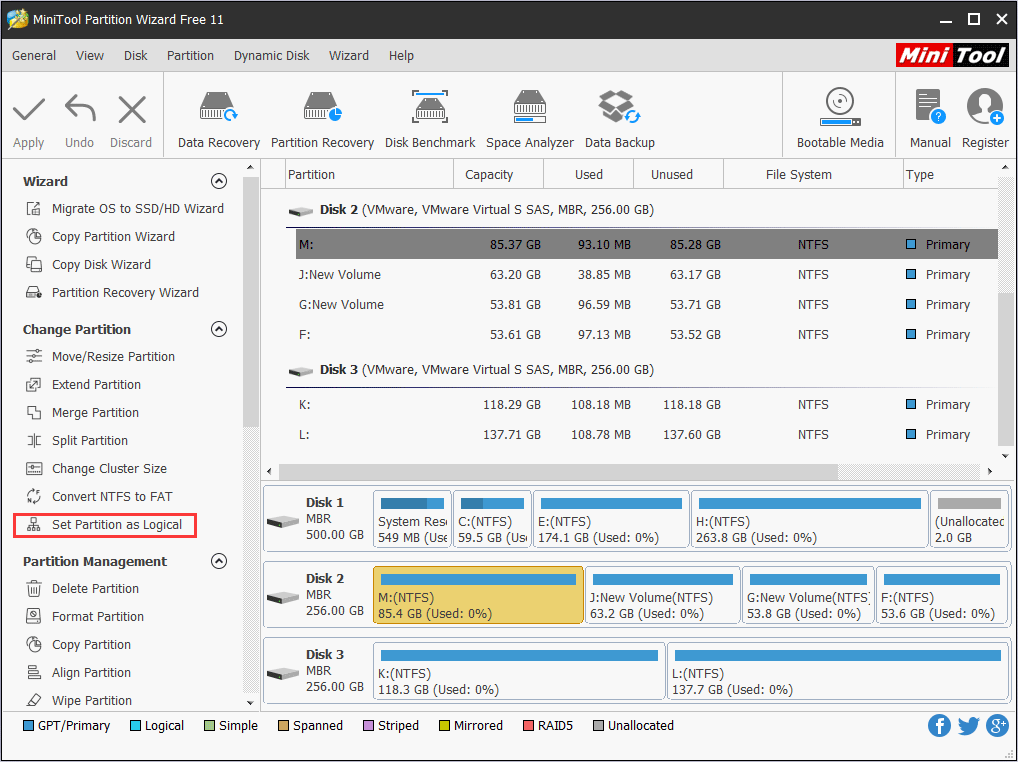
Step 3. Click the Apply button on the upper left corner. Then click Yes to allow changes.
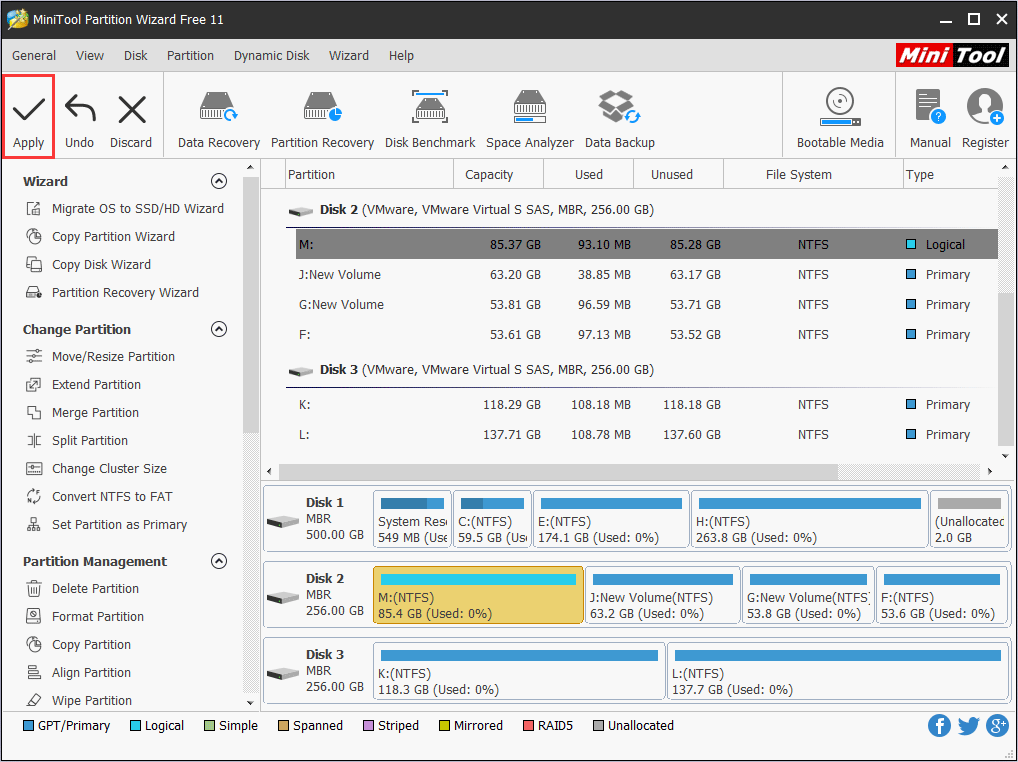
Step 4. When you successfully convert the primary partition to logical partition, you may split the partition by resizing the partition firstly. Select the logical partition and click Move/Resize Partition.
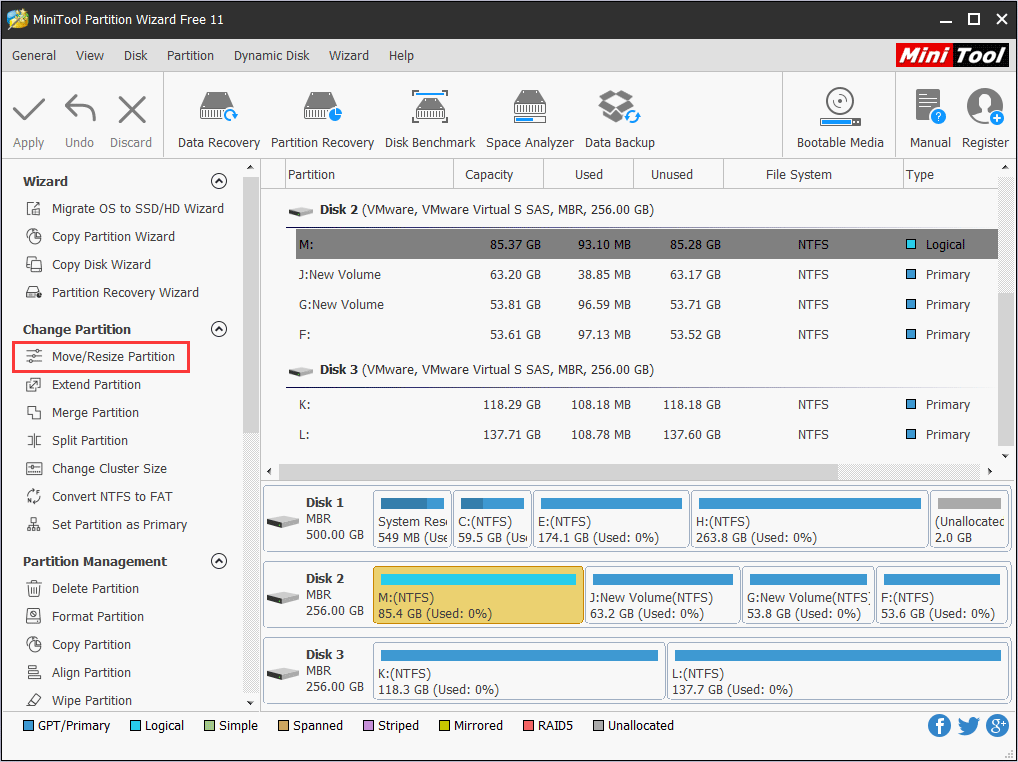
Step 5. Specify the size by moving the blue handle. You may also input the specific size directly.
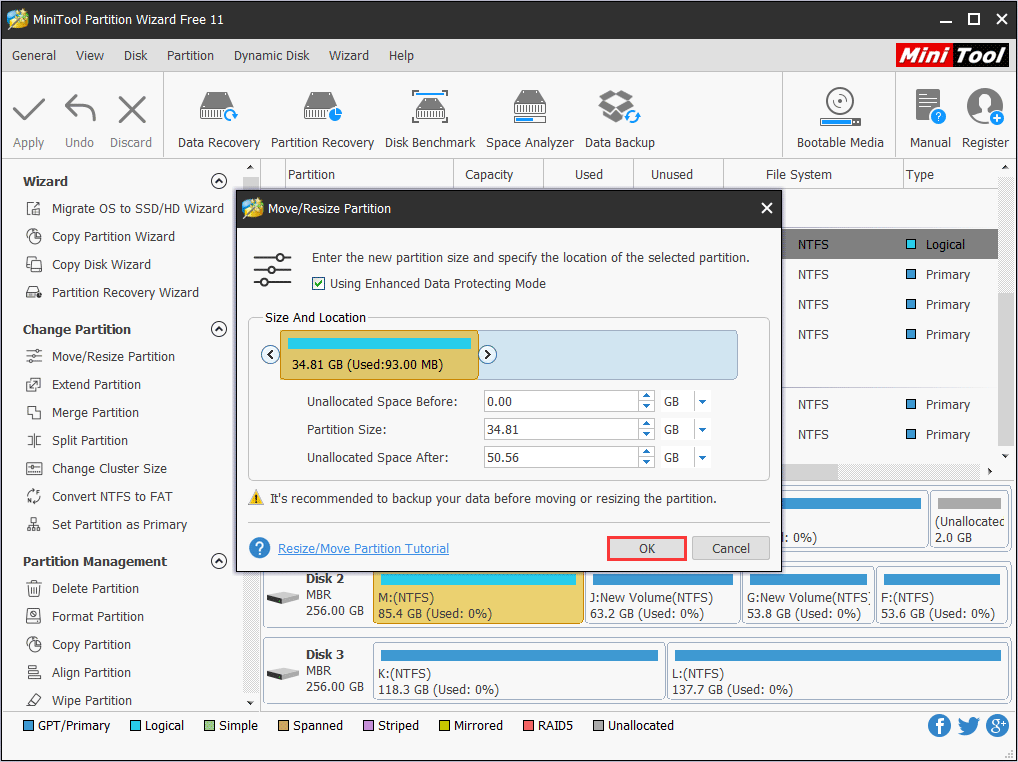
Step 6. Click Apply to allow changes at last.
Step 7.Then you may create a new partition on the unallocated space by clicking Create Partition in MiniTool Partition Wizard.
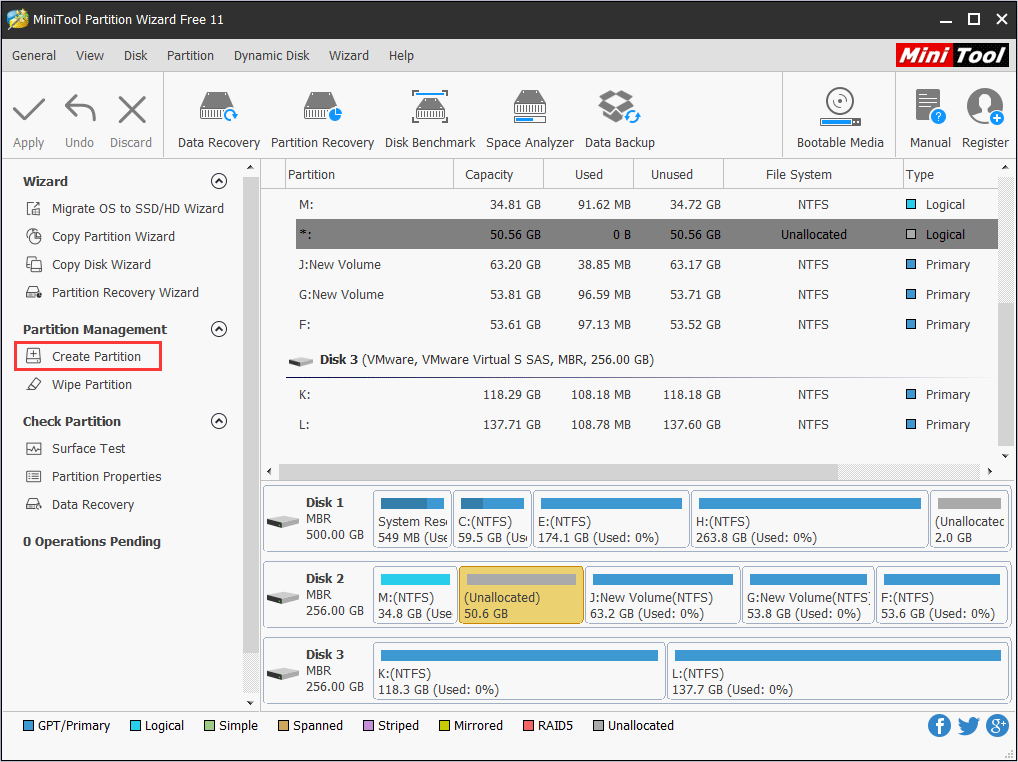
Step 8. Specify the size and click Apply at last.
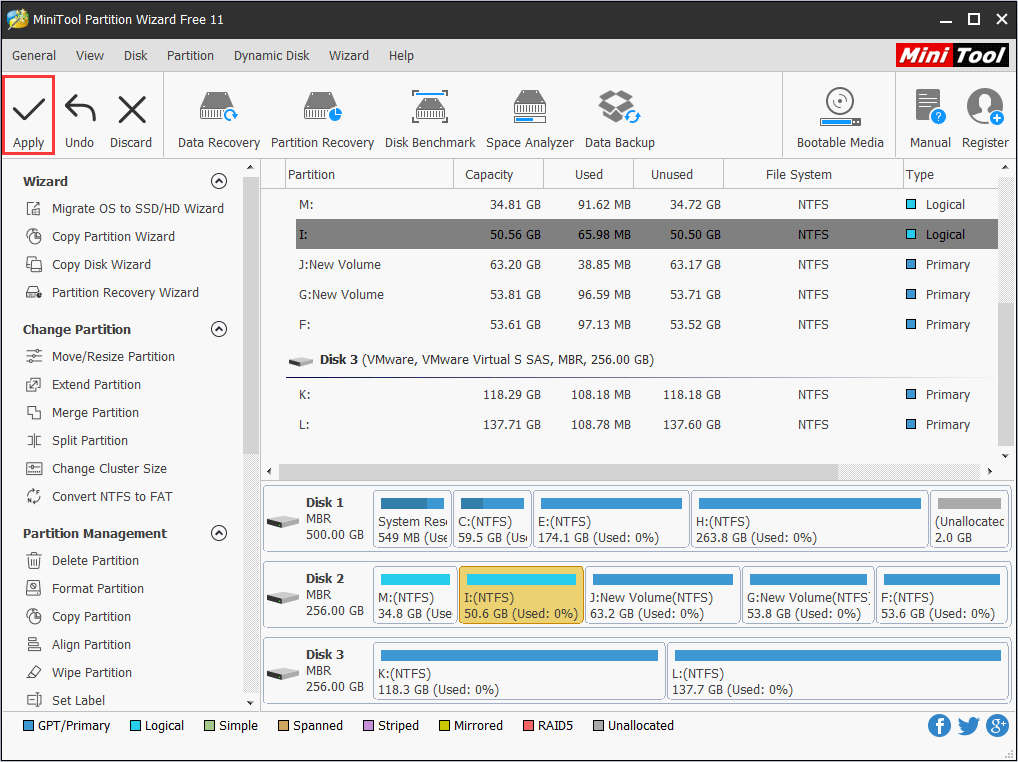
You see! It is very simple to create more than 4 partitions Windows 10 with MiniTool Partition Wizard. With this free partition management tool, you can easily create more than 4 partitions at ease.
Make More Than 4 Partitions in Windows 10 with Disk Management
You may also create more than 4 partitions on MBR disk with Windows built-in tool – Disk Management. The Windows built-in utility does not allow you to specify a primary or logical partition when creating a new one, instead it will create three primary partitions by default and make the 4th one logical. If there are already 4 primary partitions, then you need to delete one existing primary partition firstly. However, this will delete data on the selected partition. So you should backup important files and data for sake of data loss prevention.
Step 1. Right-click Windows Start menu and choose Disk Management.
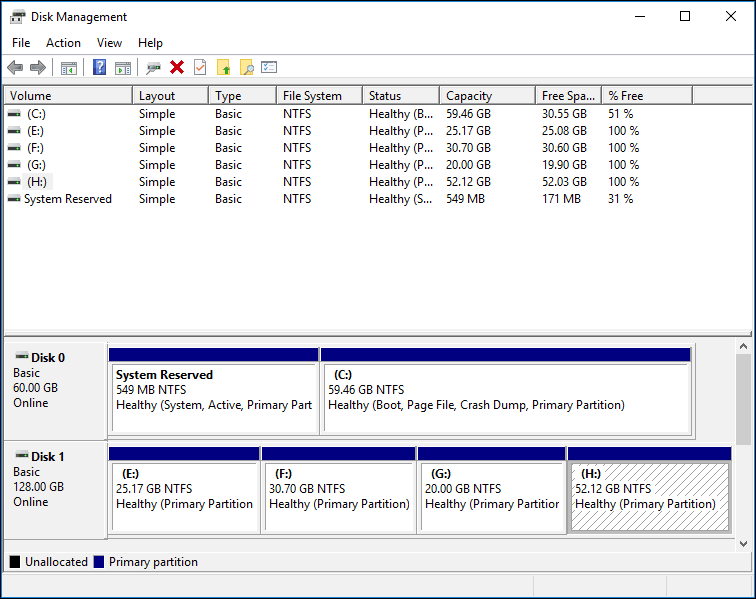
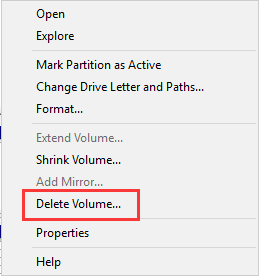
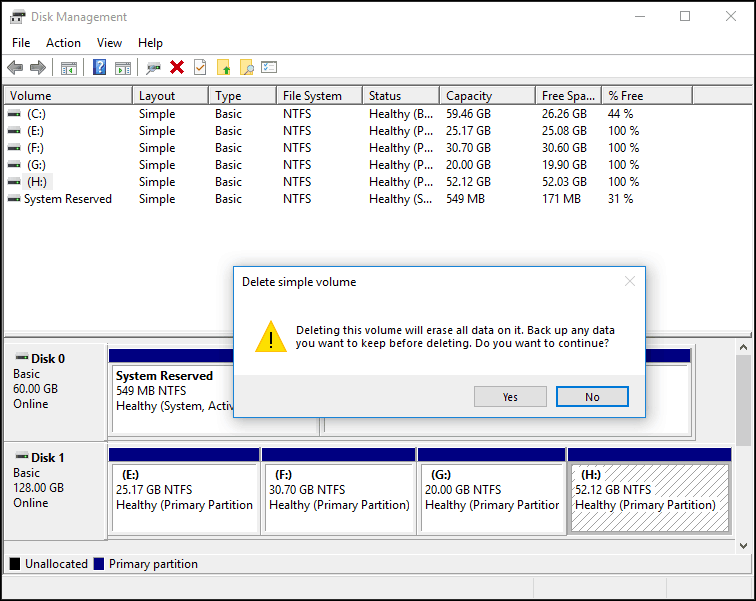
Step 2. Select the partition that you want to delete and right-click to choose Delete Volume. Then click Yes when the following window pops up.
Step 3. Right-click on the unallocated space and select New Simple Volume. Then click Yes to continue.
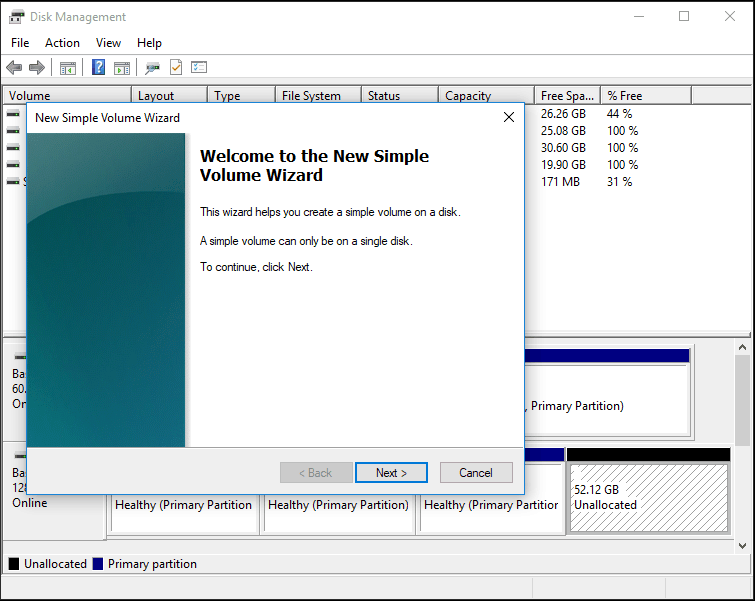
Step 4. Follow the New Simple Volume Wizard to create a new partition. The size of the new volume must be smaller than that of the unallocated space if you want to create more than 4 partitions Windows 10.
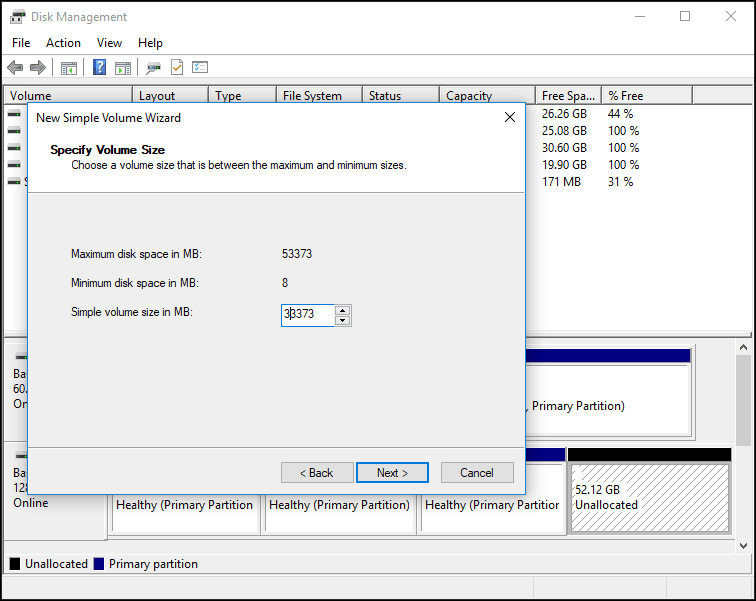
Step 5. Assign drive letter and click Next to continue.
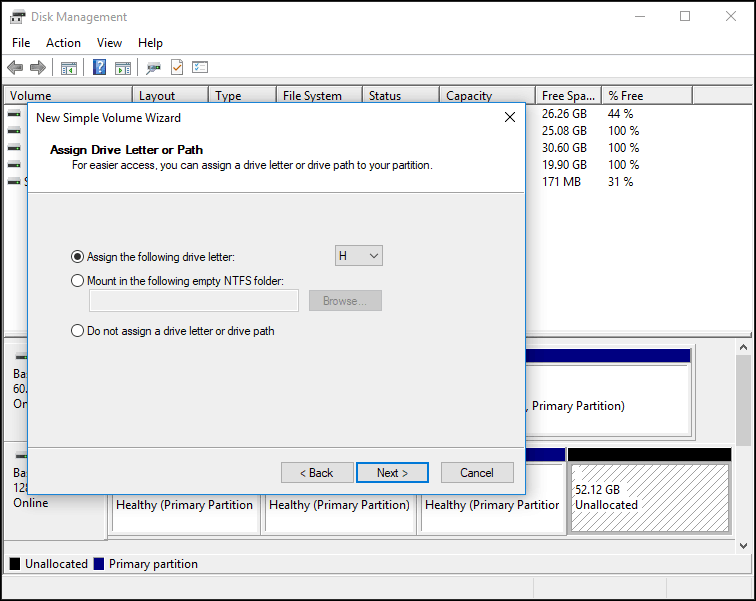
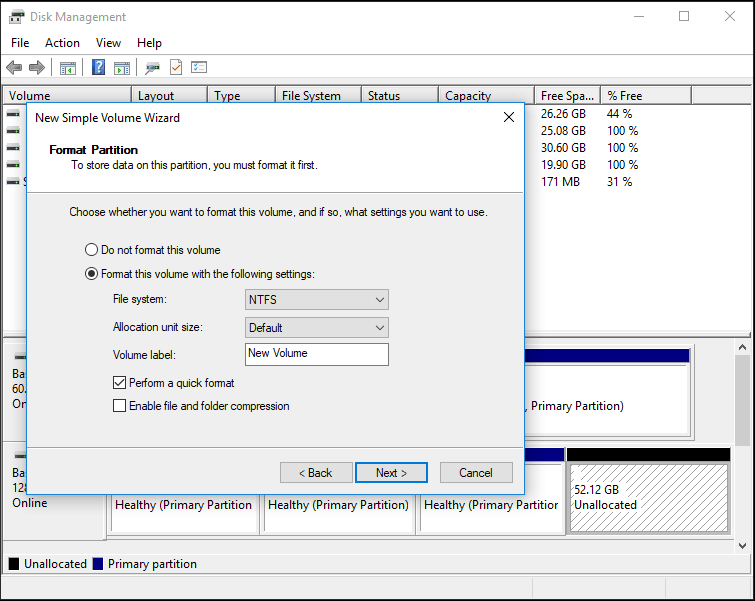
Step 6. Click Next to format partition.
Step 7. Click Finish and then you will find that a logical drive has been created.
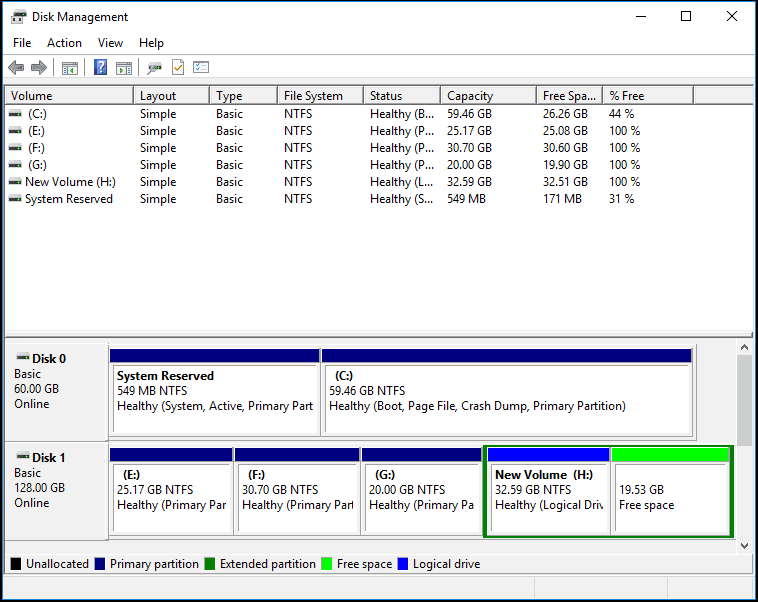
Then you may create many logical partitions as long as there is enough free space. Namely leaving some free space out of the 4 partitions, new logical partitions will be created successfully.
Actually, instead of using this complicated method and losing all the data on the primary partition deleted, you might as well use the free partition manager software – MiniTool Partition Wizard to create more than 4 partitions directly on a MBR disk with just a few clicks. You just need to follow the steps in this post as I mentioned before.
Bottom Line
With MiniTool Partition Wizard’s assistance, you don’t need to delete any partition. You just need to convert a primary partition to logical and resize the partition by using this disk partition tool. And you will find it is very easy and effortless to create more than 4 partitions Windows 10. Now it’s your turn to create partitions as many as you want by following the steps in this post.
If you have any question about creating more than 4 partitions on an MBR disk, you can leave a message on the following comment zone. We will reply as soon as possible. If you need any help when using MiniTool software, you can contact us via [email protected].

User Comments :