What are developer settings? How to use these developer tools? In this post, MiniTool will explain these questions to you. Just read on to get to know them. After that, you can control your Windows 10 PC like a pro.
What Is Developer Mode and How to Access It
For most common users, Windows 10 operating system from Microsoft can meet their demands and work effectively. The web browsers open websites, productivity apps like Office 365 create documents, emails are received and sent, and messages are exchanged. That’s good enough.
However, for some power users, this mode can’t meet their demands. Fortunately, many powerful Windows tools can be accessed via developer settings.
In previous Windows versions, many powerful applications, tools, and utilities are locked behind disabled settings and a labyrinth of configuration menus and power users had to research where to find and apply those configuration changes. However, in Windows 10, users can reach many of those power tools through developer settings.
As for how to find developer settings in Windows 10, please refer to the steps below:
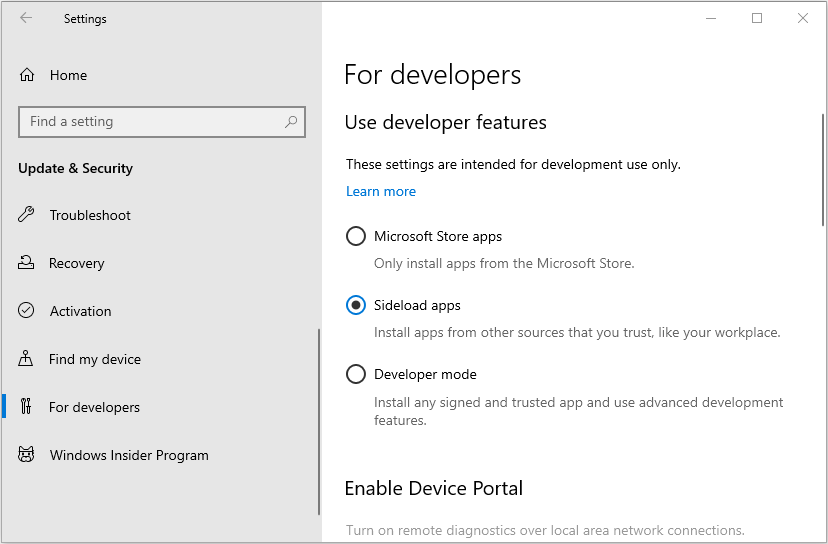
Step 1: Press “Windows + I” keys simultaneously to open Settings window. Then, choose Update & Security to open it.
Step 2: Scroll down the left pane to locate the For developers tab. You will get a window like the following picture.
What You Can Do with These Developer Tools
1. App Installation Mode
Under default conditions, the app installation mode is set either at the Windows Store apps mode or at the Sideload apps mode to protect your computer. Because enabling developer mode will grant installation permission to many more applications, which may mess your PC.
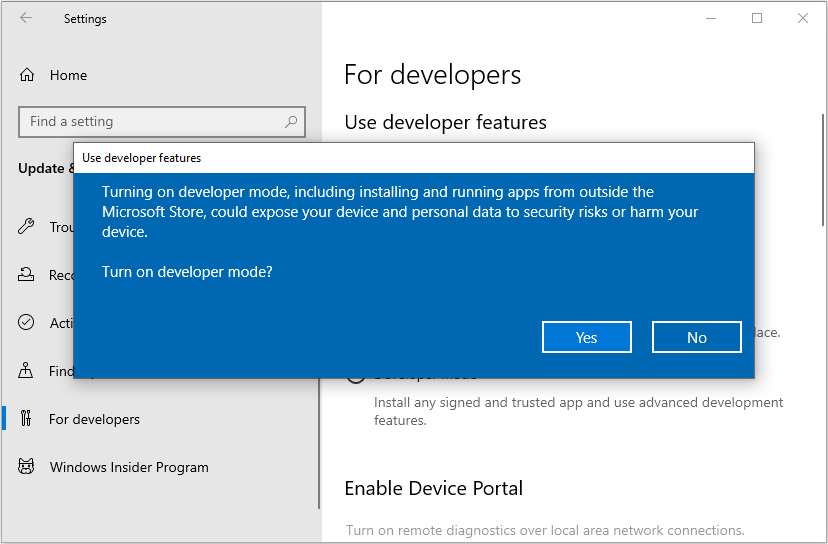
The Developer mode should not be activated without due consideration. But if you want to enable the Developer mode, you just need to check it and click Yes. Then this process will take a few minutes to download and activate.
Windows 10 V1809 Install Could Fail If Developer Mode Is Enabled
2. Device Portal and Device Discovery
If the Device Portal is enabled, you are allowed to use advanced diagnostic tools to troubleshoot and view the real-time performance of the Windows PC remotely over local area network connections.
As for the Device Discovery, you are allowed to see, configure, and manage the PC remotely over a network or USB connection, when it is enabled. The two tools are important for many developers but may not apply to your circumstances. Just leave them both disabled unless you specifically need them.
3. File Explorer
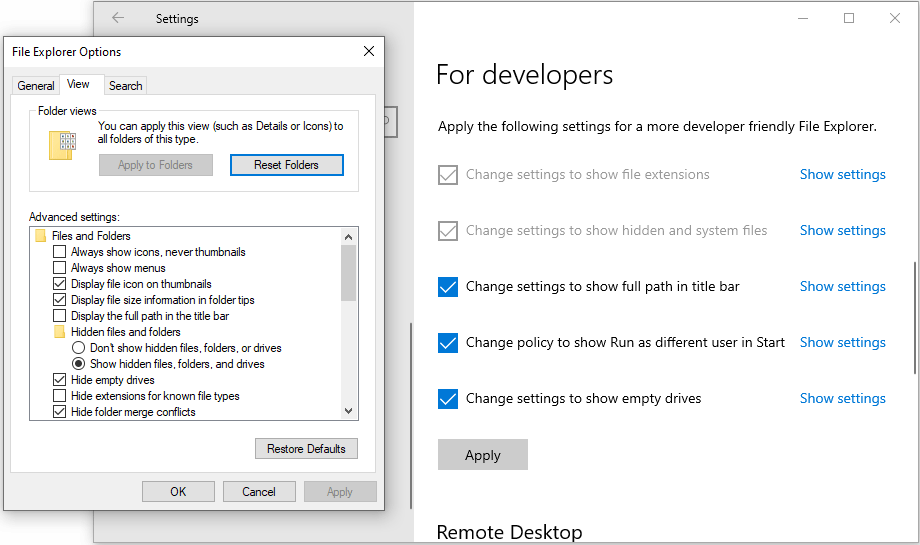
The next configuration section deals with File Explorer settings. Many of these settings will be familiar to power users and they will enable them whenever they get a new Windows 10 PC. The benefits of the settings are fairly self-explanatory.
As for how to disable them, you should click Show settings and uncheck corresponding option. Then, apply the change to disable them.
4. Remote Desktop
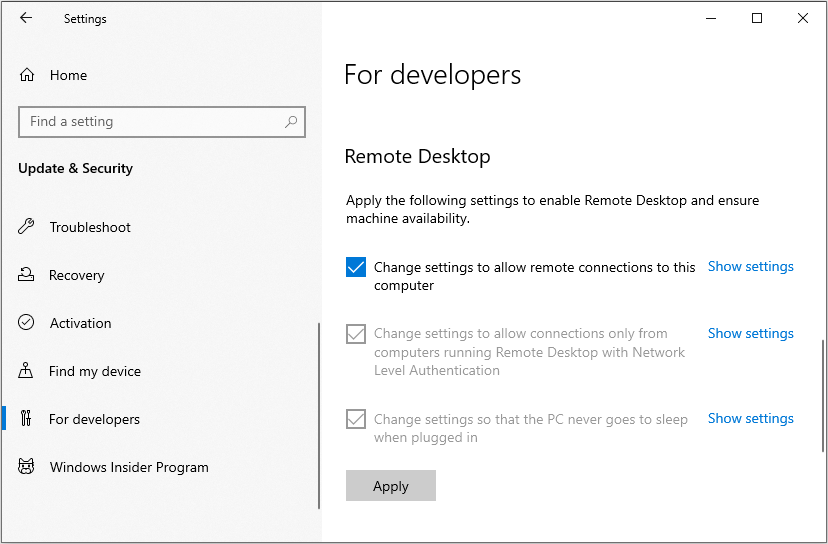
Sometimes, you may need to access a workstation connected to a local enterprise network remotely through a VPN. This is very common in a modern mobile workforce setting. In this case, these settings must be enabled to ensure a secure remote connection.
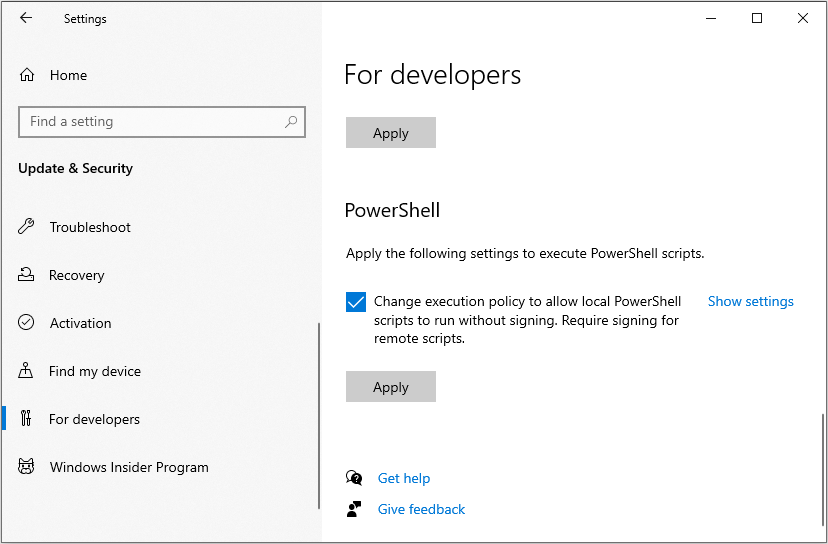
5. PowerShell
This is the last section. When this setting is enabled, you can run the PowerShell scripts without signing. This is very important for developers because they often need to run special utility scripts with no certificate associated.
But if you are not running PowerShell scripts on a regular basis, it is OK to leave this setting disabled.


User Comments :