VBS is Windows security feature. Recently, PC Gamer and Tom’s Hardware find that Windows 11 will enable this feature be default, reducing PC gaming performance. This post from MiniTool Partition Wizard shows you how to disable VBS in Windows 11 to boost PC performance.
Why Do You Need to Disable VBS in Windows 11?
Virtualization-Based Security (VBS) is a feature that can use hardware virtualization features to create and isolate a secure region of memory from the normal operating system. Due to this, many security features use VBS to increase protection from vulnerabilities in the operating system, and prevent the use of malicious exploits which attempt to defeat protections.
One such example security solution is Hypervisor-Enforced Code Integrity (HVCI), commonly referred to as Memory integrity, which uses VBS to significantly strengthen code integrity policy enforcement.
It seems that enabling VBS is a good thing. However, according to benchmark tests done by popular GPU stress test software 3DMark’s maker and independent tests done by PC Gamer and Tom’s Hardware, enabling VBS impacts performance, especially when you are using your Windows PC for gaming.
How to Upgrade Windows 10 to Windows 11? See a Detailed Guide!
Check Whether VBS Is Enabled in Windows 11
VBS is not a new Windows 11 feature. It has been around for years on Windows 10, but it is a non-default option on Windows 10. If you didn’t enable it, simply upgrading to Windows 11 will not turn on it.
However, if do a clean install of Windows 11 or buy a brand new laptop or desktop with Windows 11, you may have VBS enabled by default. Therefore, you need to check whether VBS is enabled in Windows 11. Here is the guide:
- Press Windows key + R.
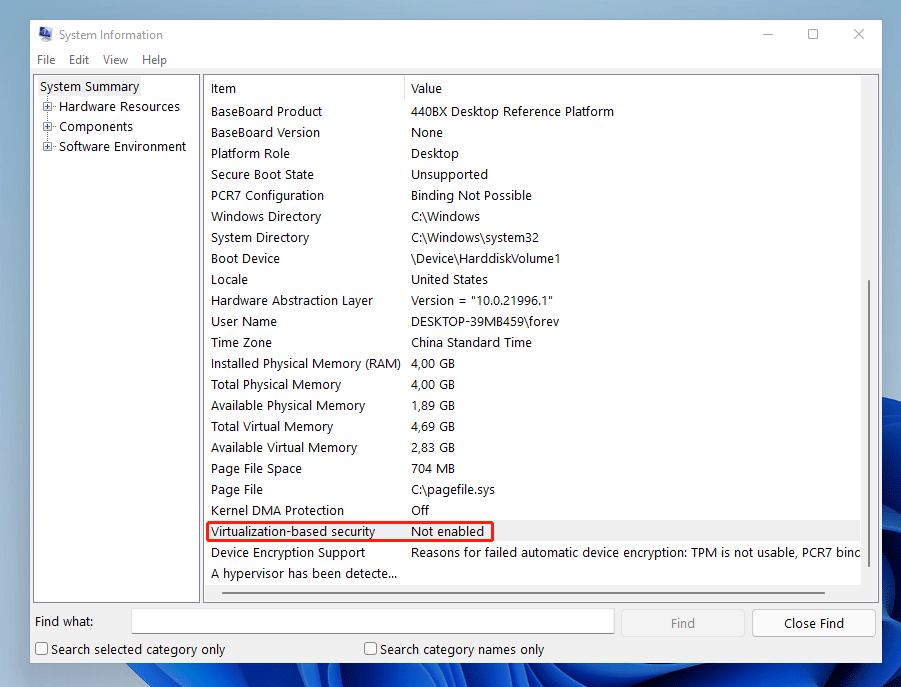
- In the Run box, type “msinfo32” and press Enter. This will open System Information window.
- In the System Information window, in the right panel, scroll down to find Virtualization-based security. It will tell you whether it is enabled.

How to Disable VBS in Windows 11
If the VBS is running, you can use the following 2 methods to disable it.
1. Disable VBS Using Core Isolation
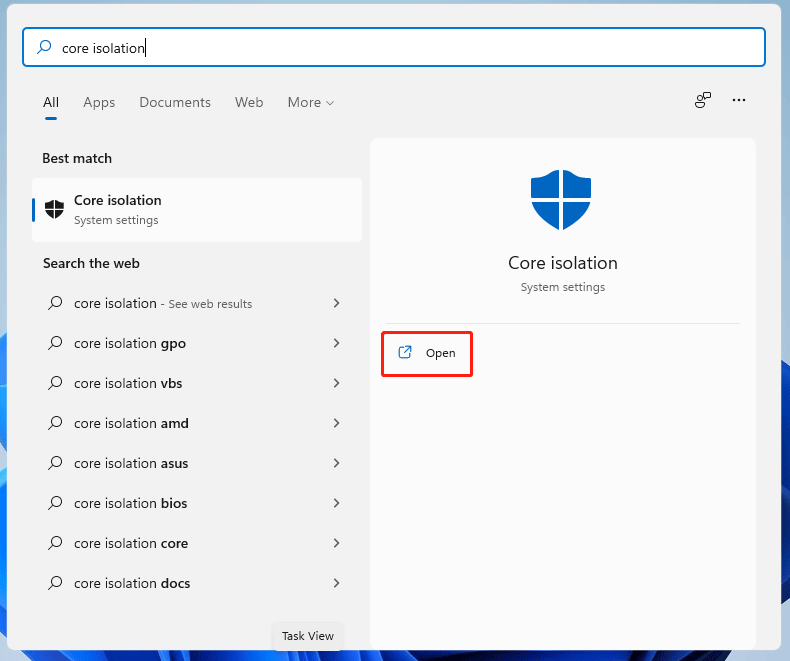
Step 1: Click the Windows 11 search icon. Enter “core isolation” into the search bar. In the right panel, under the best match tool, click the Open button.

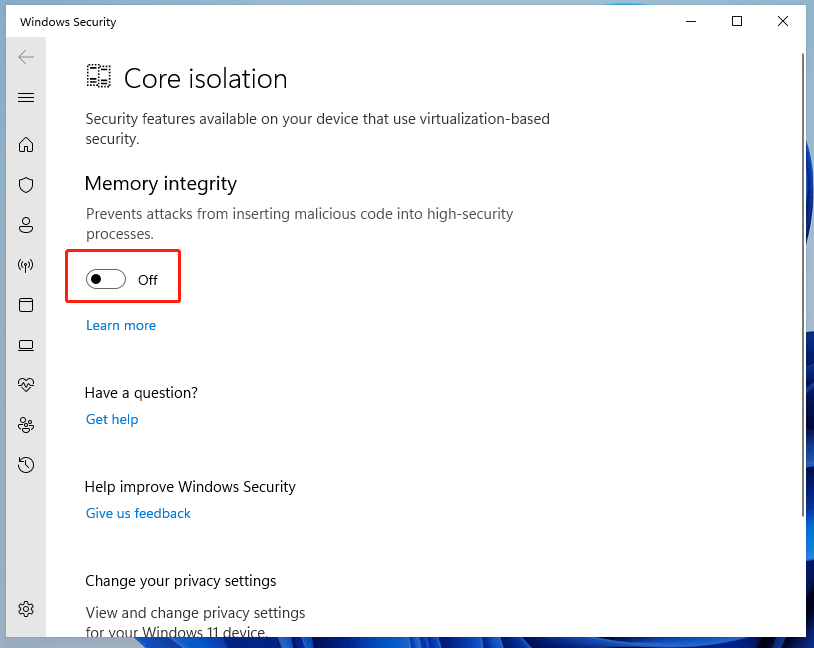
Step 2: In the new window, turn off the Memory integrity. Then, restart PC and check if the VBS is disabled now.

2. Disable VBS Using Registry Editor
- Press Windows key + R.
- In the Run box, type “regedit” and press Enter to open Registry Editor.
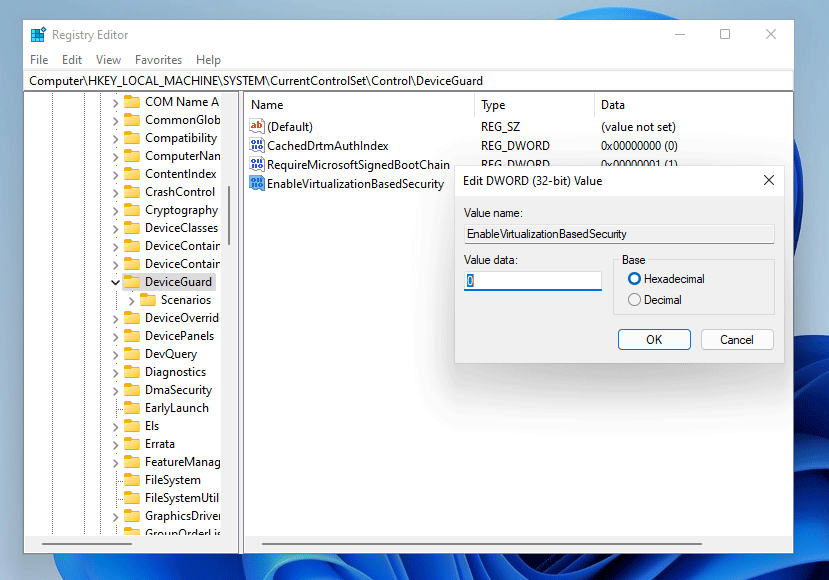
- Navigate to HKEY_LOCAL_MACHINE > System > CurrentControlSet > Control > DeviceGuard.
- In the right panel, right click EnableVirtualizationBasedSecuritykey and choose Modify. Then, set its value to 0.
- Close Registry Editor and reboot your PC.

VBS will slow down gaming performance by around 5 percent. For gamers, disabling VBS may be a good thing. To disable it, you can try the above ways.

![Frames Per Second: 10 Ways to Boost FPS Windows 10 [New Update]](https://images.minitool.com/partitionwizard.com/images/uploads/2020/04/how-to-increase-fps-thumbnail.jpg)
User Comments :