Do you know how to create logical partition in Windows 7 when the Disk Management Windows 7 can’t complete that? MiniTool Partition Wizard can help you to create logical partition with ease.
When Can’t Disk Management Windows 7 Create Logical Partition?
In general, Disk Management of Windows is a powerful tool to manage the disk and partition. But it can’t help to create a logical partition in some situations.
For example, when cleaning installing Windows 7, you just partitioned the disk to 4 blocks, namely partition system reserved, C, E and F. And the first 3 partitions are primary and the last one is logical. Then you are planning to shrink partition E so as to create a new logical partition.
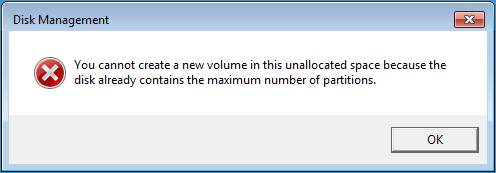
However, when you are creating a new logical partition with Disk Management Windows 7, you will receive the following the message:

Thus, do you know what the reason is and how to create a logical partition when disk management Windows 7 can’t complete the task?
As a matter of fact, if you are creating partitions with Disk Management Windows 7, Primary or Logical is not provided for you to choose, and the tool just sets it by default. When there have been 3 primary partitions and 1 logical partition, you will be unable to create logical partitions with unallocated space. For detailed information, please see Can’t Create Partition Windows 8 since both Windows 7 and Windows 8 have the same limitation.
Thus, how can you create logical partition Windows 7 when Disk Management can’t?
How to Create Logical Partition When Disk Management Can’t?
Nevertheless, in order to create a logical partition, you can take advantage of a piece of third-party software, thus MiniTool Partition Wizard would be a good choice.
MiniTool Partition Wizard is professional partition magic which is designed to optimize partition and disk use. With its powerful features, it can help you to migrate OS to SSD without data loss or perform some other actions with ease.
Thus, to create logical partition, download MiniTool Partition Wizard to have a try.
MiniTool Partition Wizard FreeClick to Download100%Clean & Safe
And in this part, we will show you how to create logical partition step by step with pictures.
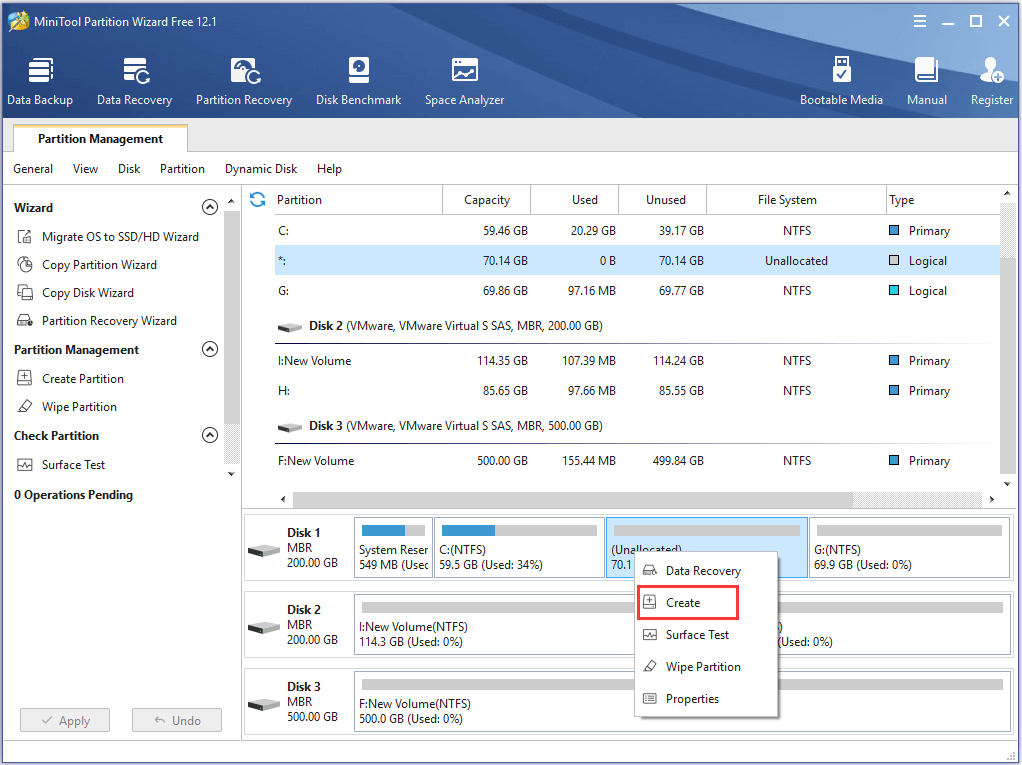
Step 1: Launch MiniTool Partition Wizard to enter its main interface. Then select the unallocated space and choose Create from the context menu.

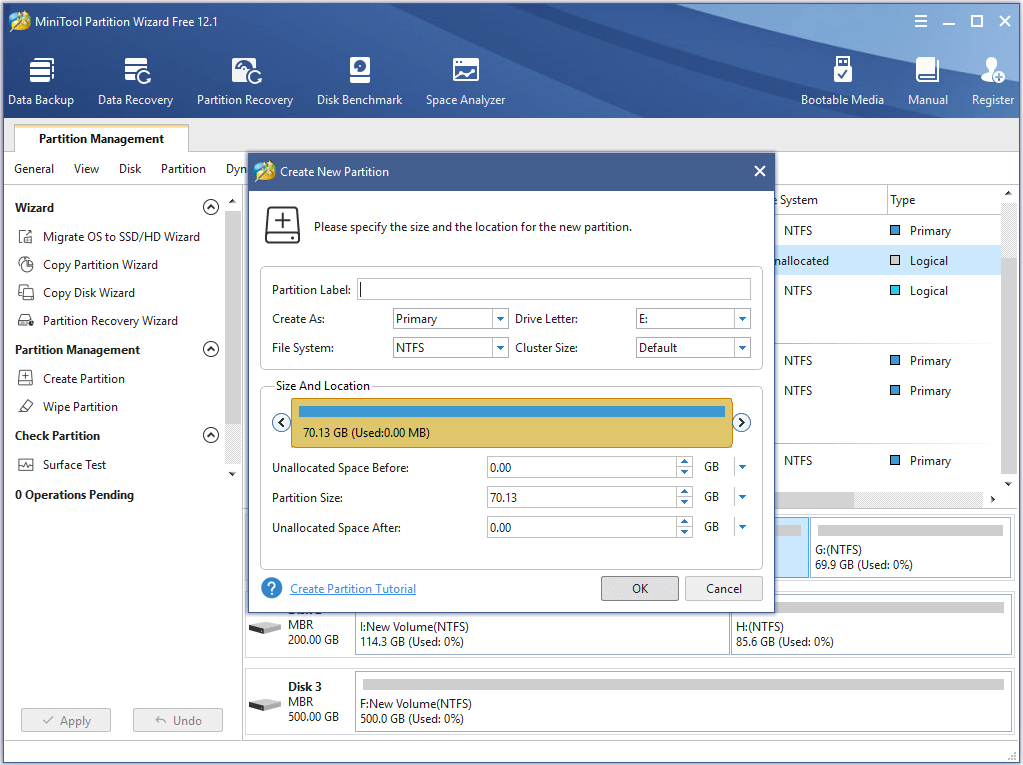
Step 2: Then you need to set some properties such as Drive Letter, File System, and Cluster Size for the new partition. You need to set this partition as logical. In addition, you can drag the slide to decide the size of the logical partition and click OK to continue.

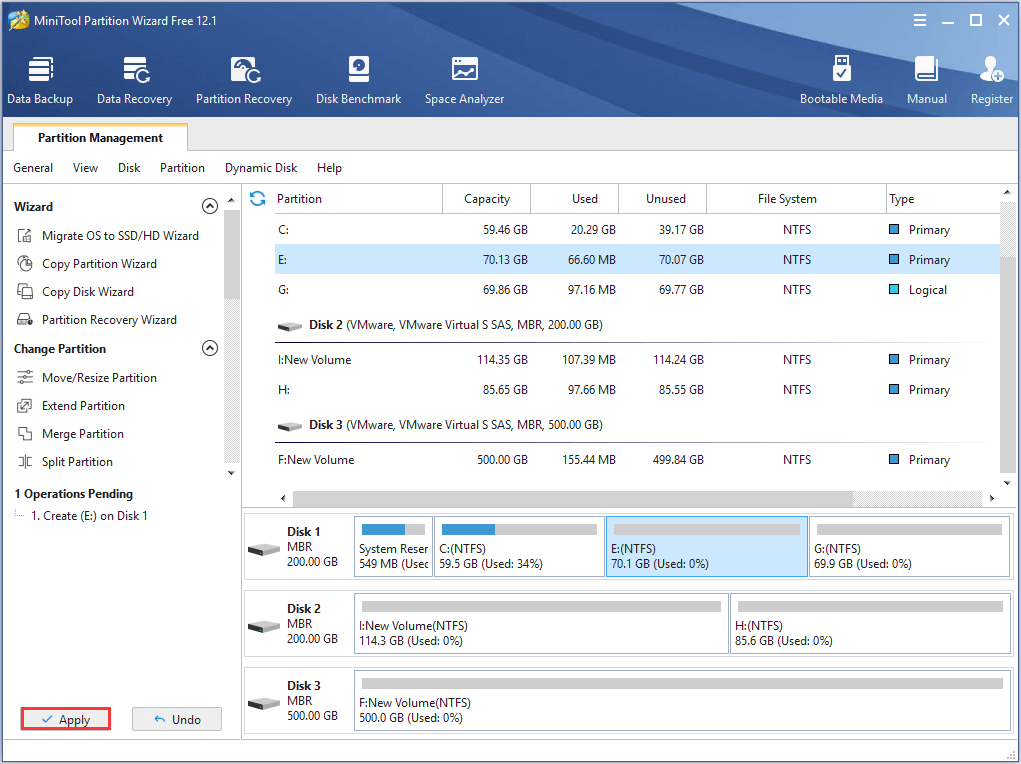
Step 3: Then preview the change and click Apply to confirm the change.

When you have finished all the steps, you can successfully create a logical partition when Disk Management can’t achieve that. With MiniTool Partition Wizard, you can easily create a logical partition. In addition, MiniTool Partition Wizard has many other powerful features, such as extending partition, cloning partition and so on.
MiniTool Partition Wizard FreeClick to Download100%Clean & Safe
Bottom Line
In this post, we have introduced a reliable way to create a logical partition when Disk Management can’t. And if you have this need, try MiniTool Partition Wizard.
If you have any better way to create a logical partition in Windows 7, you can share it on the comment zone.
In addition, if you have any problem of MiniTool Partition Wizard, please don’t hesitate to contact us via the email [email protected].
Create Extended Partition FAQ
If you are trying to install the latest operating system, the minimum hard drive space is different according to the operating system bit. For 32-bit operating system, the hard disk space needs to be 16GB at least. For 64-bit system, the hard disk needs to be 20GB.
For more information, you can read the post Windows 10 Size and Hard Drive Size: What, Why, and How-to Guide to learn more.

User Comments :