Sometimes, you might want to change WiFi name for personal preferences. But what can you do if you want to do so? In this article, you can learn about 3 different methods from MiniTool Solution to change WiFi name in Windows 10.
What You Should Know about WiFi Name
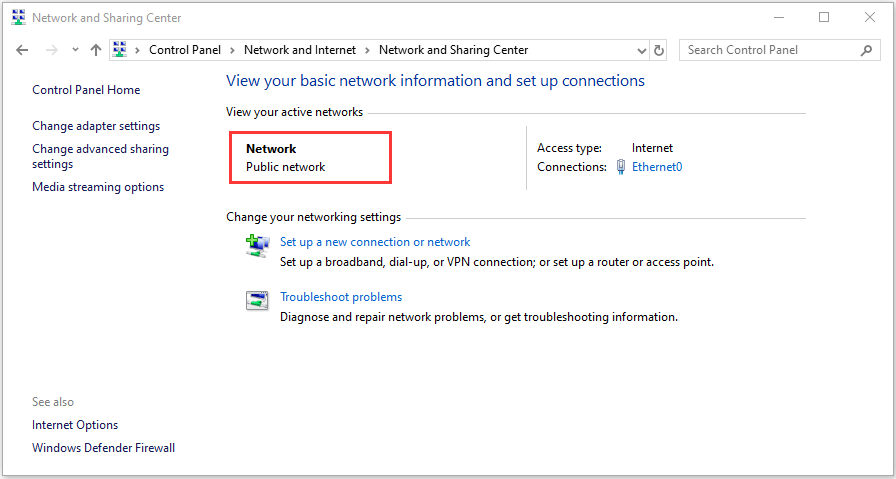
When you connect to a network for the first time, your computer will save the network profile and assign a name for the network automatically. To check the current name of your Network, you can go to Control Panel > Network and Internet > Network and Sharing Center. All the active networks on this computer are listed here with their names.

For certain reasons, some users don’t want to use the default WiFi name but have problems with changing the name. In this post, I will introduce how to change WiFi name in Windows 10 computer. But before you perform the operation, there are some rules you might need to pay attention to:
- Don’t use a WiFi name with your personal information. If you use a WiFi name that contains your personal information, you network will be identified easily by others and thus suffer from targeted attacks.
- Don’t use a WiFi name that looks like a public hotspot. If you name your network after certain popular public hotspot, many people might try to connect to your network which they regard as a free hotspot. Finally, your network will become less responsible, as it has to respond to every connection attempt.
- Don’t use a WiFi name with great social impact. You can use various cleaver WiFi names but you’d better avoid certain specific names with great social impact, especially those might cause mass panic.
So, how to change WiFi name easily? Here are 4 feasible methods and you can choose your preferred one to have a try.
Related article: How to Find/View Saved WiFi Password on Windows 10 (4 Steps)
Change WiFi Name via Web Browser
This method requires your IP address. The detailed steps of the method are displayed below:
Step 1: Press Windows + R to open Run window.
Step 2: Input cmd and click OK button to invoke Command Prompt.
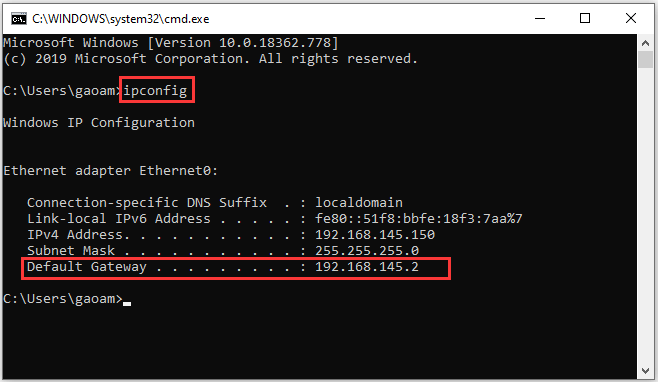
Step 3: Type the command ipconfig and press Enter. Your IP address is displayed next to Default Gateway.

Step 4: Copy and paste your IP address to your browser and search it. You will be required to enter the username and password of your router to log in. Then, choose the current name of your network, input a new name and save the changes.
Now, the network name should have been changed and you can see the new name when you open the network list.
Change WiFi Name via Registry Editor
Before you try this method, you had better back up the Windows Registry, as any improper operation to the registries might bring unrecoverable damage to your computer. After making a backup, you can follow the steps below to change your WiFi name.
Step 1: Open Run window, input regedit and click OK to open Registry Editor.
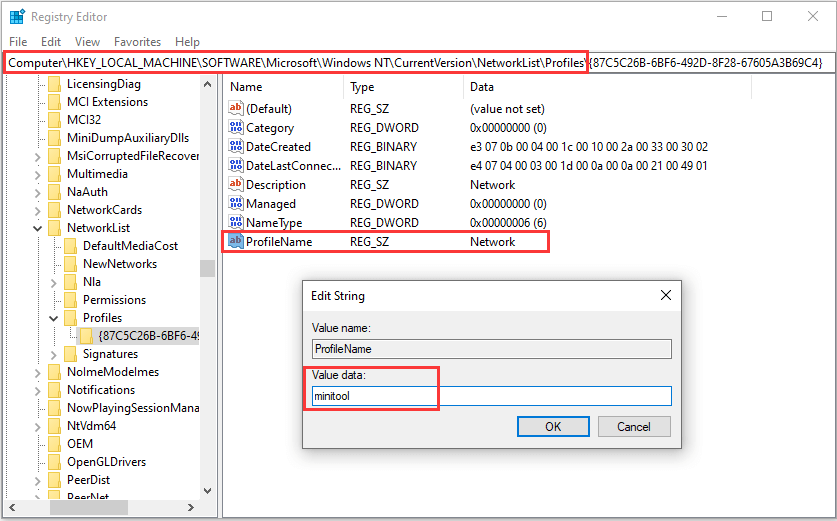
Step 2: Navigate to ComputerHKEY_LOCAL_MACHINESOFTWAREMicrosoftWindows NTCurrentVersionNetworkListProfiles
Step 3: All the network connections are listed below the Profiles folder. Select a subfolder, and the Data of the ProfileName string is the name of the specific network connection. To change the selected network name, just double-click the ProfileName string in the right pane and input a new name in the editable box of Value data. Click OK to save the change.

Change WiFi Name via Local Security Policy
You can also choose to change network name Windows 10 in Local Security Policy. But this utility is not available in Home edition of Windows. Here’s a simple guide.
Step 1: After opening Run window, input secpol.msc and click OK to enter Local Security Policy.
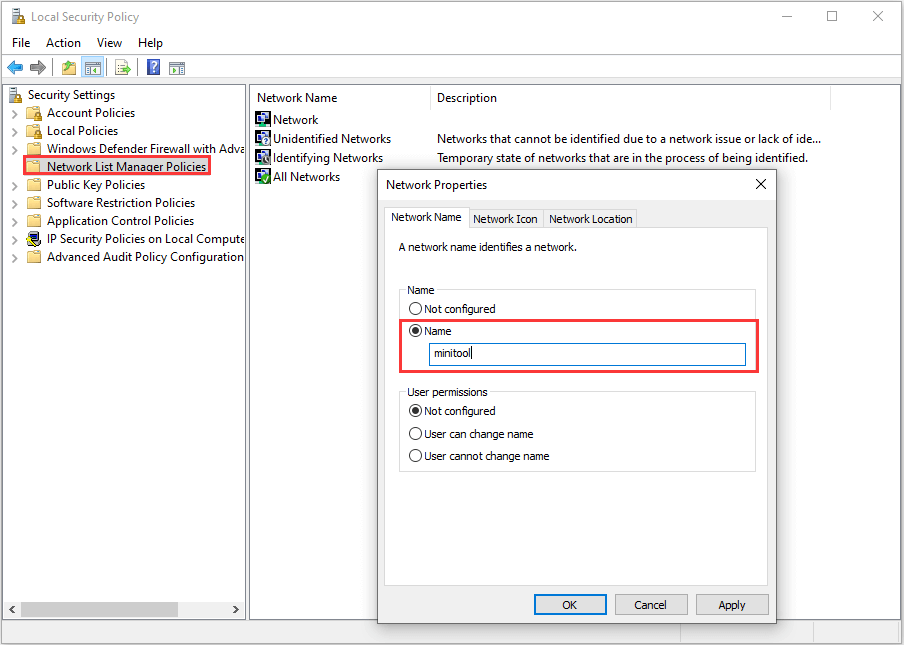
Step 2: Choose Network List Manager Policies from the left pane.
Step 3: Double-click the desired network to open its Properties. Under Network Name tab, check Name and add a new name for the network. Click Apply and OK to confirm the operation.

Here’s all about the methods to change network name Windows 10. Now, it’s your turn to choose one of them to have a try. After that, you can go to Network and Sharing Certain to check if you have changed the name successfully.


User Comments :